3405 Frame Manual
3405FR Series Fiber Optic SFP Frame
3405FR Series - 22
Revision 2.3
2.8.
SERVICING INSTRUCTIONS
CAUTION – These servicing instructions are for use by qualified service
personnel only. To reduce risk of electric shock do not perform any servicing
instructions in this section of the manual unless you are qualified to do so.
2.9.
REPLACING THE 3405PS-6 POWER SUPPLY
The 3405PS-6 tray contains two power supply modules (model 3405PS-6-SPARE) Each power supply is
a complete assembly and includes three frame cooling fans. In the event that the power supply or one of
the fans malfunction, you will need to replace the power supply assembly with a spare one while the failed
assembly is being repaired.
Do not run the frame for extended periods of time with one of the power
supplies removed. Proper cooling of the frame requires both power supplies
to be inserted into the frame.
The 3405PS-6 power supplies are hot swappable and can be easily replaced from the front without
interrupting the power being supplied by the redundant supply. Each power supply is capable of
supplying full power to up to 6 3405FR series frames by itself, however we recommend running with both
supplies powered for power redundancy. The left and right power supplies are identical.
If the Power supply is removed with the power cord still connected to the
mains, there is a potential shock hazard present as there will be mains voltages
present on the power supply connector. Use care when removing the power
supply to reduce the risk of shock.
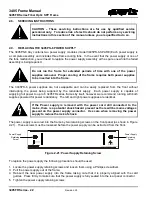
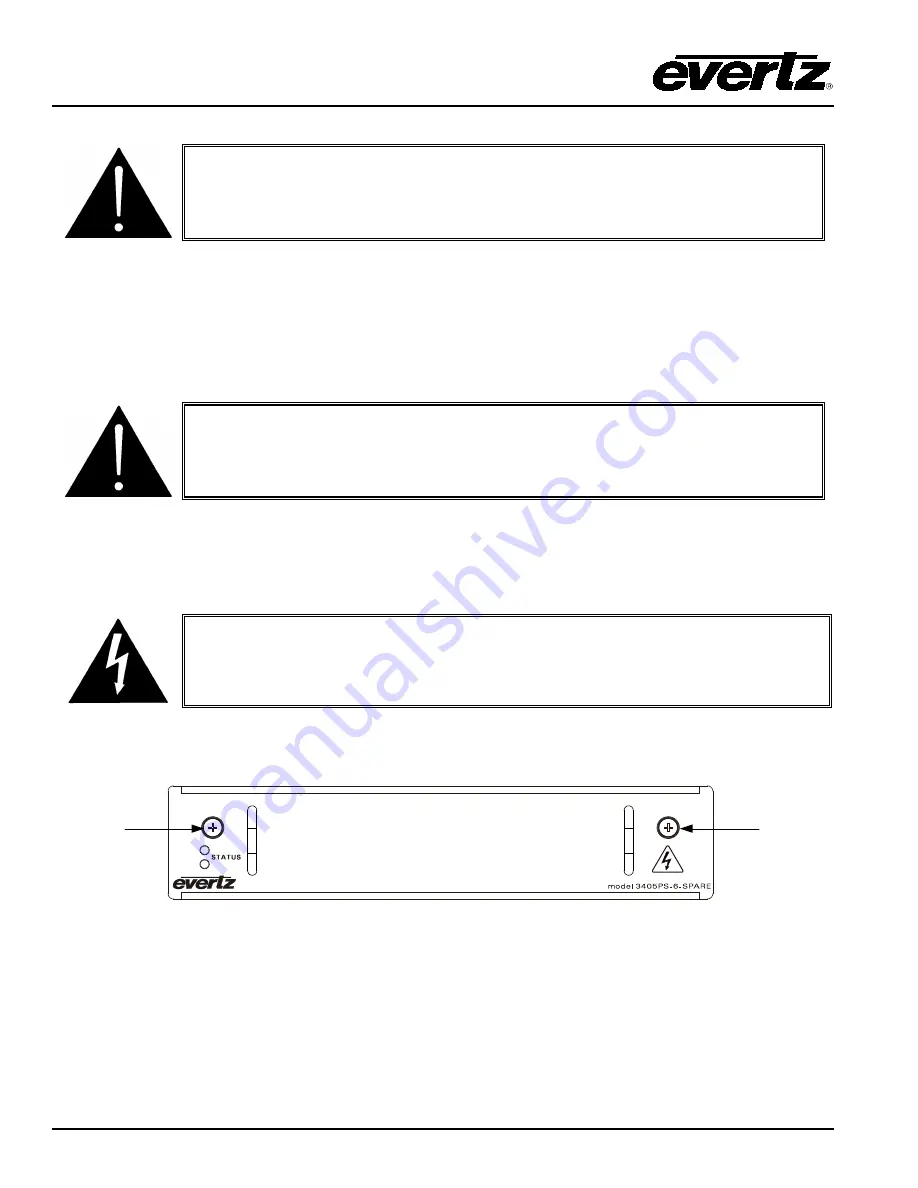
The power supply is secured into the frame by two retaining screws on the front panel (as shown in Figure
2-21). These screws must be loosened before the power supply can be extracted from the front.
Power Supply
Retaining
Screw
Power Supply
Retaining
Screw
Figure 2-21: Power Supply Retaining Screw
To replace the power supply the following procedure should be used.
1. Locate the power supply retaining screws and loosen them using a Phillips screwdriver.
3. Pull the power supply out of the frame.
4. Reinsert the new power supply into the frame taking care that it is properly aligned with the card
guides. Press firmly to make sure that the power supply is fully seated into the rear panel connector.
5. Tighten the power supply retaining screws.

