User Manual of Network Video Recorder
42
3.2
Operations in Live View Mode
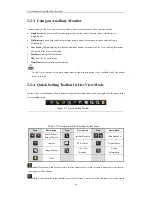
In live view mode, there are many functions provided. The functions are listed below.
•
Single Screen
: showing only one screen on the monitor.
•
Multi-screen:
showing multiple screens on the monitor simultaneously.
•
Auto-switch:
the screen is auto switched to the next one. And you must set the dwell time for each screen on
the configuration menu before enabling the auto-switch.
Menu>Configuration>Live View>Dwell Time.
•
Start Recording:
continuous record and motion detection record are supported.
•
Output Mode:
select the output mode to Standard, Bright, Gentle or Vivid.
•
Add IP Camera:
the shortcut to the IP camera management interface.
•
Playback:
playback the recorded videos for current day.
•
Aux/Main output switch:
the NVR checks the connection of the output interfaces to define the main and
auxiliary output interfaces. The priority level for the main and aux output is HDMI>VGA>CVBS. This means
if the HDMI is used, it will be the main output. If the HDMI is not used, the VGA output will be the main
output. See the table below.
Table 3. 2
Priorities of Interfaces
HDMI
VGA
CVBS
Main output
Auxiliary
output
1
√
√
√
HDMI
VGA
2
√
×
√
HDMI
CVBS
3
×
√
√
VGA
CVBS
4
×
×
√
CVBS
√
means the interface is in use,
×
means the interface is out of use or the connection is invalid. And the
HDMI, VGA and CVBScan be used at the same time.
When the aux output is enabled, the main output can’t do any operation, and you can do some basic operation on
the live view mode for the Aux output.
3.2.1
Front Panel Operation on Live View
Table 3. 3
Front Panel Operation in Live View
Functions
Front Panel Operation
Show single screen
Press the corresponding Alphanumeric button. E.g. Press 2 to display only the
screen for channel 2.
Show multi-screen
Press the
PREV/FOCUS-
button.
Manually switch screens
Next screen: right/down direction button.
Previous screen: left/up direction button.
Auto-switch
Press
Enter
button.
Playback
Press
Play
button.
Switch between main
and aux output
Press
Main/Aux
button.
Summary of Contents for Diamon Series
Page 1: ...Network Video Recorder User Manual ...
Page 12: ...User Manual of Network Video Recorder 11 Chapter 1 Introduction ...
Page 24: ...User Manual of Network Video Recorder 23 Chapter 2 Getting Started ...
Page 40: ...User Manual of Network Video Recorder 39 Figure 2 24 Edit IP Camera Interface Manual ...
Page 41: ...User Manual of Network Video Recorder 40 Chapter 3 Live View ...
Page 52: ...User Manual of Network Video Recorder 51 Chapter 4 PTZ Controls ...
Page 61: ...User Manual of Network Video Recorder 60 Chapter 5 Recording and Capture Settings ...
Page 84: ...User Manual of Network Video Recorder 83 Chapter 6 Playback ...
Page 104: ...User Manual of Network Video Recorder 103 Chapter 7 Backup ...
Page 126: ...User Manual of Network Video Recorder 125 Figure 7 44 Synchronizing ...
Page 127: ...User Manual of Network Video Recorder 126 Chapter 8 Alarm Settings ...
Page 144: ...User Manual of Network Video Recorder 143 Chapter 9 Network Settings ...
Page 168: ...User Manual of Network Video Recorder 167 Chapter 10 RAID Only for NRA0R series NVR ...
Page 183: ...User Manual of Network Video Recorder 182 Figure 10 28 Upgrade the Firmware ...
Page 184: ...User Manual of Network Video Recorder 183 Chapter 11 HDD Management ...
Page 198: ...User Manual of Network Video Recorder 197 Figure 11 26 View HDD Status 2 ...
Page 202: ...User Manual of Network Video Recorder 201 Chapter 12 Camera Settings ...
Page 206: ...User Manual of Network Video Recorder 205 Chapter 13 NVR Management and Maintenance ...
Page 218: ...User Manual of Network Video Recorder 217 Chapter 14 Others ...
Page 227: ...User Manual of Network Video Recorder 226 Appendix ...


