User Manual of Network Video Recorder
62
1)
Select
Record
tab page to configure. You can configure the stream type, the resolution, and other
parameters on your demand.
•
Pre-record:
The time you set to record before the scheduled time or event. For example, when an
alarm triggered the recording at 10:00, if you set the pre-record time as 5 seconds, the camera
records it at 9:59:55.
•
Post-record:
The time you set to record after the event or the scheduled time. For example, when
an alarm triggered the recording ends at 11:00, if you set the post-record time as 5 seconds, it
records till 11:00:05.
•
Expired Time:
The expired time is the longest time for a record file to be kept in the HDD, if the
deadline is reached, the file will be deleted. You can set the expired time to 0, and then the file will
not be deleted. The actual keeping time for the file should be determined by the capacity of the
HDD.
•
Redundant Record/ Capture:
Enabling redundant record or capture means you save the record
and captured picture in the redundant HDD. See
Chapter Configuring Redundant Recording and
Capture
.
•
Record Audio:
Check the checkbox to enable or disable audio recording.
•
Video Stream:
Main stream and sub-stream are selectable for recording. When you select
sub-stream, you can record for a longer time with the same storage space.
2)
Click
Apply
to save the settings.
The redundant record/capture is to decide whether you want the camera to save the record files or
captured pictures in the redundant HDD. You must configure the redundant HDD in HDD settings. For
detailed information, see
Chapter 11.4.2
.
The parameters of Main Stream (Event) are read-only.
3.
Parameters Settings for Sub-stream
1)
Enter the Sub-stream tab page.
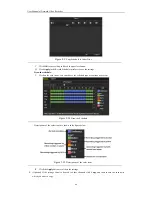
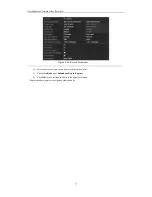
Figure 5. 4
Sub-stream Parameters
2)
Configure the parameters of the camera.
3)
Click
Apply
to save the settings.
4.
Parameters Settings for Capture
1)
Select the
Capture
tab.
Summary of Contents for Diamon Series
Page 1: ...Network Video Recorder User Manual ...
Page 12: ...User Manual of Network Video Recorder 11 Chapter 1 Introduction ...
Page 24: ...User Manual of Network Video Recorder 23 Chapter 2 Getting Started ...
Page 40: ...User Manual of Network Video Recorder 39 Figure 2 24 Edit IP Camera Interface Manual ...
Page 41: ...User Manual of Network Video Recorder 40 Chapter 3 Live View ...
Page 52: ...User Manual of Network Video Recorder 51 Chapter 4 PTZ Controls ...
Page 61: ...User Manual of Network Video Recorder 60 Chapter 5 Recording and Capture Settings ...
Page 84: ...User Manual of Network Video Recorder 83 Chapter 6 Playback ...
Page 104: ...User Manual of Network Video Recorder 103 Chapter 7 Backup ...
Page 126: ...User Manual of Network Video Recorder 125 Figure 7 44 Synchronizing ...
Page 127: ...User Manual of Network Video Recorder 126 Chapter 8 Alarm Settings ...
Page 144: ...User Manual of Network Video Recorder 143 Chapter 9 Network Settings ...
Page 168: ...User Manual of Network Video Recorder 167 Chapter 10 RAID Only for NRA0R series NVR ...
Page 183: ...User Manual of Network Video Recorder 182 Figure 10 28 Upgrade the Firmware ...
Page 184: ...User Manual of Network Video Recorder 183 Chapter 11 HDD Management ...
Page 198: ...User Manual of Network Video Recorder 197 Figure 11 26 View HDD Status 2 ...
Page 202: ...User Manual of Network Video Recorder 201 Chapter 12 Camera Settings ...
Page 206: ...User Manual of Network Video Recorder 205 Chapter 13 NVR Management and Maintenance ...
Page 218: ...User Manual of Network Video Recorder 217 Chapter 14 Others ...
Page 227: ...User Manual of Network Video Recorder 226 Appendix ...

