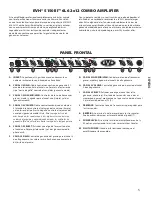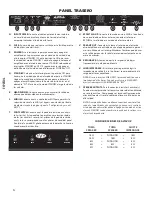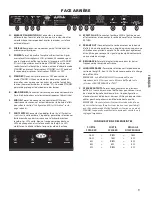
3
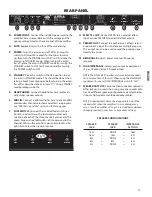
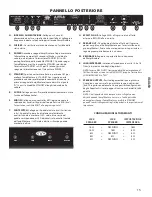
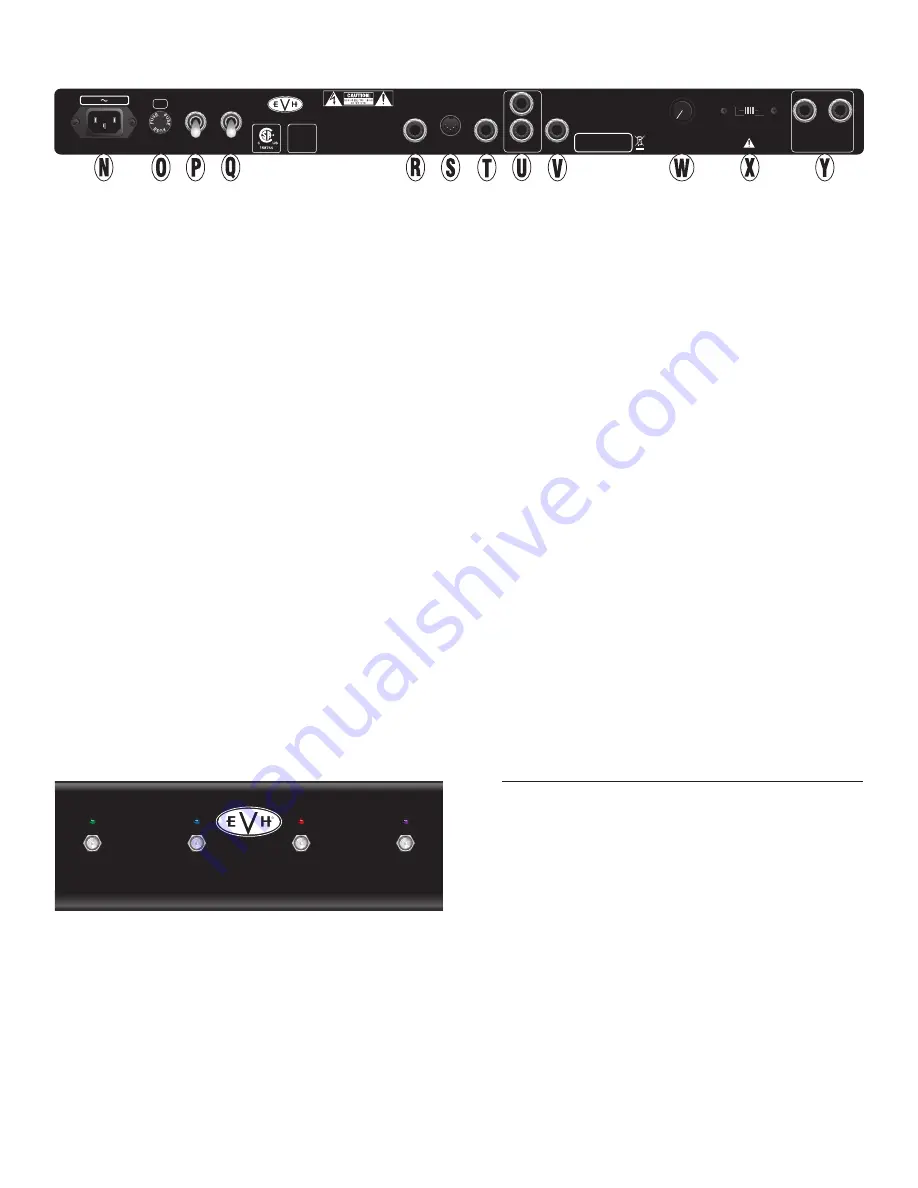
N. POWER INPUT: Connect the included power cord to the
amplifier here, in accordance with the voltage and fre-
quency ratings listed on the rear panel of the amplifier.
O. FUSE: Replace only with a fuse of the same rating.
P. POWER: Turns the amp on and off. After turning this
switch to ON, wait 30 seconds for the tubes to warm
up, then turn the STANDBY switch (O) to ON to take the
amp out of STANDBY mode. When turning the ampli-
fier off, place the amp in STANDBY mode by turning the
STANDBY switch to OFF for 10 seconds before turning
the POWER switch to OFF.
Q. STANDBY: Place this switch in the OFF position to put
the amp in STANDBY mode. This should be done when
taking a break from playing or before turning the ampli-
fier off (as described above in item “N”). Using STANDBY
mode prolongs tube life.
R. HEADPHONES: Connect headphones here (automati-
cally mutes speaker output).
S. MIDI IN: Connect a MIDI controller here to enable MIDI-
commanded channel selection and effects loop bypass
(
see “MIDI Setup and Use” section on following page
).
T. FOOTSWITCH: Connect the included footswitch (
see
illustration below
) here. The footswitch enables easy
selection of each of the three channels and reverb. The
green, blue and red footswitch LEDs correspond to the
channel LEDs on the amp front panel. Purple LED at far
right illuminates when reverb is active.
U. EFFECTS LOOP: Connect SEND to an external effect
input; connect RETURN to external effect output.
V. PREAMP OUT: Connect to another amp’s effects return
or power amp input for simultaneous multiple amp use.
This output can also be used to send the preamp signal
directly to a mixer.
W. RESONANCE: Adjusts power amp low-frequency
response.
X. LOAD IMPEDANCE: Selects amp output impedance of
(4, 8 or 16 ohms) to match speaker load.
NOTE: The 5150III 212ST speaker enclosure (recommended)
has an impedance of 16 ohms. When using the 5150III 212ST
speaker enclosure, set LOAD IMPEDANCE switch to “16Ω.”
Y. SPEAKER OUTPUTS: For connection to speaker cabinet(s).
Either jack can be used when using only one speaker cabi-
net. Five different speaker configurations are listed below.
Use only high-quality unshielded speaker cables.
NOTE: A speaker must always be plugged into one of the
speaker jacks when the amplifier is on, or damage may
occur. Turn the amplifier off or put it in standby modewhen
changing speaker connections or impedance settings.
SPEAKER CONFIGURATIONS
SPEAKER
SPEAKER IMPEDANCE
JACK
JACK
SETTING
16Ω + NONE = 16Ω
16Ω + 16Ω = 8Ω
8Ω + NONE = 8Ω
8Ω + 8Ω = 4Ω
4Ω + NONE = 4Ω
EN
GL
ISH
THREE
ONE
TWO
REVERB
LOAD
IMPEDANCE
RESONANCE
PARALLEL
SPEAKER OUTPUTS
4
Ω
min TOTAL
50W
TYPE: PR 2421
4
Ω
8
Ω
16
Ω
MIDI IN
FOOT
SWITCH
HEAD
PHONES
EFFECTS
LOOP
PREAMP
OUT
SERIAL NUMBER
WARNING:
R
E
T
U
R
N
S
E
N
D
POWER
ON
OFF
STANDBY
ON
OFF
INPUT
POWER
120V 60Hz 400W
F4A L
250V
FUSE
THIS DEVICE COMPLIES WITH PART 15 OF FCC RULES.
OPERATION IS SUBJECT TO THE FOLLOWING TWO CONDITIONS:
(1) THIS DEVICE MAY NOT CAUSE HARMFUL INTERFERENCE, AND
(2) THIS DEVICE MUST ACCEPT ANY INTERFERENCE RECEIVED,
INCLUDING INTERFERENCE THAT MAY CAUSE UNDESIRED OPERATION.
CAUTION:
CHASSIS SURFACE HOT
WARNING:
TO REDUCE THE RISK OF
FIRE OR ELECTRIC SHOCK, DO NOT EXPOSE
THIS EQUIPMENT TO RAIN OR MOISTURE
AVIS:
RISQUE DE CHOC ELECTRIQUE NE
PAS OUVRIR
ATTENTION:
SUPERFICIE DE CHASSIS
CHAUDE
CAUTION:
TO REDUCE THE RISK OF FIRE, REPLACE
FUSE WITH SAME TYPE AND RATING
ATTENTION:
UTILISER UN FUSIBLE DE RECHANGE
DE MEME TYPE ET CALIBRE
WARNING:
EVH
®
AMPLIFIER SYSTEMS
ARE CAPABLE OF PRODUCING
VERY HIGH SOUND PRESSURE
LEVELS WHICH MAY CAUSE
TEMPORARY OR PERMANENT
HEARING DAMAGE. USE CARE
WHEN SETTING AND ADJUSTING
VOLUME LEVELS DURING USE.
5150 III 1X12 COMBO
A PRODUCT OF:
FMIC
MADE IN MEXICO
MAINTAIN 6" CLEARANCE FOR VENTILATION.
REAR PANEL
Summary of Contents for 5150III 6L6 2x12
Page 23: ......

