- 68 -
DANGER!!!
PERICOLO!!!
- Ispezionare le lame per accertarsi
che siano libere da materiale estra-
neo.
- Verificare l’assenza di usure o danni
alla macchina.
In particolare verificare l’integrità
delle lame e del rullo posteriore.
- Controllare il serraggio di tutta la
bulloneria con particolare riferimen-
to alle viti di fissaggio lame (per il
corretto serraggio vedere tabella
coppie di serraggio a pag. 85).
- Controllare il corretto livello olii e
l’ingrassaggio dei vari punti come
descritto al paragrafo 7.6.
- Nonostante i controlli precedenti du-
rante il trasporto possono avvenire
parziali fuoriuscite di lubrificante da
ripristinare prima dell’uso.
- Verificare la presenza e il corretto
montaggio di tutte le protezioni di
cui la macchina è dotata.
- Inspect the knives to ensure that they
are free from foreign materials.
- Check the implement for wear and
damage.
Particularly check the knives and
the rear roller integrity.
- Check that all nuts and bolts are fully
tightened, with particular reference
to the knife bolts (for the correct
tightening torque, see the relative
table on page 85).
- Check that the oils and greases in
the various points are at the correct
level, as described in paragraph
7.6.
- Despite the previous inspections,
lubricant may have partially spilt
during transport and need topping
up.
- Make sure that all the guards with
which the machine is equipped have
been correctly mounted.
7.3 - Controlli da effettuare prima
dell’uso
7.3 - Inspections before use
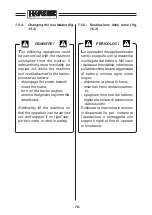
Per eseguire le operazioni di se-
guito elencate occorre:
- disinserire la presa di forza;
- inserire il freno di stazionamen-
to;
- spegnere il motore del trattore;
- togliere la chiave di accensione
dal cruscotto.
To carry out the following proce-
dures, it is necessary to first:
- disengage the power takeoff;
- insert the brake;
- turn off the tractor engine;
- remove the ignition key from the
dashboard.
Summary of Contents for HARDEE HT3
Page 2: ......
Page 22: ...10...
Page 27: ...15 39914100 g 2 2 1 g 2 2 2 Z11 399143000 g 2 2 4 Z13 Z14 g 2 2 3 399CEE001 399CEE002 Z12...
Page 42: ...30 g 2 9 1 Z06...
Page 43: ...31 1 g 2 9 2 399CEE001 39914100 Z11 Z12...
Page 44: ...32 g 2 9 3 2 72 0386 00...
Page 45: ...33 3 g 2 9 4 72 0390 00...
Page 46: ...34 5 g 2 9 5 72 0391 00...
Page 50: ...38...
Page 98: ...86...
Page 106: ...94...
Page 107: ...95 9 Assembly instructions for Kit standing jack Schema di montaggio per Piedino di appoggio...
Page 108: ...STANDING JACK PIEDISTAL STUTZHALTER PIEDINO DI APPOGGIO HT2 1 10 12 11 4 5...
Page 110: ...7 3 6 2 4 5 STANDING JACK PIEDISTAL STUTZHALTER PIEDINO DI APPOGGIO HT3...
Page 112: ...7 12 12 8 10 9 11 6 STANDING JACK PIEDISTAL STUTZHALTER PIEDINO DI APPOGGIO HT4...
Page 114: ...STANDING JACK PIEDISTAL STUTZHALTER PIEDINO DI APPOGGIO HT6 7 11 11 8 10 9 12 6...
Page 116: ...STANDING JACK PIEDISTAL STUTZHALTER PIEDINO DI APPOGGIO HT9 8 13 13 9 11 10 12 7...
Page 118: ......
Page 119: ......

