background image

[Egg-Bot Kit Assembly Guide]

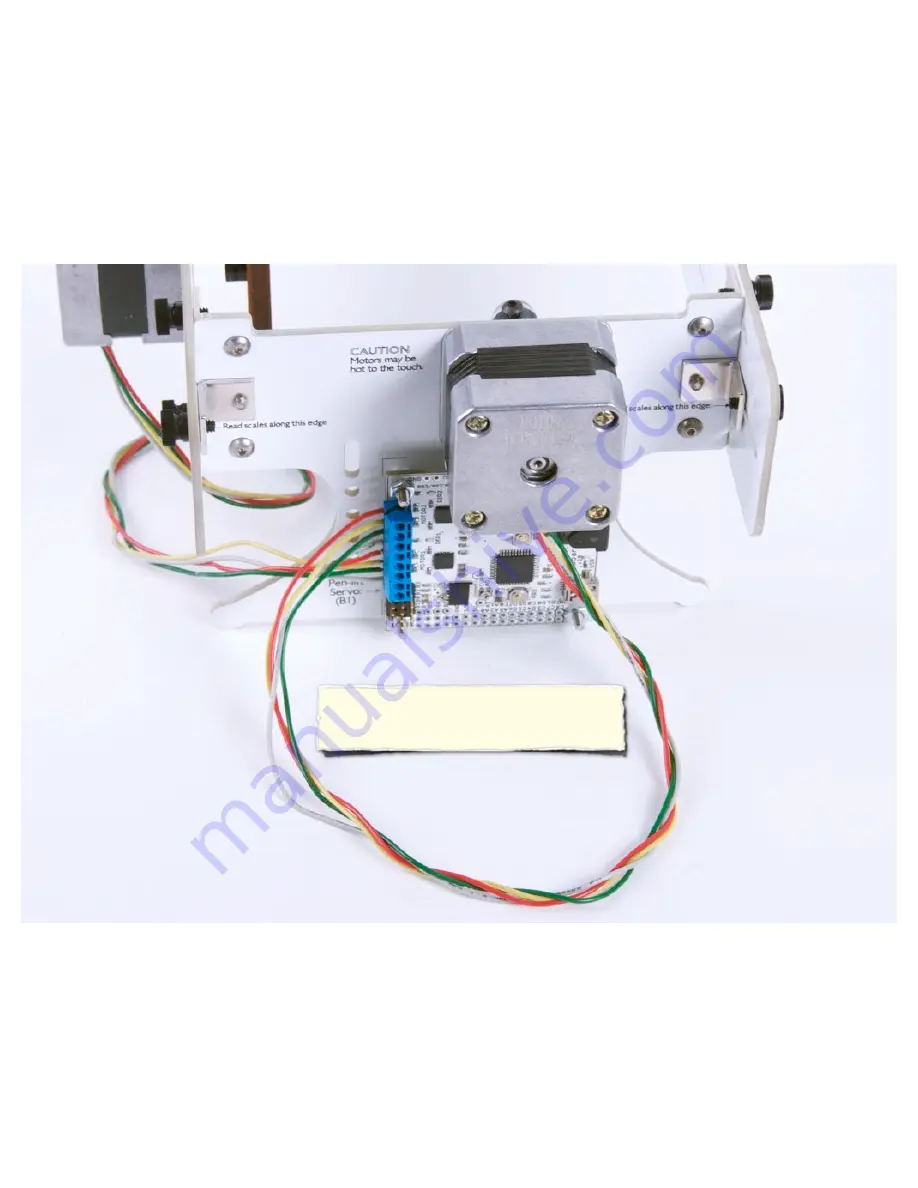
STEP 38: Wiring Motor 2

Wire up Motor 2 next. Its four wires go to the 
“Motor 2” area of the EBB.  Wire order is again 
grey (or brown), green, yellow, pink, bottom to top.

Summary of Contents for Original Egg-Bot

Page 1: ...cooperation with Bruce Shapiro Ben Trombley and Brian Schmalz This kit is designed to allow you to draw on spherical egg shaped objects from about 1 5 4 25 4 10 cm in diameter Internet access simple...

Page 2: ...cular kit The exact items may differ very slightly between versions of the kit In the instructions we refer to components by their line item number on the bill of materials For example 1 is the chassi...

Page 3: ...versal input power supply that accepts worldwide voltages and puts out 9V DC at up to at least 1 A International users may need to supply a plug adapter to fit the prongs into local outlets If you re...

Page 4: ...hex wrench and a 3 32 hex wrench You ll use them frequently The chassis is made of fiberglass and copper Its edges may initially be sharp both from how it s cut and from any residual tabs little bridg...

Page 5: ...the chassis Use the nickel plated hex wrench the shiny one to remove any sharp edges from the five chassis pieces Rub the wrench along each chassis edge at a 45 angle Usually one solid rub on each ed...

Page 6: ...The two nylon split bushings part 4 go into the two of the chassis pieces indicated from the sides labeled with the big black circles TO BE CONTINUED Egg Bot Kit Assembly Guide This piece is called th...

Page 7: ...twist it as shown so that you can insert it into the hole one edge at a time They snap into place and it will be clear when they re installed correctly If necessary the bushings can be removed by a si...

Page 8: ...fully seated and try again If the problem persists please contact Evil Mad Science customer support for help contact evilmadscience com Carefully insert the dowel pin into each of the installed split...

Page 9: ...num standoffs part 6 You ll also need 8 pieces of part 7 the 1 4 length stainless steel button socket cap screws There are a total of 21 of these in the kit Be careful to use all screws of the same le...

Page 10: ...Bot Kit Assembly Guide The screws go into the four holes shown from the side that where the holes have solid outlines Holding each screw head with a fingertip thread on the standoff from the opposite...

Page 11: ...screws go into the standoffs from the other side again through the holes with solid outlines STEP 9 Mating the two tailstock pieces Egg Bot Kit Assembly Guide Test fit the two tailstock pieces togeth...

Page 12: ...e brackets part 8 You ll also need 6 more pieces of part 7 the 1 4 length button socket cap screws Pro tip You may want to test thread one of the steel screws into each side of each angle bracket usin...

Page 13: ...ce by a screw from the other side Again they go through the holes with solid outlines Tighten the screws only just enough to hold them in place Once the brackets are all in place stand the assembly up...

Page 14: ...angle brackets go in the outlined locations Again put the angle brackets in loosely at first and only tighten them once they re held flat This chassis piece is the headstock It s a good idea to check...

Page 15: ...rt 5 the 1 4 steel dowel pin Polyurethane egg cups part 13 There are four in each kit You ll only need two and two are there as extras 9 the steel spring 10 the 1 4 shaft collar It s the one that fits...

Page 16: ...l pin You may need to loosen its screw but it should fit easily Carefully line up the end of the end of the dowel pin to the end of the shaft collar The dowel pin must not stick out through the shaft...

Page 17: ...sticking the egg cup in place Wipe them off if necessary STEP 15 Adding an Egg Cup to the Plunger Egg Bot Kit Assembly Guide We ve already got the shaft collar on the dowel pin Next we ll add one of t...

Page 18: ...into place Lay the tailstock down as shown and place the little O ring right here Lower the shaft through the tailstock brace through the O ring and into the tailstock foot The tailstock assembly is n...

Page 19: ...ount the Eggbot control circuit board This is the EiBotBoard aka EggBotBoard aka EBB and 14 on your BOM This circuit board may be either red or white You ll also need the 3 32 hex wrench again it fits...

Page 20: ...mounted in this location oriented as it s shown below The EBB has mounting holes on its four corners To mount it we re going to put those four long hex cap skinny screws in from the back side of the...

Page 21: ...e screw heads in place with your fingers while you flip the headstock over On the other side place one of the nylon spacers over each screw Then add the EBB with the orientation shown Thread hex nuts...

Page 22: ...already hold the EBB loosely in place hinged at the top by those two screws For the two remaining holes push a screw up from the bottom add the spacer and thread on the nut from the top side of the EB...

Page 23: ...y four M3 metric screws part 19 the black metal screws in the kit Put in all four screws and tighten them well with the 5 64 hex wrench Here s the motor fixed in place It s called the egg motor becaus...

Page 24: ...wall As before test fit the motor in place and then use the black M3 screws to fix it in place The screws on this motor only need to be moderately tight Pro tip You do not need to install all four sc...

Page 25: ...mbscrew These fit through the long slots in the chassis side walls and thread into the angle brackets on the headstock Use six of them to attach the headstock to the side walls Part 20 6 32 x 1 4 nylo...

Page 26: ...STEP 24 Attach the Tailstock to the Chassis Use six more of the thumbscrews to attach the tailstock as shown...

Page 27: ...aft As before the shaft collar goes flush to the end of the shaft the shaft must not protrude Once the shaft collar is in the right place tighten it well But do not use excessive force that might dama...

Page 28: ...ket 1 19 M3 Screw black 1 22 the pen arm backer 1 23 the distal pen arm 1 24 the pen arm hinge clamp 1 25 the proximal pen arm 1 26 the flexure hinge 1 27 the flexure hinge washer 1 28 Small Phillips...

Page 29: ...t along for the ride Orient the distal pen arm and clamp as shown Place the flexure hinge as shown with the holes lined up to those on the distal pen arm Place the flexure hinge washer on top of the h...

Page 30: ...ttom side of the pen arm hinge clamp Then place the free end of the flexure hinge over that screw end as shown Add the angle bracket on top of the hinge and screw it tightly into place with the 5 64 h...

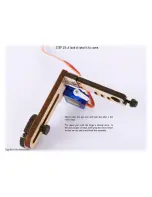
Page 31: ...t s to come Here s what the pen arm will look like after a few more steps The upper part with the hinge is already done In the next couple of steps we ll prep the servo motor so that we can add it and...

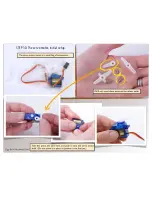
Page 32: ...nd push it onto the servo motor shaft Do not screw it in place its position is not final yet We ll only need these parts set the others aside STEP 30 The servo motor initial setup The servo motor come...

Page 33: ...ut half of a turn Center Once you know where center is point the servo horn in that direction This orients the output shaft in the correct direction Then remove the servo horn taking care to move the...

Page 34: ...s centered we need to place the servo horn at the correct angle Orient the servo horn as shown the horn points in the same direction as the cable Use the small screw from the servo bag to fix the serv...

Page 35: ...he two remaining larger size screws and use it to screw the servo motor down into the wood of the proximal pen arm Hold the servo motor down and flush against the side against the proximal pen arm as...

Page 36: ...Adding the Proximal pen arm Use the other long stainless screw 29 to attach the pen arm assembly with the hinge to the proximal pen arm Tighten it in place with the 5 64 hex wrench Hold it by the clam...

Page 37: ...haft collar inside the pen arm backer Loosely thread it only at this point 32 the large nylon thumbscrew Using the large nylon thumbscrew attach the pen arm backer to the proximal pen arm Make sure th...

Page 38: ...of the motor shaft is flatted to accept a screw from a shaft collar Test fit the pen arm in place over the shaft The depth on the shaft is adjustable so that you can line up the pen holder with the eg...

Page 39: ...to the area labeled Motor 1 on the EBB Individually insert the four wires into the terminal block and screw them down The wire order is grey or brown green yellow pink bottom to top Check that each wi...

Page 40: ...Egg Bot Kit Assembly Guide STEP 38 Wiring Motor 2 Wire up Motor 2 next Its four wires go to the Motor 2 area of the EBB Wire order is again grey or brown green yellow pink bottom to top...

Page 41: ...ble out of the way route it through the screw hole of the servo casing like so Egg Bot Kit Assembly Guide STEP 39 Servo Motor Wiring The servo cable connects to location B1 the bottom set of three pin...

Page 42: ...pply and USB cable 33 the 9V plug in power supply 34 the USB cable Big hint to avoid future frustration The EBB will power on and respond to computer commands while only the USB cable is plugged in bu...

Page 43: ...TEP 41 Adding a pen The standard pen holder fits popular fine point markers like the ultra fine point Sharpie Copic Multiliner and many others 35 the pen Use the nylon thumbscrew in the distal pen arm...

Page 44: ...Bot for the first time you will probably want to learn about the following topics next Installing Eggbot software How to set up the Eggbot to draw on any given object How to do make your first drawin...

Page 45: ...Spring Thrust washer Nylon split Bushings 2 Tension indicating O ring around plunger shaft Thumbscrews 12 Angle brackets 12 Chassis side walls Pen Arm Pen Arm distal Pe n Ar m p ro xi m al Pen motor p...

Page 46: ...the holes are slightly oversized there s a new issue which is that the plunger can wiggle a bit from side to side That can lead to a loss of precision in plotting In practice it s much less of a probl...

Page 47: ...ily As mentioned in Step 5 the bushings are removable Essentially they can be pushed out from the back side just by pushing on the correct side of the split section Apply tape wrap around most of the...

Page 48: ...ck assembled and the plunger dowel pin in place when you glue the bushings This ensures that the bushings are in the right place and are held at the correct diameter to fit the plunger 3 Glue the bush...

Reviews: