41
X
A
DJUSTMENTS
ADJUSTMENTS
Idle RPM in Gear
The idle RPM in gear setting can be adjusted,
if desired, to provide more idle control, steer-
ing, and quietness in certain applications.
IMPORTANT:
Only your Dealer can adjust
the idle RPM in gear setting.
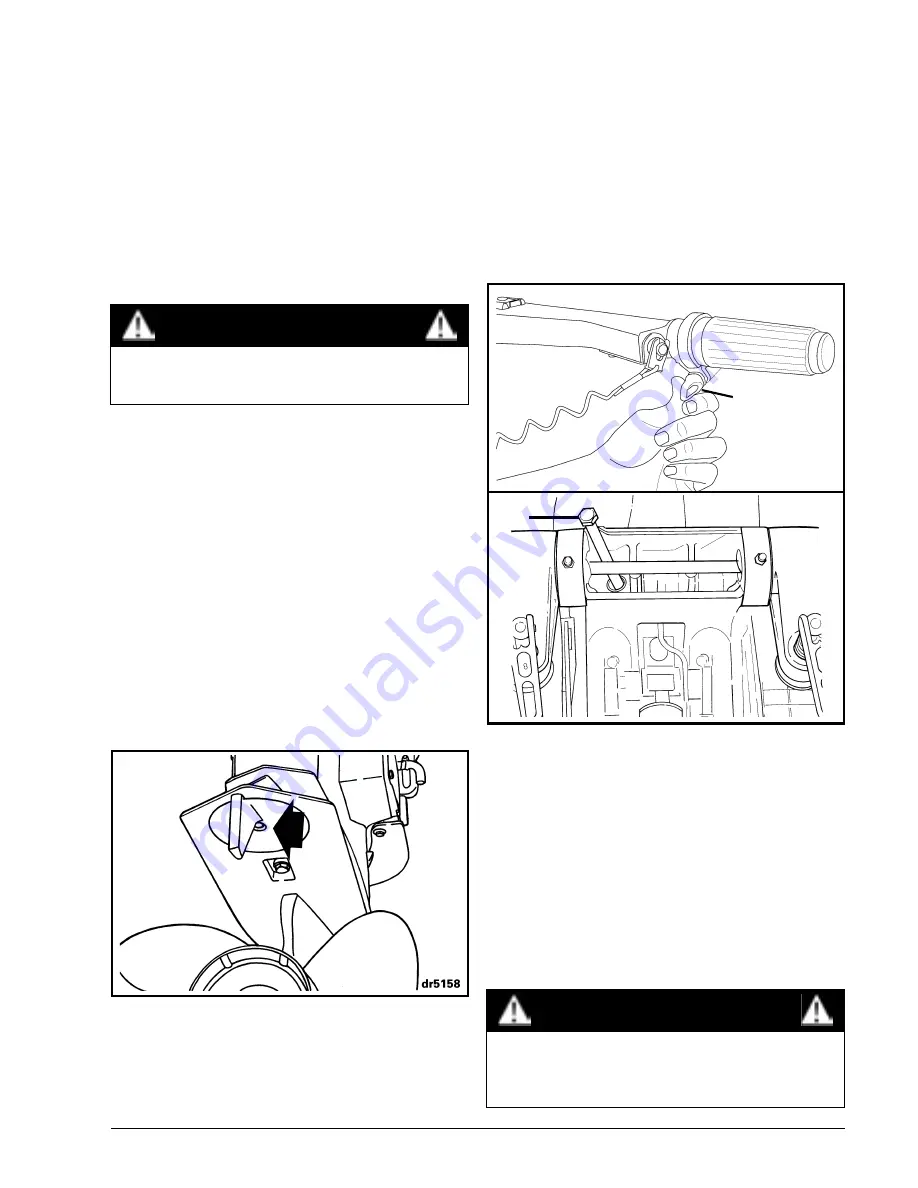
Trim Tab
A propeller will generate steering torque when
the propeller shaft is not running parallel to
the water’s surface. The trim tab is adjustable
to compensate for this steering torque.
IMPORTANT:
A single trim tab adjustment
will relieve steering effort under only one set
of speed, outboard angle and load conditions.
No single adjustment can relieve steering ef-
fort under all speed, outboard angle and load
conditions. If the boat pulls to the left or right
when its load is evenly distributed, adjust the
trim tab as follows:
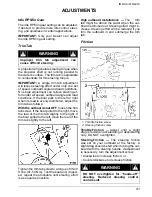
With the outboard shut OFF
, loosen the trim
tab screw. If the boat pulled to the right, move
the rear of the trim tab slightly to the right. If
the boat pulled to the left, move the rear of the
trim tab slightly to the left.
Tighten the trim tab screw to a torque of 35-40
ft. lbs. (47-54 N·m). Test the boat and, if need-
ed, repeat the procedure until steering effort
is as equal as possible.
High outboard installations —
The trim
tab might be above the water when the out-
board is trimmed out. Steering effort might in-
crease. Steering effort will be reduced if you
trim the outboard in and submerge the trim
tab.
Friction
1. Throttle friction screw
2. Steering friction screw
Throttle Friction —
Adjust until a slight
drag is felt when accelerating or decelerating
only. DO NOT overtighten.
Steering Friction —
The steering friction
was set on your outboard at the factory. A
slight drag should be felt when turning the out-
board with the steering handle. If adjustment
is necessary, turn the adjustment screw:
• Clockwise to increase friction; or
• Counterclockwise to decrease friction.
WARNING
Improper trim tab adjustment can
cause difficult steering.
WARNING
DO NOT overtighten for “hands-off”
steering. Reduced steering control
could result.
2
1
Summary of Contents for E-TEC 40RL 2008
Page 2: ...40 HORSEPOWER RL 2008 Model Year ...
Page 3: ......
Page 5: ......
Page 14: ...11 X USING YOUR EVINRUDE E TEC OUTBOARD USING YOUR E TEC OUTBOARD ...
Page 31: ......
Page 32: ...29 X MAINTENANCE ...
Page 40: ...37 X PRODUCT INFORMATION ...
Page 55: ......
Page 57: ......
Page 58: ......

