background image

1.


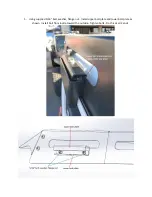
On a flat level surface.  Begin by assembling the 3 inner slat assemblies.  Each will consist of 2 

“L” Slat pieces and 1 “T” slat pieces.  Using supplied ¼” bolt, washer and flange nuts, assemble 3 

sets of inner slat assemblies by installing 6 bolts on the 6 inner holes of each.  The end 2 holes 
on each end of each slat assembly should remain without bolts at this time.  Tighten bolts of all 
3 assemblies. 


2.


Assemble the front and rear slat assemblies next.  These will consist of 1 “L” Slat piece and 1 “T” 

flat piece.  

Using supplied ¼” bolt, washer and flange nuts, assemble 2 sets of end (front and 

rear) slat assemblies by installing bolts on the 3 inner holes only.  The end 2 holes and other 
middle 3 holes should remain without bolts at this time.  Tighten 3 bolts on both front and rear 
assemblies.  Front and rear assemblies are duplicates of each other. 


Summary of Contents for EVO-3038

Page 1: ...stributed dynamic load rating of 70kg 154lbs Applying a bead of RTV Silicone in drip rail before inserting rack rails is advised for higher loads speeds It is advised to not carry items at high speeds that can create lift upward force to due to wind such as but not limited to kayaks and surfboards etc ...

Page 2: ...ly should remain without bolts at this time Tighten bolts of all 3 assemblies 2 Assemble the front and rear slat assemblies next These will consist of 1 L Slat piece and 1 T flat piece Using supplied bolt washer and flange nuts assemble 2 sets of end front and rear slat assemblies by installing bolts on the 3 inner holes only The end 2 holes and other middle 3 holes should remain without bolts at ...

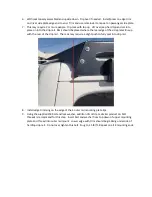
Page 3: ...e Front plate and Rear plate Using the supplied bolts washer and flange nut loosely install 2 sets at each corner 4 Using supplied bolt washer and flange nuts loosely install the 3 pre assembled middle cross bar slats front and rear cross bar slat All cross bar assemblies should be installed on the underside of the perimeter parts ...

Page 4: ...5 Using supplied 5 16 bolt washer flange nut Install upper bolt plate and lower bolt plate as shown Install bolt from inside toward the outside Tighten bolts Do this at all 4 ends ...

Page 5: ...side plates line up with the rear of the drip rail The rack may require a slight push to fully seat into drip rail 8 Install edge trimming on the edge of the 4 outer rail mounting plate lips 9 Using the supplied 3 8 bolt and lock washer addition of Loctite or similar product on bolt threads is recommend for this step Insert bolt and washer from top down of upper mounting plate and thread into oute...

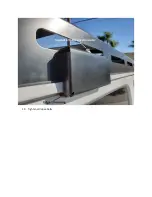
Page 6: ...10 Tighten all loose bolts ...

Page 7: ......

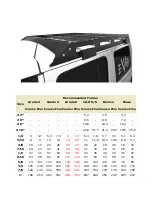
Page 8: ... 9 10 6 3 7 8 5 7 7 3 5 1 6 4 5 16 8 9 13 14 18 20 11 11 8 10 3 10 9 8 9 9 7 3 8 15 17 23 26 33 37 20 22 18 20 16 18 7 16 24 27 37 41 52 58 31 33 29 31 26 27 1 2 37 41 57 64 80 90 43 45 40 42 35 37 9 16 53 59 82 91 115 129 57 63 53 58 47 51 5 8 73 83 112 128 159 180 93 104 86 96 76 85 3 4 125 138 200 223 282 315 128 124 104 102 118 115 7 8 129 144 322 355 454 501 194 193 178 178 159 158 1 188 210 ...

Page 9: ......

Reviews: