Chapter 2 Installation
NPC-8118
- 11 -
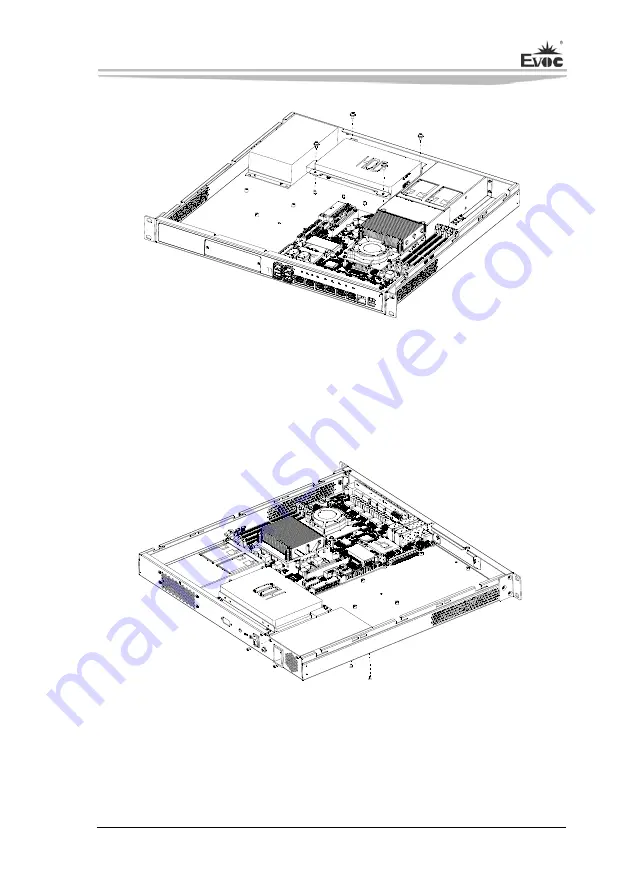
Installing the Power
Lay the power at the corresponding position in chassis and then fix it by four
countersunk head #6-32*1/4 screws from the bottom and rear of the chassis.
Installing the Fan
Fix the two fans with the fan bracket by sixteen ST4.0*10 screws, then put the module
at the corresponding position in chassis, and fix the fan bracket by four M3
countersunk head screws from external of the chassis and four pan head screws from
internal of the chassis.
Summary of Contents for NPC-8118
Page 9: ...第二章 安装说明 NPC 8118 5 第二章 安装说明 产品外观图 ...
Page 10: ...第二章 安装说明 6 NPC 8118 产品外形及安装尺寸图 单位 mm ...
Page 11: ...第二章 安装说明 NPC 8118 7 外部控制接口图 箱体装配图 1 空白挡板 2 挂耳 3 主板 4 箱体 5 风扇 6 硬盘 7 箱盖 8 电源 ...
Page 15: ...第二章 安装说明 NPC 8118 11 ...
Page 16: ...第三章 驱动程序安装说明 12 NPC 8118 第三章 驱动程序安装说明 本产品的驱动程序安装及主板详细信息请参考整机配套光盘 在此不做介 绍 ...
Page 17: ......
Page 26: ...Chapter 2 Installation 6 NPC 8118 Chapter 2 Installation Product Outline ...
Page 27: ...Chapter 2 Installation NPC 8118 7 Product Appearance and Installation Dimensions Unit mm ...


