–
Use the handles on the floaters to place the vehicle in the water.
While handling the vehicle, avoid mechanical damage to side-scan sonar antennas!
–
Push the Sonobot away from the shore and make sure its floating.
• Near the shore, test the propulsion system of the vehicle afloat:
–
Use the remote control in Manual mode and test the jet-thrusters again: steer the vehicle left and right with
the Steering stick, speed up and down with the Throttle stick.
Be careful: make sure floating debris or dirt does not get sucked into the thrusters!
• Check the echosounder:
–
In shallow water, keep the vehicle still.
–
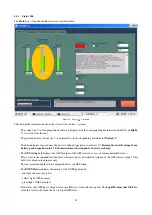
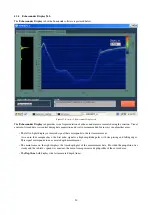
In the
Sonobot 2
software, go to the
Echosounder Display
tab.
–
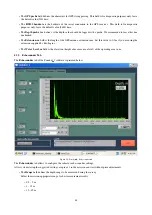
Check the depth value, measured by the echosounder. It should be close to the observed actual depth.
• Calibrate the echosounder. To make sure the depth measurements are as accurate as possible, estimate the correct
sound speed in water at the operating area.
Manual procedure:
–
At Sonobot’s location, measure the depth with a lead line (sounding line) as accurately as possible.
–
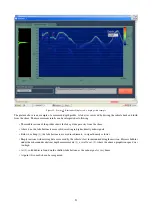
Compare the depth value, measured manually, with the depth value estimated by the echosounder (see the
Echosounder Display
tab of the
Sonobot 2
software).
–
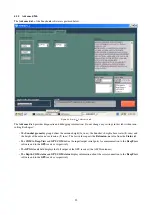
Go to the
Echosounder
tab.
In small increments, adjust the sound velocity value in the corresponding field and monitor the depth measured
by the echosounder. Repeat until the echosounder’s depth estimation matches with the manually measured
depth value.
Automated procedure:
–
At Sonobot’s location, use a c-profiler to measure the sound velocity in water. Refer to manufacturer’s guide
for detailed instructions.
–
Go to the
Echosounder
tab.
Enter the measured value into the corresponding field.
• Start the mission:
–
Use the remote control in Manual mode and steer the Sonobot to the start position of the survey.
–
Once the vehicle approaches the first waypoint, switch the remote control into Autopilot mode.
–
Set the operating speed in the
Horizon
software (see section 4.2 for details).
The vehicle will now ride along the survey grid.
• Start saving echosounder measurements:
Press
Start new profile
in the
Sonobot 2
software. The echosounder depth measurements are now stored into a
log-file on the on-board PC.
• After a few measurements are taken, you can enable the automatic depth range recognition in the
Echosounder
tab
of the
Sonobot 2
software.
• During the mission, you can monitor the results in the
Deep View
software (see more in section 4.4).
• Monitor the battery charge in the
Status
tab of the
Sonobot 2
software during the mission. The voltage should
never drop below 13 V!
• Finishing up the mission:
56


