background image

System setup menu 

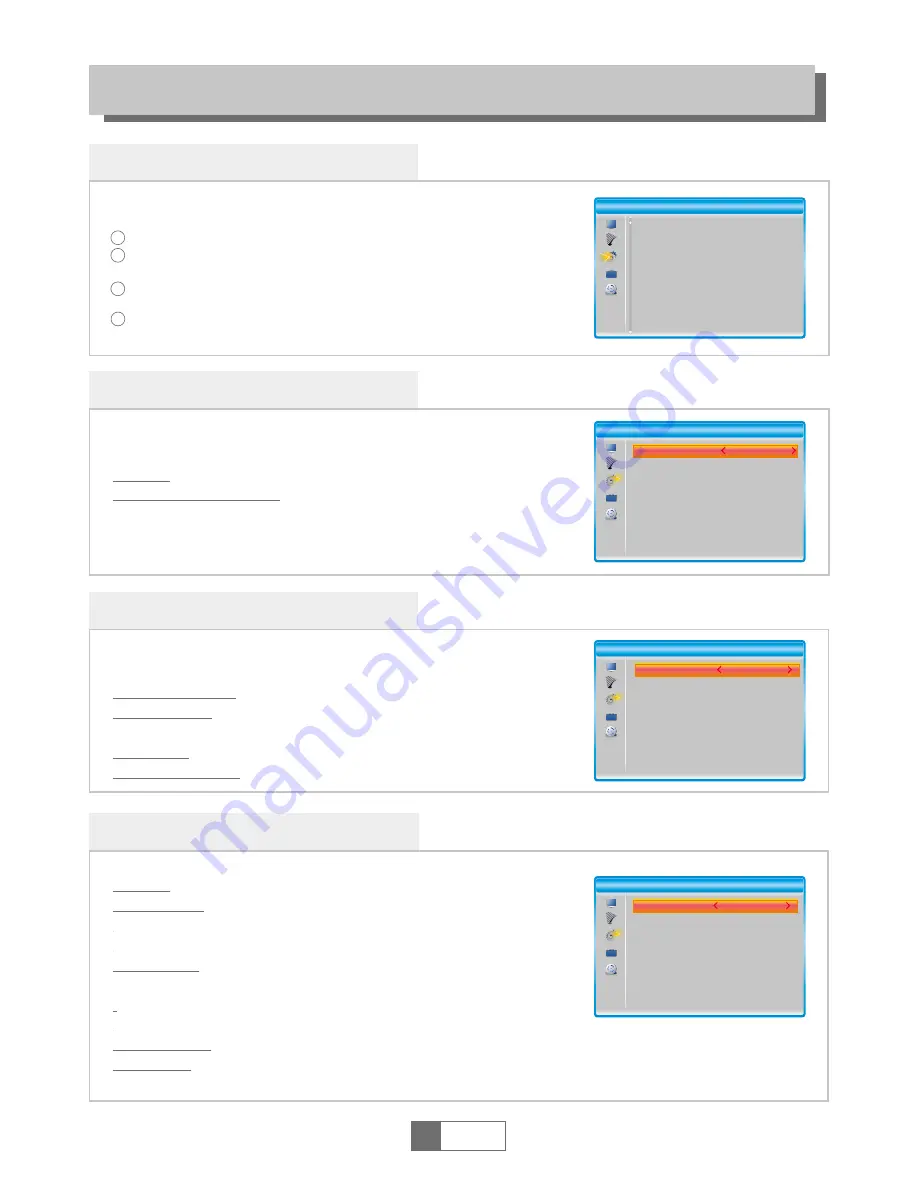
Language 

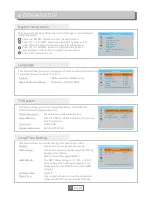
This menu allows you to set Language of system, Audio, Subtitle and
Teletext and to set subtitle function.

SYSTEM SETUP

TV System

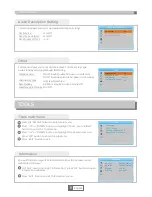
This menu allows you to set Video Resolution, Aspect Mode, 
Video Out and Digital Audio Out.

Local Time Setting

This menu allows you to set the region and the local time.

Region: 
GMT Usage:  

GMT Offset: 


Summer Time:
Date/Time:

Use this menu to change the region.
Use this menu to open the usage of GMT by 
Region/User Define. 
Also to close the usage of GMT.
The GMT offset range is "-11:30 ~ +12:00", 
increasing every half hour progressively.
(Only valid in "User Define" mode for GMT 
Usage.)
On/Off 
Press numeric button to set the date/time.
(Only valid in "Off" mode for GMT Usage.)

Video Resolution:
Aspect Mode: 

Video Out:
Digital Audio Out: 

1

English

7

4

1

2

3

Press the "MENU" button to enter the main menu.
Press "UP" or "DOWN" button to highlight "System Setup", 
press "RIGHT" button to enter the System Setup menu.
Press "UP" or "DOWN" button to highlight the desired 
item and press "OK" button to enter the sub-menu.
Press "EXIT" button to exit.

Set up Various video resolutions.
4:3PS/4:3LB/16:9PB/16:9PS/4:3 full-screen/
16:9 full-screen
CVBS/RGB
BS Out/LPCM Out

Many aspects of your STB can be set to reflect your circumstances 
and preference. 

Subtitle:

Off/Normal/Hard of Hearing

System Setup

Language
TV System
Local Time Setting
Timer Setting
Parental Lock
OSD Setting
Favorite
Audio Description Setting 
Other

Language

Language

First Audio
Second Audio
Subtitle Language 
Teletext 
Subtitle
Mp4 Subtitle CodePage

English


Czech
Czech
Czech
Czech

Off

Windows-1250

Video Resolution

Aspect Mode
Video Out
Digital Audio Out

720p@50HZ

4:3 full-screen

CVBS

LPCM Out

TV System

Local Time Setting 

Region

GMT Usage

GMT Offset
Summer Time
Date
Time

United Kingdom

By Region

GMT+ 00:00

On

12/07/2016

01:51

Reykjavik,Casablanca,Lisbon,Dublin,London

Mp4 Subtitle CodePage:

Windows-1250/ISO8859

Summary of Contents for GAMMA T2

Page 1: ...English www evolveo com GAMMA T2 HD DVB T2 H 265 HEVC recorder...

Page 2: ...anel INTRODUCTION 1 English 1 RF Loop through for an external device HDMI Output TV Scart for connection to the TV Remote sensor USB port Display Power USB port Power indicator Antenna Digital Audio O...

Page 3: ...UBTITLE Set up the Subtitle 8 9 11 10 12 13 15 14 4 5 6 7 16 17 18 19 20 21 22 23 24 25 BACK Switch to previous channel EPG Open up Electronic Program Guide Menu RECORD Record the TV program Search ba...

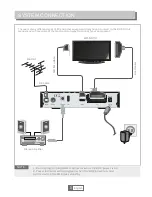
Page 4: ...nt that you can connect to the BOX In this manual you will see some of the most common ways to connect your equipment HDMI TV HDMI cable Stereo Amplifier NOTE 1 Do not plug unplug HDMI connector while...

Page 5: ...button to exit Highlight the Auto Scan press OK button to enter the Auto Scan menu Press the cursor button to set FTA Only T2 Signal Only Highlight Search press the OK button to start channel scan au...

Page 6: ...19 01 30 02 00 02 30 03 00 The Recor Auntie s War on Smut This is CBeebies The Re Commons Questions Proms on FOUR 01 39 4 4 0010 BBC NEWS 24 EPG 0008 0009 0010 0011 0012 Interecon BBC Parl BBC NEWS C...

Page 7: ...nction 1 English 6 4 1 2 3 Press the MENU button to enter main menu Press UP or DOWN button to highlight Edit Channel press RIGHT button to enter the Edit Channel menu Press UP or DOWN button to highl...

Page 8: ...OWN button to highlight System Setup press RIGHT button to enter the System Setup menu Press UP or DOWN button to highlight the desired item and press OK button to enter the sub menu Press EXIT button...

Page 9: ...pad Input letter and numeric one by one by pressing the cursor buttons and press OK button to select after finished input press Blue button you changed Favorite group name successfully Press EXIT butt...

Page 10: ...Antenna Power Channel Play Type Auto Standby Loopthrough In Standby Off All 3 Hours Off TOOLS Information In Tools menu highlight Information press OK button to open information window Press EXIT but...

Page 11: ...Software Upgrade menu is shown 1 2 Press cursor button to select the desired item then highlight Start and press OK button to start upgrade 3 This menu allows you to upgrade software version by USB Fa...

Page 12: ...Video Record Press 2 button to open the sort window You can sort by Name Time Size Favorite Press INFO button to set repeat mode The option is Repeat Folder Random Folder Repeat One Return to the uppe...

Page 13: ...P or DOWN button to highlight the desired item and press LEFT or RIGHT button to change the setting Press EXIT button to exit 1 2 3 Timeshift Jump After Recording Pause Off Auto 30 sec 1 min 5 min 10...

Page 14: ...HT or LEFT button to select the time you want to start Press OK button to start timeshift playback Playback Timer record You can enter timer setting menu to set a timer record by EPG or System set up...

Page 15: ...ket The driver is not properly pointing The front of the player is shaded The batteries are exhausted The selected channel has a signal but no sound By moving the signal strength received by the playe...

Page 16: ...MPEG 1 Layer 1 2 PCM HE AAC V1 0 ICE958 SPDIF Dolby D and Dolby D SPECIFICATIONS HDMI DATA PORT SCART SPDIF INPUT VOLTAGE ANTENNA INPUTx1 RF OUTPUT x1 HDMI OUTPUT x1 USB slot x2 TV OUTPUT x1 COAXIAL...

Reviews: