11
Operation
WARNING! Before commissioning must check the oil level in the compressor.
WARNING! IN case of any abnormal noise, immediately turn off the tool and
contact an authorized service facility for repairs
Asembly and components checking
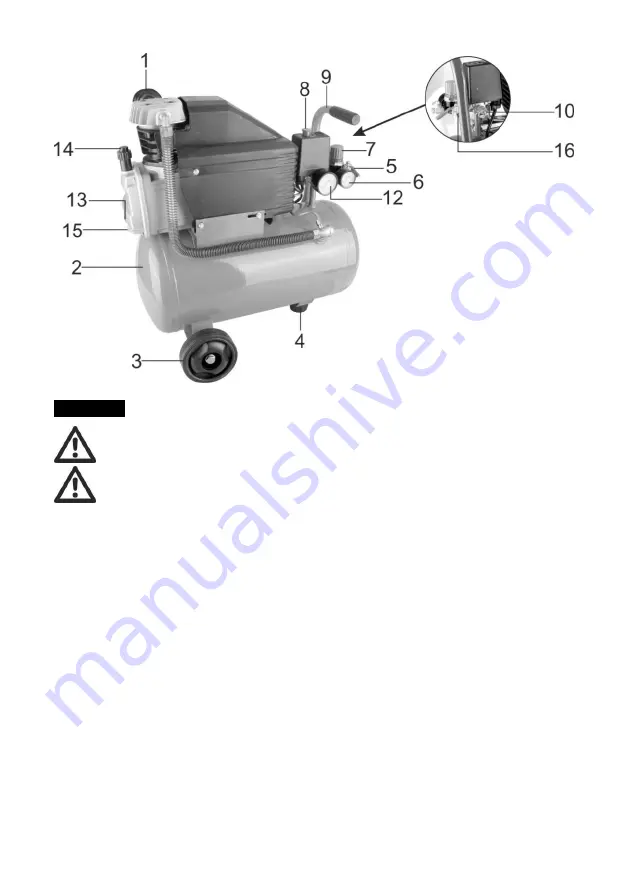
Install wheels (3) and foot (4)
– with bolts and nuts provided
Replacing the air filter (1) - Remove the brackets used during transport with a screwdriver or
similar tool and attach an air filter (1) by screwing on the device. (Fig. 7)
Changing the oil cap closure (14) - Remove the transport cover from the oil filler hole using a
screwdriver and place the cap closure (14) in the spout (Fig. 8).
The compressor is equipped with power-connection cable with protective contact plug. It can
be plugged into any socket with protective contact 230V ~ 50Hz which is equipped with a
safety 16 A. Before starting, check whether the mains voltage corresponds to the operating
voltage stated on the data plate device. Power cords and extension cords or long cable
drums causes low voltage and prevent proper starting.
Safety valve (10) is adjusted to the maximum allowable pressure of the pressure tank. Do not
modify or remove safety valve seal. To function properly in the event of switch damage,
safety valve should be checked weekly. Firmly pull ring out until the compressed air comes
out. Then release safety valve the valve again.
Check oil level: place the compressor on a flat,horizontal surface. The oil level should be
between MAX and MIN values of the viewfinder.
Start / stop
the operation. Compressor start by pulling out the button (8).
To switch off , the button (8) must be pressed down. (Fig. 2)


