background image

RU

14

Добавление/удаление объектов рабочего стола 

Вы можете вынести на рабочий стол ярлыки установленных программ, виджеты, 

папки  для  организации  ярлыков,  ссылки  на  интернет  страницы  из  избранного, 

музыкальные плейлисты и другие объекты. 
Самым простым и удобным способом добавления ярлыка является перетаскива-

ние значка приложения из меню «Все программы» на рабочий стол. 
Для добавления ярлыка: 
1) нажмите на кнопку 

2) найдите программу, которую Вы хотите разместить на рабочем столе; 
3) нажмите на значок программы и удерживайте 2-3 секунды; 
4) не отрывая палец от экрана, перетащите значок на свободное место актив-

ного рабочего стола; 
5) отпустите значок, и он зафиксируется на рабочем столе. 

Примечание: 

• Вы можете переместить любой объект на свободное место активного экрана. 

•  Вы  не  сможете  добавить  новый  объект  на  экран  рабочего  стола,  если 

пространство заполнено. Удалите неиспользуемые объекты с активного экрана, 

либо добавьте новый объект на другой экран рабочего стола. 

Для удаления объекта с рабочего стола: 

1) нажмите на ненужный объект и удерживайте 2-3 секунды 
2) в верхней части рабочего экрана появится значок «Корзина»; 
3) не отрывая палец от экрана, перетащите объект в корзину. 

Примечание:  удаление  объекта  с  рабочего  стола  не  приведёт  к  удалению  его 

из  системы.  Любой  объект  можно  восстановить  на  рабочем  столе,  используя 

приведённые выше инструкции. 

Установка фонового изображения 

Для установки фонового изображения на рабочий стол и экран блокировки: 

Вариант I 

1) нажмите кнопку 

 для перехода на главный экран; 

2) нажмите на свободную область рабочего стола и удерживайте 2-3 секунды; 

Summary of Contents for Play Pad PRO

Page 1: ...USER MANUAL Play Pad PRO...

Page 2: ......

Page 3: ...3 RU PLAY PAD PLAY PAD 8 12...

Page 4: ...RU 4...

Page 5: ...5 RU microSD...

Page 6: ...RU 6 PLAY PAD...

Page 7: ...7 RU 1 2 3 Power 4 5 mini HDMI 6 7 USB 8 9 10...

Page 8: ...RU 8 220 50 60 mini USB mini USB USB 3...

Page 9: ...9 RU Reset 5 1...

Page 10: ...RU 10 2 3 PLAY PAD microSD SDHC 1 2 3 4 5 SD USB USB 1 2 3 USB USB...

Page 11: ...11 RU Wi Fi Wi Fi 1 2 3 4 Wi Fi 1 Wi Fi 2 Wi Fi 3 4 IP Wi Fi IP IP USB USB miniUSB 1 2 USB 3 USB 4 USB USB 1 2 USB 3 USB...

Page 12: ...RU 12 5 5 3 4 5 6 7 9 2 1 8 1 2 3 4 5 6 7 Wi Fi 8 9...

Page 13: ...13 RU Windows 2 Android Market...

Page 14: ...RU 14 1 2 3 2 3 4 5 1 2 3 2 3 I 1 2 2 3...

Page 15: ...15 RU 3 4 5 II 1 2 3 4 5 OS Android USB Android Market Android Market Android Market Google Google Google Android Market...

Page 16: ...RU 16 AndroidMarket Android Market Android Market Android Market 1 apk 2 3 Android Market 1 2 3 4 5 6...

Page 17: ...17 RU Wi Fi 1 2 1 2 Wi Fi...

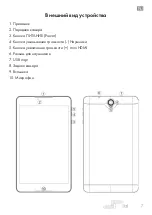
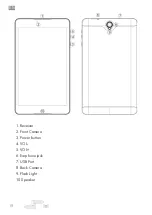
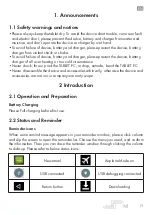
Page 18: ...EN 18 1 Receiver 2 Front Camera 3 Power button 4 VOL 5 VOL 6 Earphone jack 7 USB Port 8 Back Camera 9 Flash Light 10 Speaker...

Page 19: ...ce Never shock throw prod the TABLET PC or drop extrude bend the TABLET PC Never disassemble the device and accessories arbitrarily otherwise the device and accessories are not in our company warranty...

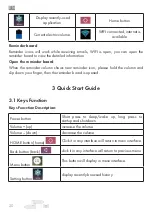
Page 20: ...se hold the column and slip down your finger then the reminder board is opened 3 Quick Start Guide 3 1 Keys Function Keys Funcction Description Power button Short press to sleep wake up long press to...

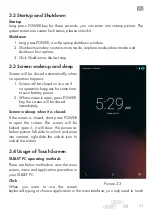
Page 21: ...f no operation happens for some time to save battery power 2 When screen is open press POWER key the screen will be closed immediately Screen wakeup when it is closed If the screen is closed short pre...

Page 22: ...renghth until you pull it into the position you want Rotate For most pictures you only need to retate the TABLET PC sidewise to change the screen direction from horizoncial to vertical For instance wh...

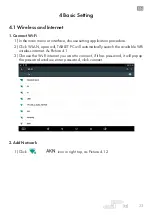
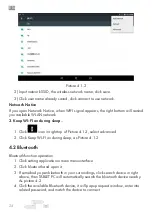
Page 23: ...ication procedure 2 Click WLAN open wifi TABLET PC will automatically search the available Wifi wireless internet As Picture 4 1 3 Choose the Wi Fi internet you want to connect if it has password it w...

Page 24: ...t top of Picture 4 1 2 select advanced 2 Click Keep WI FI on during sleep as Picture 4 1 2 4 2 Bluetooth Bluetooth function operation 1 Click setting application in main menu interface 2 Click bluetoo...

Page 25: ...isplay 4 3 1 Adjust the screen brightness 1 Click Setting application procedure 2 Click display choose brightness 3 Drag the portlito to adjust the brightness volume As Picture 4 3 1 4 Click OK after...

Page 26: ...e TABLET PC screen by G sensor 4 3 3 Sleep 1 Click setting appliation 2 Click display 3 Click sleep 4 Set the sleep time as you want as Picture 4 3 3 Picture 4 3 3 5 Multi Media 5 1 Music Enter into m...

Page 27: ...ss bar to adjust play progress Operation of music player button as Picture 5 1 5 2 Video Enter video player choose application in main menu choose the video you want to play Operation of video player...

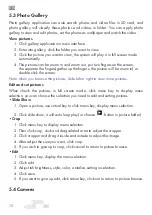
Page 28: ...ght to view more pictures Edit and set pictures When check the pictures in full screen mode click menu key to display menu selection you can choose the selection you need to edit and setting pictures...

Page 29: ...29 EN In the main interface or desktop click camera application procedure enter into camera Operation of camera Switch camera choose Menu key click switch front back camera as Picture 5 4 Picture 5 4...

Page 30: ...terface or desktop to enter into FM radio interface Radio button operation instruction as Picture 5 5 Picture 5 5 Note You need to insert earphone as antenna when using FM radio If no antenna your TAB...

Page 31: ...procedure 2 Operate as Picture 6 1 Picture 6 1 7 Internet 7 1 Browser In case of Wi Fi or mobile internet is connected well Please refer to Chapter 7 1 for wireless and internet setting click IE brow...

Page 32: ...ut the website click start enter into related webpage then you can browse the website information as Picture 7 1 2 and you can click the menu you can refresh save to bookmarks share page bookmarks his...

Page 33: ...EVROMEDIA 0 0 4 1 5 044 581 02 02 114 www evromedia eu remont org net ua...

Page 34: ...EVROMEDIA UPC 6559584479893...

Reviews: