


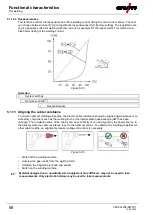
Functional characteristics
TIG welding
099-00L200-EW501
13.05.2022
45
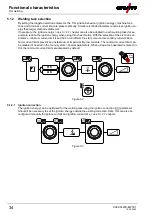
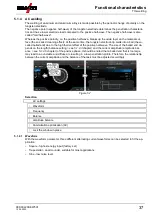
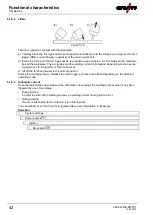
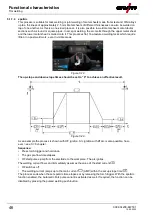
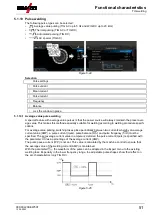
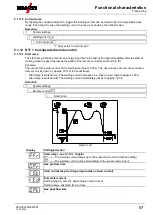
1st cycle
• Press torch trigger 1
, the gas pre-flow time elapses.
• HF start pulses jump from the electrode to the workpiece. The arc ignites.
• Welding current flows and immediately assumes the set start current
(search arc at minimum set-
ting). HF switches off.
• Start current flows at least for the start time
or as long as the torch trigger is held.
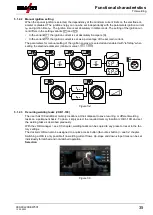
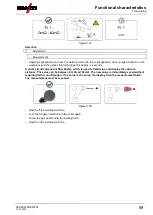
2nd cycle
• Release torch trigger 1.
• The welding current ramps up to the main current
in the selected upslope time
.
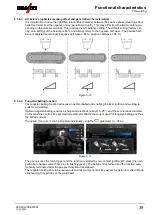
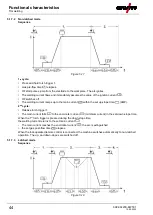
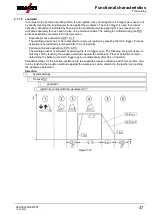
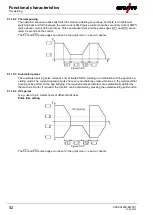
Switching from the main current AMP to secondary current
(AMP%):
• Press torch trigger 2 or
• Tap torch trigger 1 (torch modes 1–6).
If torch trigger 2 is pressed together with torch trigger 1 during the main current phase, the welding cur-
rent decreases to the secondary current
in the set slope time
.
Once torch trigger 2 is released, the welding current increases again to the main current AMP in the set
slope time
. The parameters
and
can be set in the quick menu
> see 4.4 chapter
.
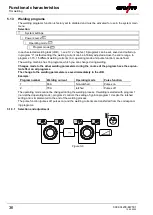
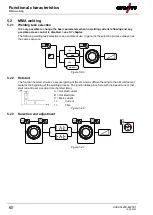
3rd cycle
• Press torch trigger 1.
• The main current decreases to the end-crater current
within the set down-slope time
.
Once the main current phase
has been reached, you can shorten the welding sequence by tapping
torch trigger 1 (third cycle will be omitted).
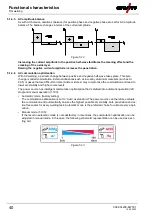
4th cycle
• Release torch trigger 1; arc is extinguished.
• Set gas post-flow time
runs.
When the foot-operated remote control is connected, the machine switches automatically to non-latched
operation. The up- and down-slopes are switched off.
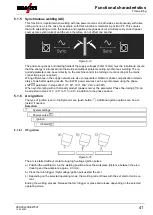
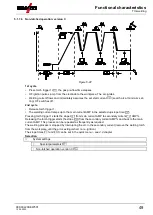
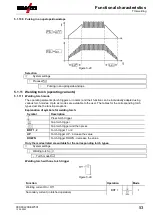
Alternative welding start (tapping start):
For the alternative welding start, the durations of the first and second cycle are defined by the set process
times only (tapping the torch trigger in the gas pre-low phase
).
This function can also be deactivated completely when required (welding stop by tapping remains active).
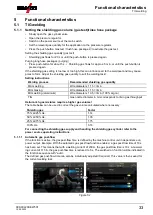
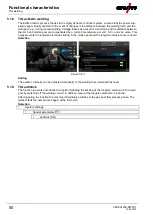
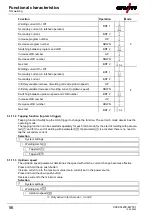
Selection
System settings
Welding torch
Tap start


