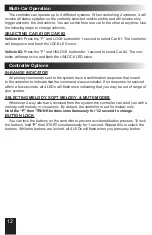
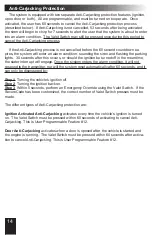
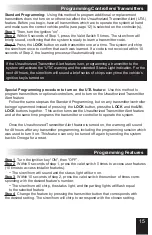
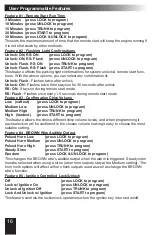
background image

Installer Programmable Features (cont’d)

This device complies with part 15 of the FCC Rules Operation is subject to the following two conditions: 

(1) This device may not cause harmful interference, and 

(2) This device must accept any interference received, including interference that may cause undesired operation

This equipment has been tested and found to comply with the limits for a Class B digital device, pursuant to part 15 of 

the FCC Rules These limits are designed to provide reasonable protection against harmful interference in a residential 

installation This equipment generates, uses and can radiate radio frequency energy and, if not installed and used in ac-

cordance with the instructions, may cause harmful interference to radio communications However, there is no guarantee 

that interference will not occur in a particular installation If this equipment does cause harmful interference to radio or 

television reception, which can be determined by turning the equipment off and on, the user is encouraged to try to cor-

rect the interference by one or more of the following measures:

- Reorient or relocate the receiving antenna

- Increase the separation between the equipment and receiver

- Connect the equipment into an outlet on a circuit different from that to which the receiver is connected

- Consult the dealer or an experienced radio/TV technician for help

Warning! Changes or modifications made to this equipment not expressly approved by the part responsible for compli-

ance could void the use’s authority to operate the equipment

NOTE: The manufacturer is not responsible for any radio or TV interference caused by unauthorized modifica-

tions to this equipment. Such modifications could void the user’s authority to operate the equipment.

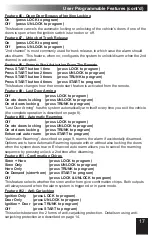
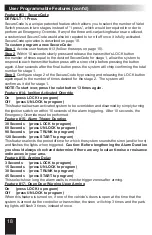
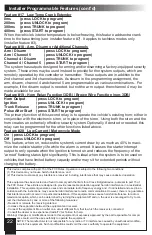
Feature #17   Low Temp Crank Extender

0ms  

(press LOCK to program)

200ms  (press UNLOCK to program) 

300ms  (press TRUNK to program)

400ms  (press START to program)

When the vehicle’s interior temperature is below freezing, this feature adds extra crank 

time to the base timing (see  installer feature #7) It applies to tachless modes only 

(installer feature #3)

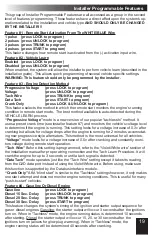
Feature #20   Low Current / Motorcycle Mode

On  (press LOCK to program)  

Off  (press UNLOCK to program)


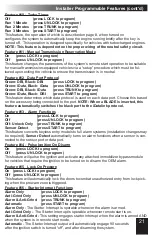
This feature, when on, reduces the system’s current draw by as much as 40% to maxi-

mize the vehicle’s battery life while the alarm is armed It causes the starter interrupt 

output to only operate when the ignition is turned on and reduces the frequency of the 

“armed” flashing status light significantly. This is ideal when the system is to be used on 

vehicles that have limited battery capacity and/or may sit for extended periods without 

charging the battery

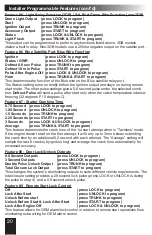
Feature #18 - Arm, Disarm or Additional Channels

Arm / Disarm          (press LOCK to program) 

Arm / Channel 5       (press UNLOCK to program)

Channel 4 / Disarm    (press TRUNK to program)

Channel 4 / Channel 5  (press START to program)

The system has outputs designed for arming and/or disarming a factory-equipped security 

system  These wires may be used instead to provide further system outputs, which are 

remotely operated by the controller or transmitter  These outputs are in addition to the 

2nd channel and 3rd channel outputs As shown in the programming assignment, the 

arm, disarm, channel 4 and channel 5 are programmable as various combinations  For 

example, if the disarm output is needed, but not the arm output, then channel 4 may be 

made available for use 

Feature #19 - Horn Relay Function (3DB) / Brown Wire Function (non-3DB)

Horn Output      (press LOCK to program) 

Ignition     (press 

UNLOCK 

to 

program)

Trunk Release    (press TRUNK to program)

Pulse After Start   (press START to program)

The primary function of this second relay, is to operate the vehicle’s existing horn; either in 

conjunction with the electronic siren, or in place of the siren  Using both the siren and the 

horn creates an extremely effective security system Optionally, if desired or needed, this 

relay can be programmed for the other functions listed above

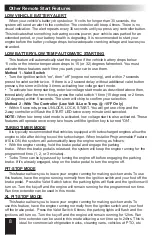
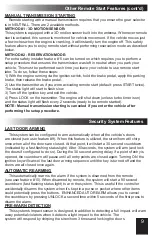
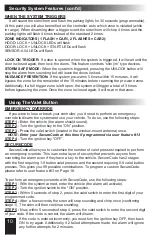
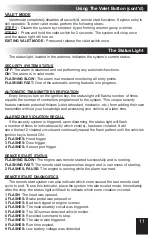
22

Summary of Contents for AL-1775-3DB

Page 1: ...Register at caralarm com OPERATION GUIDE AL 1775 3DB RS 475 3D al 1775 3db rs 475 3d op guide indd 1 8 3 16 7 41 AM...

Page 2: ...Temporary cover Final cover is in a separate file OPERATION GUIDE AL 1775 3DB RS 475 3D REMOTE START SECURITY PERFECTED 1...

Page 3: ...urity System Features 9 Last Door Arming 9 Automatic Rearming 9 Pre Warn Detection 9 When The System Triggers 10 Using The Valet Button 10 Emergency Override 10 SecureCode 10 Valet Mode 11 The Status...

Page 4: ...Replace the batteries and reassemble the transmitter case THE 1 WAY TRANSMITTER LOCK ARM Press and release the LOCK button THE SIREN WILL CHIRP THE PARKING LIGHTS WILL FLASH ONCE UPON RECEIVING CONFI...

Page 5: ...PARKING LIGHTS WILL FLASH ONCE AND THE STATUS LIGHT WILL FLASH RAPIDLY THE SYSTEM WILL PROCEED TO START THE ENGINE UPON RECEIVING CONFIRMATION THE CONTROLLER WILL PLAY THE START MELODY AND FLASH THE S...

Page 6: ...mote start cycle The controller will also give you run time expiration warning 2 beeps 1 minute before the remote start cycle ends If you decide not to drive your vehicle you can turn off the remote s...

Page 7: ...rm system THE SYSTEM WILL GIVE ONE CHIRP AFTER LOCKING TO INDICATE THE SENSOR IS BYPASSED UPON RECEIVING CONFIRMATION FROM YOUR SYSTEM THE CONTROLLER WILL ALSO CHIRP ONCE FLASH ALL 4 LED S ONCE 1 REMO...

Page 8: ...to operate extra vehicle functions like automatic sliding doors or motorized hatches Aux 1 4 are virtual outputs only available on certain vehicles when this system is integrated with the vehicle s d...

Page 9: ...drops below adequate cranking voltage and leaves you stranded This feature allows you to leave your engine running for making quick errands To use this feature have the engine running normally from t...

Page 10: ...transmission starting is canceled if you enter the vehicle after performing the setup procedure Security System Features LAST DOOR ARMING This system can be configured to arm automatically when all t...

Page 11: ...tion key to the ON position STEP 3 Press the valet switch located in the window mount antenna once NOTE Enter your SecureCode at this time if programmed via user feature 13 STEP 4 Turn the ignition ke...

Page 12: ...hicle at a later time ALARM ZONE VIOLATION RECALL If the security system is triggered upon disarming the status light will flash a number of times to indicate exactly which zone s has been violated It...

Page 13: ...ING MELODY SOFT MELODY MUTE MODES Whenever 2 way alerts are received from the system the controller can alert you with a melody soft melody or visual only By default the controller is set for melody o...

Page 14: ...BLANK PAGE 13...

Page 15: ...tion be turned off in the meantime the stater interrupt will engage Once the system enters the alarm condition it will not respond to the transmitter nor will the system reset automatically after 60 s...

Page 16: ...switch 5 times to access user features 10 times to access installer features The siren horn will sound and the status light will turn on Step 3 Within 10 seconds of step 2 press the valet switch the...

Page 17: ...d in the chosen volume making it easy to choose the most suitable setting Feature 4 BROWN Wire Audible Output Pulsed Horn Low press LOCK to program Pulsed Horn Medium press UNLOCK to program Pulsed Ho...

Page 18: ...7 Unlock w Trunk Release On press LOCK to program Off press UNLOCK to program 2nd channel is most commonly used for trunk release in which case the alarm should also disarm This feature when on config...

Page 19: ...feature allows an activated system to be overridden and disarmed by simply turning the ignition switch on within 10 seconds of the alarm triggering After 10 seconds the Emergency Override must be perf...

Page 20: ...his setting looks for a voltage increase of 0 3v after cranking but allows for voltage drops after the engine is running for 2 minutes accomodat ing new progressive style alternators This method is th...

Page 21: ...press UNLOCK to program Double Pulse Unlock Output press TRUNK to program Total Closure Lock Output press START to program This changes the system s doorlocking outputs to suite different vehicle req...

Page 22: ...he black port to the iDatalink protocol Feature 14 Pulse Ignition On Disarm On press LOCK to program Off press UNLOCK to program This feature will pulse the ignition and activate any attached immobili...

Page 23: ...to program 400ms press START to program When the vehicle s interior temperature is below freezing this feature adds extra crank time to the base timing see installer feature 7 It applies to tachless m...

Page 24: ...ramming Ignition on off press valet 10 times 1 RS Activation WHITE BLUE wire 1 Pulse 2 pulses 3 pulses 4 pulses 2 Vehicle Learn Enabled Disabled 3 Engine Detection Prog Voltage Voltage Tach Wire Data...

Page 25: ...Back Cover Color cover is in a separate file 24...

Reviews: