10
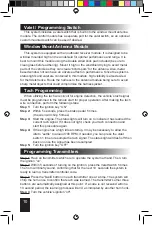
Window Mount Antenna Module
This system is equipped with an outboard receiver module. It is designed to be
window mounted high on the windshield for optimal performance and range� It is
best to mount this module using the double sided stick pad included (be sure to
clean glass before adhering)� Mount it high in the windshield trying to avoid metal
parts of the vehicle as they can create “blind spots” for the antenna� Also, metal
based window tint can have an adverse affect on performance� Since the system’s
status lights and valet are contained in this module, high visibility is also desired
for theft deterrence� Route the harness to the antenna module being sure to avoid
sharp metal objects that could compromise the harness jacket�
Valet / Programming Switch
This system includes a valet switch that is built into the window mount antenna
module� The control module has a separate port for the valet switch, so an optional
custom mounted switch can be used if desired�
Tach Programming
When utilizing the tach wire circuit for engine detection, the vehicle’s tach signal
must be programmed to the remote start for proper operation� After making the tach
wire connection, perform the following steps:
Step 1:
Turn the ignition key “ON”
Step 2:
Within 5 seconds, press the brake pedal 5 times�
(the siren will chirp 5 times)
Step 3:
Start the engine� The status lights will turn on to indicate it has learned the
current tach signal� If it does not light, check your tach connection and
start this procedure again�
Step 4:
If the engine has a high idle at startup, it may be necessary to allow the
idle to “settle” to around 700 RPM� If needed, you can press the valet
switch 1 time to resample the tach signal. The status light will flash off then
back on once the signal has been resampled�
Step 5:
Turn the ignition key “OFF”�
Step 1
Have all transmitters which are to operate the system at hand� Then, turn
the ignition “on”�
Step 3
Press the “
lock
” button on each transmitter one at a time� The system will
chirp the horn once to confirm that each was learned. The transmitter’s other three
button’s are automatically assigned at this point� If a code is not received within a
10 second period, the learning process will end, as indicated by another horn honk�
Step 4
Turn the vehicle’s ignition “off”�
Step 2
Within 5 seconds of turning on the ignition, press the Valet Switch 5 times�
The horn will briefly sound, confirming that for the next 10 seconds the system is
ready to learn a transmitter/controller code�
Programming Transmitters


