~ 7 ~
Overall user manual
© 2011 VAN OS MEDICAL UK LTD.
Tel. +44(0)1757 701177, Fax +44(0)1757 706011, E-mail:
sales@vanosmedical.com
,
www.vanosmedical.com
5.1 Disengaging Motors
Warning
Danger of the vehicle running away!
When the motors are disengaged (for push operation), the electromagnetic motor brakes are deactivated!
When the vehicle is parked, the levers for engaging and disengaging the motors must without fail be locked
firmly into the "DRIVE" position (electromagnetic motor brakes activated)!
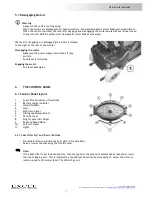
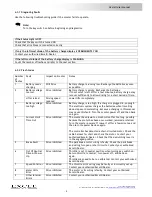
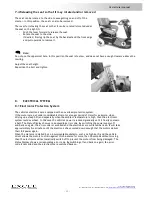
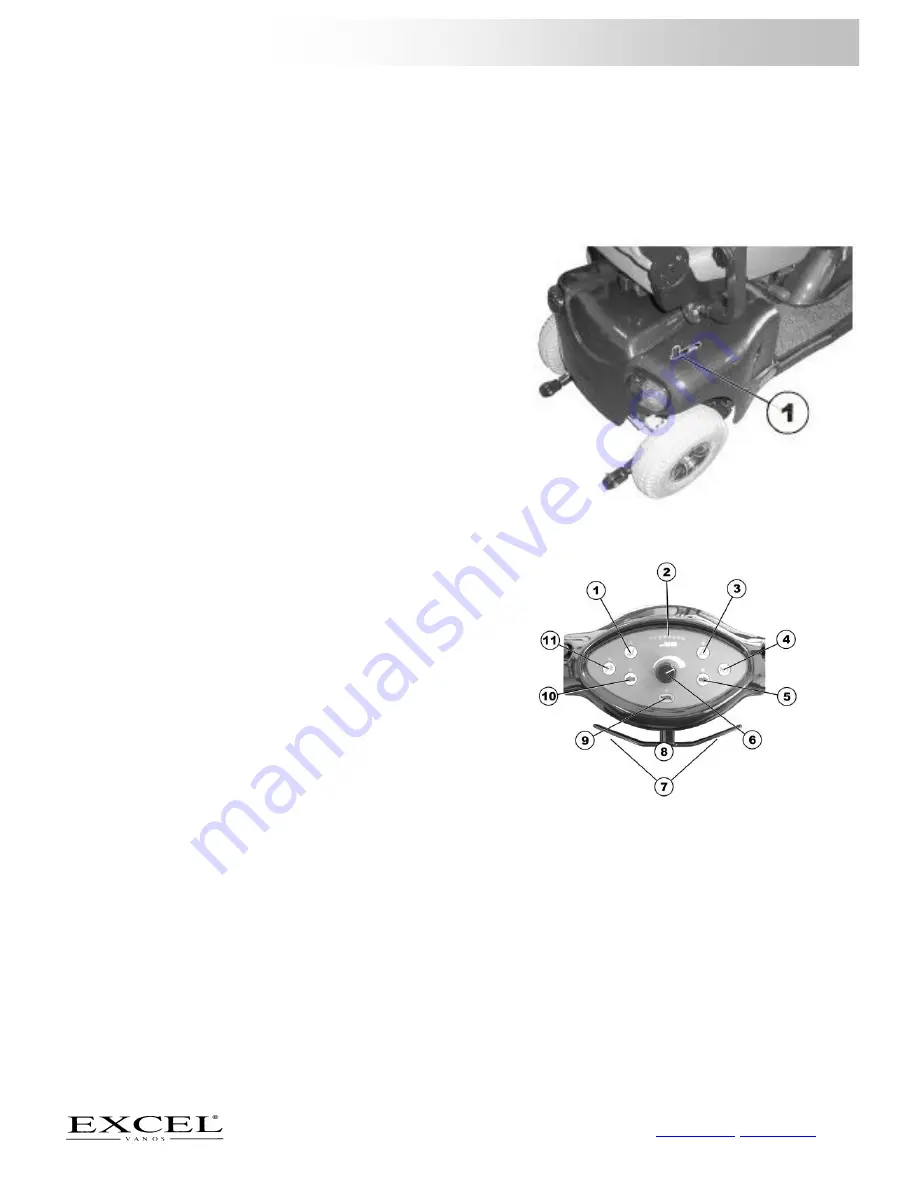
The lever for engaging and disengaging the motor is located
on the right at the rear of the scooter.
Disengaging the motor
-
Make sure the power supply is switched off (key
switch).
-
Push lever (1) forwards.
Engaging the motor
-
Pull lever backwards.
6.
THE CONTROL PANEL
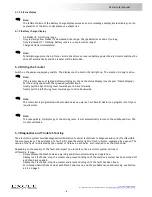
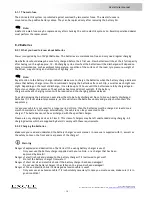
6.1 Control Panel layout
1.
Seat Lifter activation (if installed)
2.
Battery charge indicator
3.
Hazard flashers
4.
Horn
5.
Right turn signal
6.
Driving speed adjustment
7.
Throttle lever
8.
Plug for external charger
9
Reduced Speed Mode
10.
Left turn signal
11.
Lights
6.1.1 Seat Lifter "Up" and "Down" Buttons
-
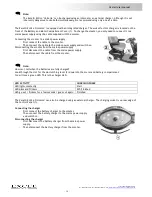
Press the button to activate the Seat Lifter (if is installed).
-
Raise or lower the seat using the throttle lever.
Note:
If the Seat Lifter is not lowered entirely, then the speed of the scooter is automatically reduced to lower
the risk of tipping over. This is indicated by the LED just above the buttons being lit. Lower the Lifter to
restore speed to it's normal level. The LED will go out.


