© 2016 Excel, part of Van Os Medical B.V.
Koperslagerij 3 | 4651 SK Steenbergen | The Netherlands | T: +31 (0)167-573020 | E: info@vanosmedical.nl | W:
www.vanosmedical.com
19
User Manual
| Excel G-Explorer
User Manual
| Excel G-Explorer
EXCEL G-EXPLORER
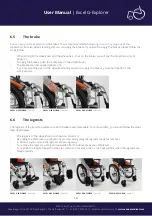
| Photo 21
EXCEL G-EXPLORER
| Photo 22
EXCEL G-EXPLORER
| Photo 23
EXCEL G-EXPLORER
| Photo 24
EXCEL G-EXPLORER
| Photo 25
EXCEL G-EXPLORER
| Photo 26
EXCEL G-EXPLORER
| Photo 27
6.5
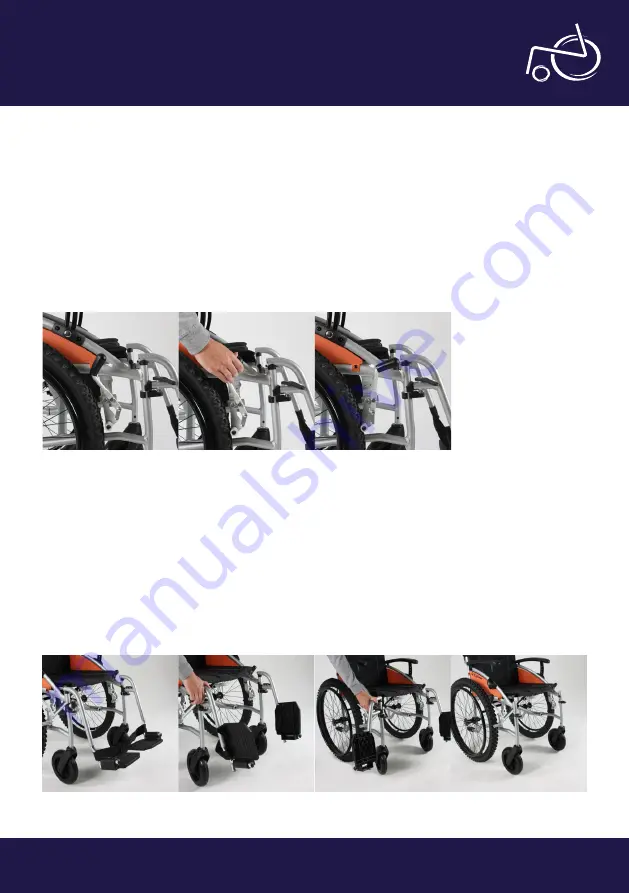
The brake
You can put your G-Explorer on the brakes. This is recommended when going in and / or going out of the
wheelchair, but also when standing still, you can apply the brakes. If you want to apply the brakes, please follow the
steps below.
•
When sitting in the wheelchair and the wheelchair is not on the brake, you will see the situation as it is at
photo 21;
•
To apply the brakes, push the brake lever forward (photo 22)
•
The brakes are now applied (photo 23);
•
If you are standing next to the wheelchair and you want to apply the brakes, you should perform the
same actions.
6.6
The legrests
The legrests of the Excel G-Explorer are both foldable and removable. To remove them, you should follow the steps
described below.
•
The legrests of the wheelchair are shown on photo 24;
•
By pulling the black lever up (photo 25), you can swing away the legrests ready for removal;
•
In photo 26 you can see the legrests are swung away;
•
To remove the legrests, simply pull upwards after the above steps are completed;
•
To replace the legrets follow the steps for removal in reverse order. A click will confirm when the legrests are
fitted properly.


