25
Q53 Installation and Configuration Guide © Exegin Technologies Limited, 2009
v. Configuring the Q53 on Your Network
Required TCP/IP Settings
Using Telnet
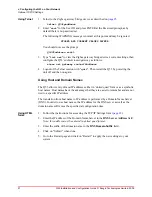
1. Start a Telnet session with the Q53. Type:
telnet Q53IPaddress
where
Q53IPaddress
is the IP address of the Q53 unit. This will bring up a login
prompt.
2. Enter "
root
" for the User ID and press ENTER at the Password prompt, as by
default there is no password set.
The following WARNING message is normal at this point and may be ignored.
STORED AND CURRENT VALUES DIFFER
You should now see the prompt:
Q53IPaddress:root>
3. Store the new IP address and netmask in EEPROM so that the setting will remain
intact after restart. To do this, enter:
store net addr Q53IPaddress
store net mask Q53netmask
where:
Q53netmask
is the netmask address for the Q53.
If you would like to communicate with the Q53 from across routers, you will need
to make an entry in the "Routing" section. See
4. [
Optional, but recommended
] Configure root and guest user passwords with the
following commands:
set user passwd root newRootPssswd
set user passwd guest newGuestPasswd
5. Save these configurations to EEPROM. Enter:
save
6. Verify the IP address and netmask. Enter:
list stored net
7. Log out of the telnet session with "
quit
" then restart the Q53 by powering the unit
off and then back on again.
8. Test the equipment and configuration after installation is complete.
ping Q53IPaddress
An Important
Note
Once you have configured the unit using any of the above methods, the STAT LED will
flash once per second. This means the Q53 is configured and recognizable on the
network.
The STAT LED will flash when the IP Address is configured; it does not mean that
the unit is properly configured, only that an IP address has been saved.


