Page 15
C Copyright 2005 Exel Orbital
All Rights Reserved
1.
2.
3.
4.
5.
6.
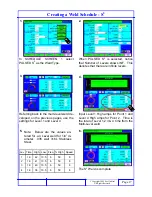
Creating a Weld Schedule - 4 Level Weld
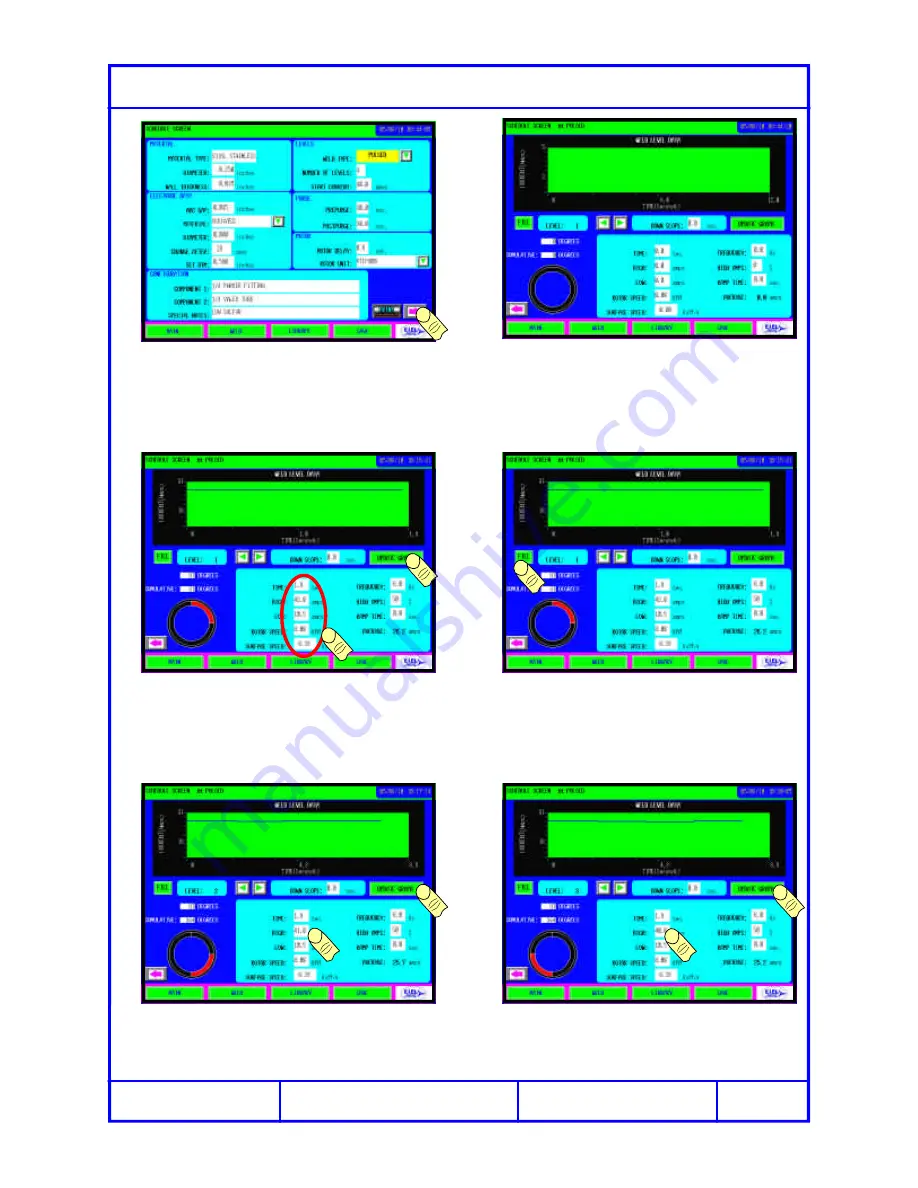
After entering the data on the first screen
push the right arrow to move to the sec-
ond Schedule Screen
The above screen appears.
Enter Level 1 data and click UPDATE
GRAPH, both the polar and linear graph
of time, current and rotation are shown.
With a multi level weld it is convenient to
click the fill button to copy Level 1 infor-
mation to all subsequent levels.
Level 2 contains the same information as
level 1. Change the relevant field, in this
case 41 High amps. UPDATE GRAPH.
1
2
1
2
1
2
Edit Level 3 in the same manner as
Level 2 and UPDATE GRAPH to con-
form changes.


