13
ASSEMBLY
Step 3
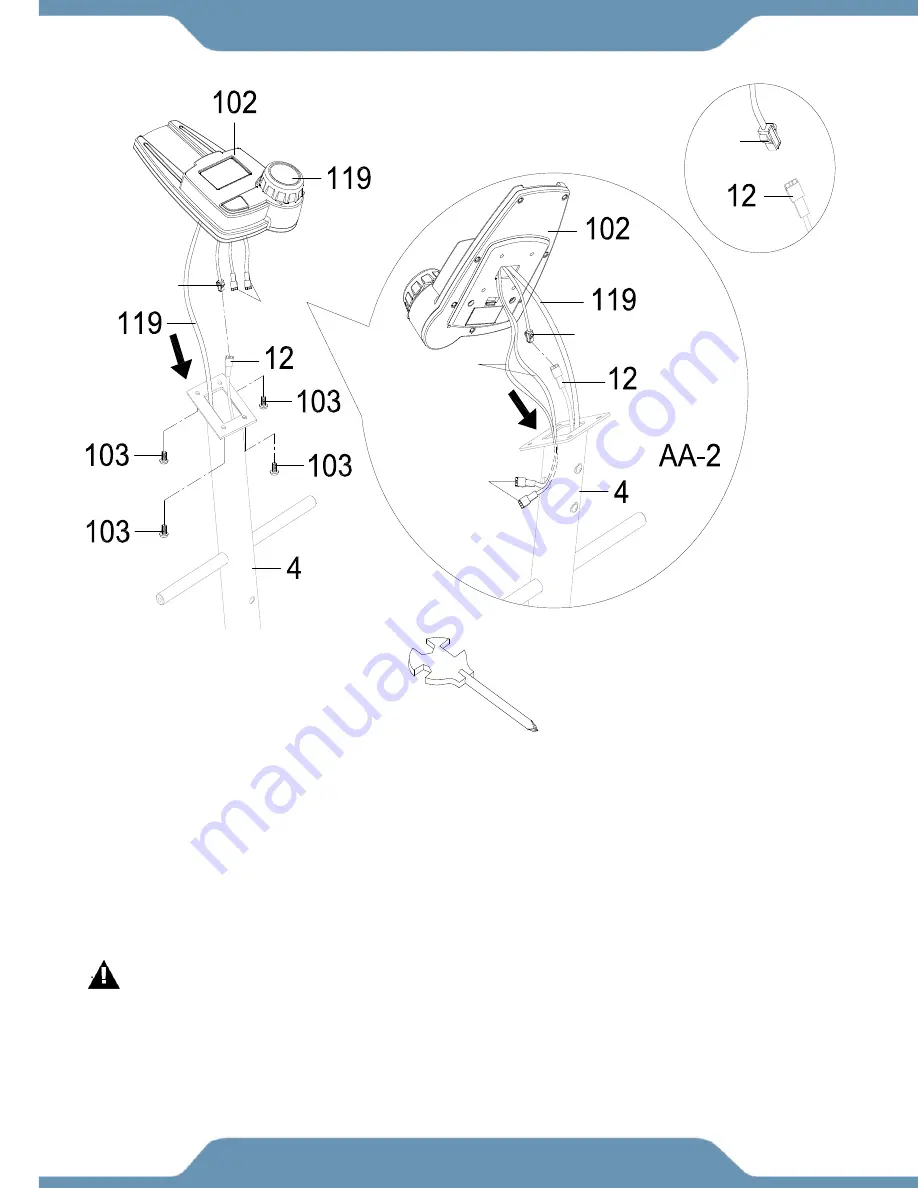
3-A Computer Console Installation
Remove the four
Screws (103)
from the backside of the
Console (102)
. Put them aside. Insert the
Hand Pulse Sensor Wires (17)
in the tube of the
Front Post (4)
and out of the same tube through
a side hole. The
Hand Pulse Sensor Wires (17)
are both females. See
Fig. AA-2
.
Connect the
Console Extension Wire (12)
to the
Console Connection Wire (13)
coming out from
the back of the
Console (102)
. Refer to
Fig. AA-2
.
Mount the
Console (102)
to the plate on the top of the
Front Post (4)
while the carefully tucking in
the loose wiring. Be sure to pull out the
Hand Pulse Sensor Wires (17)
fully out from the right side
of the
Front Post (4)
as you are mounting the console.
:
To prevent damage, ensure that none of the wires are folded or pinched during installation.
Secure the console using the four
Screws (103)
that were previously removed. Then tighten the
screws with the
Multi Hex Tool with Philips Screwdriver
provided.
Tool:
Multi Hex Tool with Phillips Screwdriver
1 PC
17
17
17
13
13
13
Summary of Contents for 1317.5-101016
Page 2: ......
Page 5: ...3...
Page 6: ...4 LABEL PLACEMENTS...
Page 8: ...6 OVERVIEW DRAWING 1 1 6 1 1 6 1 3...
Page 12: ...10 HARDWARE TOOLS PACK...


