19
ASSEMBLY
Step 9
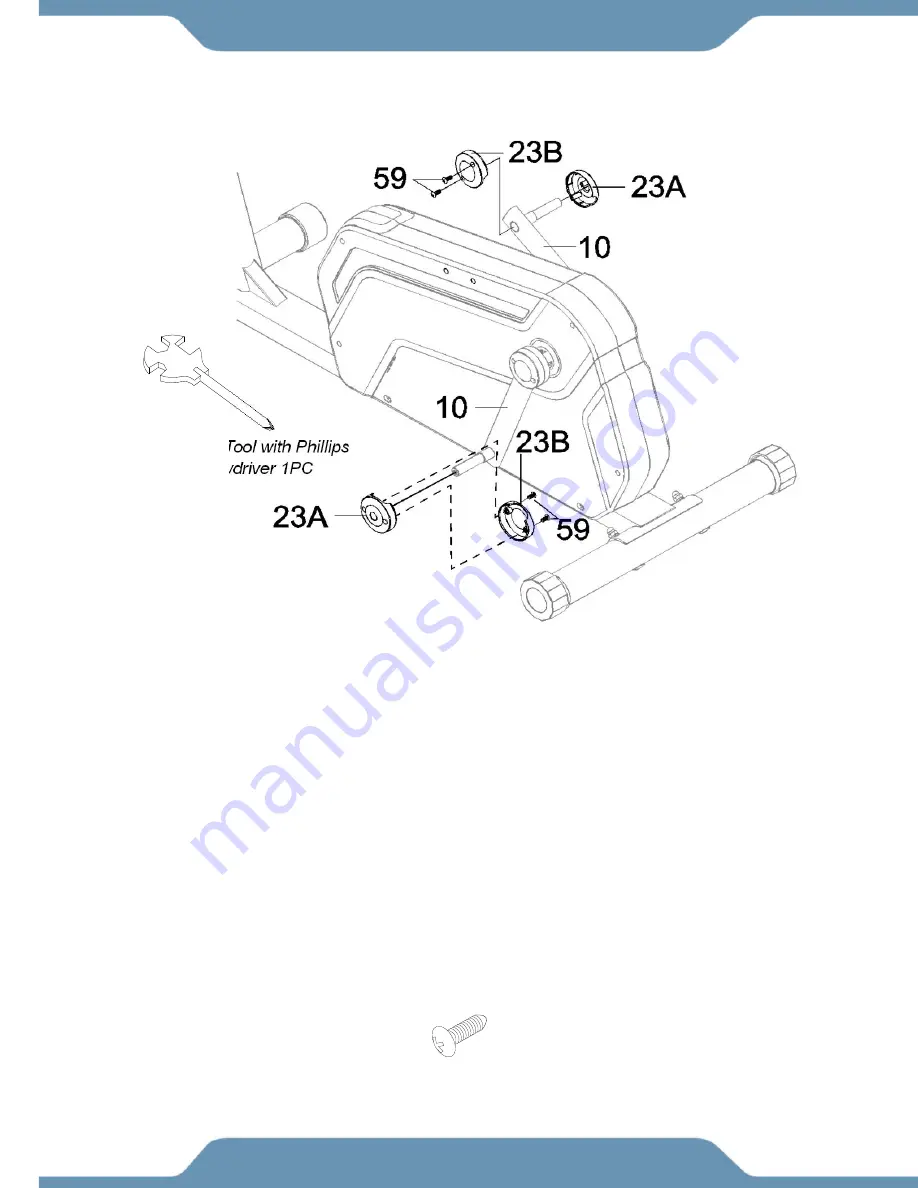
Assemble Upper Crank Cover A/B
Remove the plastic tape covering the left side
Crank (10)
and rotate the left side Crank (10) to its
highest position.
Slide one
Pedal Cover A (23A)
all the way towards the outwards facing side of the left side
Crank
(10)
. Hold one
Pedal Cover B (23B)
onto the inside of the left
Crank (10)
. Attach the
Pedal Cover
A (23A)
to
Pedal Cover B (23B)
with two
Round Head Self Tapping Screws (59)
. Then tighten
the hardware with the
Multi Hex Tool with Phillips Screwdriver
until they are both firm and
secure.
Repeat the same assembly step for the right side
Crank (10)
.
Note:
The
Pedal Cover A (23A)
will be covering on the outwards on a crank while the
Pedal
Cover B (23B)
will cover the inside of the crank.
(59) Round Head Self
Tapping Screw
4 PCS
Hardware:
Tool:
Multi Hex Tool with Phillips
Screwdriver 1PC
Summary of Contents for 1317.5-101016
Page 2: ......
Page 5: ...3...
Page 6: ...4 LABEL PLACEMENTS...
Page 8: ...6 OVERVIEW DRAWING 1 1 6 1 1 6 1 3...
Page 12: ...10 HARDWARE TOOLS PACK...


