background image

VF / DSL Cable Qualifier


  220 

 
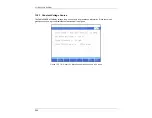
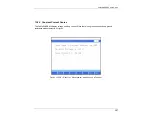
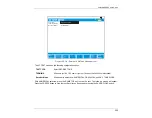
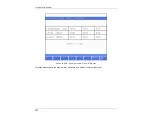
With VARIABLE frequency selected, press the RUN/STOP key to start the test. The following screen will 
appear. 


F

IGURE 

15.1.2B


-


R

UNNING A 

VARIABLE


F

REQUENCY 

T

EST


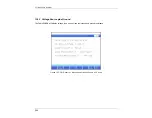
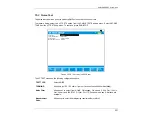
The VARIABLE frequency screen allows a user to modify what is being transmitted from the CableSHARK. 
Selecting the EDIT/SELECT button will allow the user to modify the LEVEL and the FREQUENCY if desired. 


Summary of Contents for CableSHARK P3

Page 1: ......

Page 2: ...med by EXFO for its use or for any infringements of patents or other rights of third parties that may result from its use No license is granted by implication or otherwise under any patent rights of E...

Page 3: ...IME DOMAIN REFLECTOMETRY OVERVIEW 9 SECTION 4 PHYSICAL FEATURES AND POWER SUPPLY 15 4 1 PHYSICAL FEATURES OF THE CABLESHARK 15 4 1 1 The Front Panel 15 4 1 2 The Rear Panel 17 4 1 3 The Serial Interfa...

Page 4: ...ference Mask 34 5 5 INDUSTRY STANDARD TEST LOOPS 38 5 6 BANDWIDTH REQUIREMENTS 38 SECTION 6 MAIN MENU 39 6 1 THE CABLE TEST MENU 42 6 2 RESPONDER MODE 46 6 3 RECALL RESULTS 47 6 4 THE SYSTEM SETUP MEN...

Page 5: ...Test 77 8 2 2 Manual TDR Testing 83 8 2 2 1 Testing Cables with the Manual TDR 87 8 2 3 Auto TDR Testing 89 8 2 4 TDR Application Hints 90 8 2 4 1 Blind Spots 90 8 2 4 2 Pulse Width 90 8 2 4 3 Reflec...

Page 6: ...RESISTANCE TEST 144 8 9 1 Setting up an Isolation Resistance Test 144 8 9 2 Running an Isolation Resistance Test 145 8 10 LOOPMAPPER 147 8 10 1 Setting up a LoopMapper Test 147 8 10 2 LoopMapper Testi...

Page 7: ...ESTING 203 13 1 1 Setting up a Ground Resistance Test 203 13 2 RUNNING A GROUND RESISTANCE TEST 205 13 2 1 Constant Voltage Source 206 13 2 2 Constant Current Source 207 13 2 3 Voltage Source plus Gro...

Page 8: ...OOP CHARACTERISTICS 257 APPENDIX C CABLESHARK SPECIFICATIONS 259 APPENDIX D SAFETY 271 APPENDIX E WARRANTY 275 GENERAL INFORMATION 275 IMPORTANT 275 LIABILITY 275 EXCLUSIONS 275 CERTIFICATION 276 APPE...

Page 9: ...OOLBAR FUNCTIONS 292 J 6 1 File Menu 293 J 6 1 1 Upload Result 293 J 6 1 2 Print 294 J 6 1 3 Print Preview 294 J 6 1 4 Print Setup 295 J 6 1 5 Exit 295 J 6 2 Screen Image menu 295 J 6 2 1 Recall from...

Page 10: ...VF DSL Cable Qualifier viii...

Page 11: ...ADSL Data Rate Prediction End to End United States Patent US 6 445 773 B1 September 3 2002 ADSL Data Rate Prediction End to End Canada Patent 2 297 871 December 28 2004 The Single Ended DMT test used...

Page 12: ...VF DSL Cable Qualifier x...

Page 13: ...n of the tester is listed in the Table of Contents Section 5 2 explains connecting the CableSHARK to the local loop while Section 7 features a Quick Start guide to performing all the available tests w...

Page 14: ...owever the unit should be kept away from extremes of heat cold moisture and dust Failure to do this may shorten the life of the instrument The CableSHARK s display should be cleaned using a soft lint...

Page 15: ...Office CO and the other at the customer premise ISDN Integrated Services Digital Network is very similar to that of xDSL in that it is a digital technology and uses the existing telephone company cop...

Page 16: ...primarily for businesses that require PBX network connections Virtual Private Networks VPNs Frame Relay Circuits Internet Access and private data networks HDSL is also preferred over traditional T1 be...

Page 17: ...tering In a similar fashion to ADSL and POTS on the same line ADSL can also co exist with ISDN However since ISDN operates in the bandwidth up to 150 kHz there are fewer ADSL sub channels that can be...

Page 18: ...POTS signals from the ADSL signals use some of the possible carrier allocations There is also a guard band between the upstream and downstream carriers Figure 2E ADSL DMT ADSL uses 256 amplitude modu...

Page 19: ...nagement systems allow the transmission speed to be set or limited to a maximum bit rate G Lite A lighter version of ADSL where downstream rates are limited to approx 1 5 Mbps G Lite uses 128 bins rat...

Page 20: ...al loops SHDSL owes this to the Trellis Coded Pulse Amplitude Modulation TC PAM line coding This coding technique maximizes the use of the lower frequencies of available loop bandwidth thus avoiding h...

Page 21: ...se encounters the end of the cable or a possible problem area like a bridge tap or an open circuit part or all of the energy is reflected back to the TDR device The TDR device measures the time it tak...

Page 22: ...n of TDR devices and the results they display As mentioned earlier in this section VOP or Velocity of Propagation is a very important value to know in determining the distance to an impairment VOP rep...

Page 23: ...ER MORE AUTO REPEAT Reflections at ft dBRL 1998 7 33 8 Cursor position Press or to move cursor The above figure depicts an OPEN circuit or a high impedance fault Depending upon the size of the reflect...

Page 24: ...ally a noisy reflection could mean water 0 0 1250 0 2500 0 5000 0 3750 0 ZOOM IN VERT MAIN MENU E F CHG 1 000 0 750 0 500 0 250 0 000 0 250 0 500 0 750 1 000 ZOOM IN HORIZ SELECT MARKER MORE Reflectio...

Page 25: ...cal response from a LOAD COIL It resembles a complete OPEN Although LOAD COILS are placed at specific intervals a TDR will typically not see past the first LOAD COIL 0 0 1250 0 2500 0 5000 0 3750 0 ZO...

Page 26: ...VF DSL Cable Qualifier 14...

Page 27: ...9 10 1 Copyright Consultronics Lim ited 2000 2006 Software Version 3 86 AUTO TESTS RESPOND MODE RECA LL RESULTS AUTO SETUP CableSHARK P3 VF DSL Cable Qualifier Figure 4 1 1A CableSHARK Front Panel 1 A...

Page 28: ...n not needed i e when there is sufficient ambient light Press the symbol to toggle the backlight on and off 6 Volume Controls Not used 7 Integral Keypad Used for entering alphanumeric values names and...

Page 29: ...attery is automatically charged once the instrument is plugged in even when the instrument is switched off 2 Universal Serial Bus USB Series A Receptacle This USB connection provides the user with the...

Page 30: ...functionality 6 RJ 11 connector RJ 11 connector for connection to the line Supports 2 wire TX and RX functionality 7 2 Wire TX RX 3 Pin Connector 3 Pin connector for connection to the line and acting...

Page 31: ...ws to enable reliable operation All necessary serial cables should be double shielded where appropriate If the unit is connected to a terminal or computer a Null Modem cable is required This null mode...

Page 32: ...Figure 4 1 4A Ethernet Straight Connection TIA EIA T568B use for connections between CableSHARK and a PC Green Pair 3 Orange Pair 2 Blue Pair 1 Brown Pair 4 CableSHARK End PC End 1 2 3 4 5 6 7 8 1 2 3...

Page 33: ...seconds The CableSHARK will cycle through its Self test sequence and will indicate any fault conditions The CableSHARK is switched off by pressing the Power button for 2 seconds It is recommended that...

Page 34: ...e instructions for replacing and charging The CableSHARK has been designed such that the user can change the battery easily with very few tools Extra batteries are available from your EXFO representat...

Page 35: ...RK into the mains so that the battery will be charged The power LED should be green at this time Charge the unit until fully charged 4 2 3 The LED Power Status Indicator The CableSHARK s dual color Po...

Page 36: ...VF DSL Cable Qualifier 24...

Page 37: ...equipped with a self test feature The function is performed each time the unit is turned on To repeat a self test turn the instrument off wait a few seconds and then turn it back on There are actually...

Page 38: ...DSL Cable Qualifier to the line for each of these tests 5 2 1 Test Cable and Connector Requirements The CableSHARK can be ordered with an optional Siemens CF connector to three colour coded Telco clip...

Page 39: ...esting Note Single Ended testing can only give a partial picture of cable quality if testing is done from one end only For an accurate picture of cable quality single ended testing should be done from...

Page 40: ...the Rx unit which in turn converts the signal and analyzes the results The Rx unit is the one that analyzes and displays the information CableSHARK P3 xDS LCableQualifi er F1 F2 F3 F4 F5 F6 F7 F8 1 2...

Page 41: ...emory and over 1000 results to a 16 Mbyte USB Memory 5 3 1 Saving Results Once a test has completed and been successfully displayed on the screen the user can elect to save the results to internal mem...

Page 42: ...ove to the right for the next character to be enter Up to 8 characters no spaces allowed can be entered using the alphanumeric keypad to define a file name Once the file name is completely entered pre...

Page 43: ...APR 17 2001 14 29 06 Noise TEST0 NSD USB APR 19 2001 09 11 54 Noise TEST1 NSD USB APR 19 2001 10 09 01 FR 1234 5 FRQ E F CHG RECALL SESSION ALL REF ON OFF MEM APR 16 2001 08 15 36 TDR TEST0 TDR DELETE...

Page 44: ...Test To view all saved results at this point press the function key associated with SHOW ALL Note that the CableSHARK will display 16 results per page If there are more than 128 results in total all...

Page 45: ...transfer of results from internal memory to USB memory By pressing the COPY RENAME button from the RECALL SETUP screen users can transfer all internal results to an attached USB memory device The tim...

Page 46: ...ERENCE mask from the highlighted file The capitol letter R beside a file name denotes this result as a REFERENCE MASK Multiple results can be designated as REFERENCE MASKS 5 4 1 Comparing a Result to...

Page 47: ...test complete for 3995 ft dB 0 0 20 0 40 0 60 0 80 0 dB Attenuation 38 10 dB Cursor Position 1263 56 kHz 4 503 1003 2001 1502 SAVE UPLOAD SHOW REF TEST SETUP 0 0 20 0 40 0 60 0 80 0 ZOOM IN HORIZ kHz...

Page 48: ...VF DSL Cable Qualifier 36 SHOW REF MAIN MENU E F CHG PREVIOUS SCREEN R MEM APR 17 2001 14 29 06 Noise TEST0 NSD Select a session using the arrow keys Figure 5 4 1B Select A Reference Mask...

Page 49: ...cursor ZOOM IN VERT Figure 5 4 1C Overlay of a Reference Mask The result screen will change as depicted above once a REFERENCE MASK is recalled In addition to the REFERENCE MASK being displayed the S...

Page 50: ...Subscriber Line R ADSL operates at a lower speed when confronted with a local loop which is longer than one of the standard test loops has a bridge tap longer than those of the standard test loops or...

Page 51: ...the bottom of the CableSHARK CABLE TESTS Selecting the function button corresponding to CABLE TESTS displays a primary pop up menu where the user can select from all tests installed in the unit From t...

Page 52: ...on defines the PASS FAIL criteria for the VF AUTO POTS VF AUTO NO POTS ADSL AUTO ADSL2 AUTO ADSL2 AUTO and SHDSL AUTO tests Users can define minimum upstream and downstream ADSL data rate criteria min...

Page 53: ...st that has been selected However some of these Functions are the same regardless of any specific test These Functions are described here EDIT SELECT There are two functions provided by the EDIT SELEC...

Page 54: ...menu the user can select from the variety of cable tests available from the CableSHARK including FREQUENCY RESPONSE TDR PSD NOISE and LOAD COIL DETECTION The sub menu is available to some cable tests...

Page 55: ...urrent DC Current Resistance and Capacitance Tests for AC DC Voltage AC DC Current Resistance and Capacitance can be done from Tip to Ring Tip to Ground and Ring to Ground DMT Discrete Multi Tone Sele...

Page 56: ...AL BALANCE SETUP menu The longitudinal balance test ensures that the twisted pair is balanced A properly balanced cable allows the cable to be resistant to common mode noise LOAD COIL Selecting LOAD C...

Page 57: ...osstalk on an adjacent pair of wires ISOLATION or STRESS LEAKAGE The function associated with ISOLATION TEST or STRESS LEAKAGE depends on unit setup invokes the ISOLATION or STRESS LEAKAGE TEST SETUP...

Page 58: ...mit signals to a Receiving unit It is the Receiving unit that will display the test results The illustration below shows the Responder Mode screen E F CHG CABLE TESTS MAIN MENU Figure 6 2A The Respond...

Page 59: ...t Off min Live Sign al Thr dBm Measurement Standa rd Distance Units Wire Size Lang uage IP Ad dress Subnet Mask Gatewa y Externa l Cap De tection Rem ote De vice VisiSHARK En able 0923 49 3840 0 NONE...

Page 60: ...AIN MENU to return to the Main Menu Flow Control XON XOFF Every command and response is controlled by the CableSHARK using this software flow control method XON resumes transmission of data and XOFF p...

Page 61: ...est is not performed as the live signal may influence a test in such a way that the CableSHARK may present inaccurate results Measurement Standard Allows the user to specify the operating environment...

Page 62: ...able remote control of the CableSHARK with the PC based Visi SHARK software if the Visi SHARK support is enabled in the CableSHARK unit See OPTIONS button below At the bottom of the setup screen there...

Page 63: ...eypad Press the CableSHARK alphanumeric keys to enter the Software KEY Use the right and or left arrow keys to enter the next character or edit the previous character respectively Press ENTER when the...

Page 64: ...VF DSL Cable Qualifier 52...

Page 65: ...ect of adding a noise filter is required the technician can set the noise filter to the appropriate one A summary of the noise filter setting for DMT PSD Noise and Spectral Detective Tests are as foll...

Page 66: ...ose TDR from the pop up menu and MANUAL from the sub menu Press the RUN STOP key 3 Select the appropriate Graph Scale option to a scale that is greater than the actual distance of the line under test...

Page 67: ...Press the RUN STOP key 3 Press the RUN STOP button to start the Single End test When the test is completed the user can move the cursor to get all the information numerically and graphically If the t...

Page 68: ...e insertion loss the cable noise and the possible number of bits allocated for an individual DMT subchannel as well as the estimated maximum bit rate for the whole cable with respective to full rate A...

Page 69: ...he Transmit Tx unit To set one of the CableSHARK s in TX mode select the RESPOND MODE from the MAIN MENU This mode is enabled to allow hands free operation so only one person is needed to do testing T...

Page 70: ...pulse Noise Test or the Impulse Histogram Test and set the other parameters if required Parameters for the Impulse Noise test include Impulse Noise Threshold and Impulse Noise Measurement Time which a...

Page 71: ...use of DSL technology Typically only lines that are greater than 18 000 feet contain Load Coils They are usually inserted at 4500 6000 ft intervals along the line The CableSHARK Load Coil Detection Te...

Page 72: ...so change option settings if you wish by pressing the function button associated with FREEZE and then TEST SETUP 7 9 Digital Multimeter DMM Test Note This is a Single ended test A DMM is a useful tool...

Page 73: ...kbps to 2 312 Mbps 1 From the Main Menu select CABLE TESTS function button F1 2 Choose SHDSL from the pop up menu 3 Select SHDSL EVALUATION of ITU T Annex A NOISE MARGIN set to AUTO and CABLE TYPE set...

Page 74: ...ction button F1 2 Choose ISOLATION TEST or STRESS LEAKAGE from the pop up menu 3 Using the SELECT NEXT or SELECT PREVIOUS function keys select a Test Type of Tip to Ring 4 Press the RUN STOP button to...

Page 75: ...quickly evaluates a cable to see if it is acceptable for SHDSL based on pre defined PASS FAIL criteria The SHDSL auto test will perform a DMM test Longitudinal Balance Load Coil test Capacitive Imbal...

Page 76: ...see if it is acceptable for voice frequencies based on pre defined PASS FAIL criteria The VF Auto test will perform a DMM test Load Coil test a Capacitive Imbalance test and a Longitudinal Balance tes...

Page 77: ...From the Main Menu select CABLE TESTS function button F1 2 Choose GROUND RESISTANCE from the pop up menu Ensure the RING connection of the CableSHARK is connected to the lead on the negative side of t...

Page 78: ...rmine where the far end strap is to be placed 5 Results will provide a user with a clear indication of the distance to the fault the distance from the fault to the strap and the distance from the Cabl...

Page 79: ...on the circuit The VF Tests include TX RX VF measurements a RMS Noise measurement and an Impulse Noise Measurement 1 From the Main Menu select CABLE TESTS function button F1 2 Choose VF TESTS from the...

Page 80: ...VF DSL Cable Qualifier 68...

Page 81: ...nd Frequency Response tests note that End to End does not support VDSL Using the single ended test a cable can be evaluated with only one CableSHARK This allows for great flexibility For single ended...

Page 82: ...oose from Single End or End to End RX Each of these tests are described in Sections 5 2 2 5 2 3 For End to End testing activate one CableSHARK to Responder Mode from its Main Menu RESULT SCALING Resul...

Page 83: ...the cable as all cables are manufactured differently The available options for Imperial Measurement Units are 19 22 24 and 26 AWG For METRIC Measurement Units the options are 0 4 mm PE 0 5 mm PE 0 6...

Page 84: ...m s Teflon VOP 0 67 100 m s EDIT SELECT CABLE TESTS MAIN MENU Test Typ e Result Scaling Max Cap Imbalance F1 Length Cab le Type VOP VOP m us Cap acitance nF mi Resistance ohm mi Attn at 300kHz dB mi...

Page 85: ...MAIN MENU To modify a test parameter it must first be highlighted with the cursor A test parameter can be highlighted by moving the cursor to the desired parameter with the Cursor Pad UP DOWN arrow bu...

Page 86: ...on kHz and Attenuation dB are numeric representations of the solid cursor line bisecting the result line of the test By using the Cursor Pad LEFT RIGHT arrow keys on the front panel of the CableSHARK...

Page 87: ...r more information SAVE TO USB Choosing SAVE TO USB from the SAVE UPLOAD pop up menu invokes the SAVE SESSION menu From here the test results can be saved to external USB memory See Section 5 3 for mo...

Page 88: ...Position 301 875 kHz SAVE UPLOAD SHOW REF TEST SETUP 0 0 20 0 40 0 60 0 80 0 ZOOM IN HORIZ Press or to move cursor ZOOM IN VERT 4 555 1106 2208 1657 kHz FIGURE 8 1 3C 4000 FT 1200 M MAIN MENU E F CHG...

Page 89: ...ton F1 CABLE TESTS will bring the user to the CABLE TESTS pop up menu Choosing TDR from the pop up menu and subsequently Auto Cable End Auto Bridge Tap Manual or Manual 4 Wire will invoke the TDR TEST...

Page 90: ...n is for TIP RING CABLE TYPE The CABLE TYPE setting is used to select the appropriate cable type or more appropriately the appropriate diameter It is best however to ensure the correct VOP for the cab...

Page 91: ...P of 0 66 PULSE WIDTH NS The pulse width should be set here The valid range is 28 ns to 20 s and the default value is 1000 ns for manual tests The wider the pulse width the greater the energy pulse Th...

Page 92: ...not possible Tip and Ring wires are substantially different lengths If TDR TEST TYPE is set to AUTO CABLE END only the following option will be displayed F1 LENGTH Optional Feature The CableSHARK is c...

Page 93: ...parameters that are available for the highlighted option CABLE TESTS Pressing the function button corresponding to CABLE TESTS causes the CABLE TESTS pop up menu to appear MAIN MENU Select the functi...

Page 94: ...lse from the end of the cable regardless of whatever the VOP setting is for the TDR test Then the exact VOP of the cable can be calculated as Metric Calculation VOP cable length m time reading s light...

Page 95: ...en with TEST TYPE set to MANUAL Cursor position Marker position Cursor Marker Delta 0 0 1250 0 2500 0 5000 0 3750 0 ZOOM IN VERT MAIN MENU E F CHG 1 000 0 750 0 500 0 250 0 000 0 250 0 500 0 750 1 000...

Page 96: ...e TDR Test Result screen consists of several options available to the operator The following are brief descriptions of each of the function button options ZOOM IN VERT ZOOM OUT VERT Use these function...

Page 97: ...E SCALE changes the horizontal scale of the display In addition the GUI changes to include the phrase Press Up Down key to change pulse gain FIGURE 8 2 2B CHANGING PULSE GAIN MAIN MENU Select MAIN MEN...

Page 98: ...SAVE UPLOAD pop up menu invokes the SAVE SESSION menu From here the test results can be saved to internal non volatile memory See Section 5 3 for more information SAVE TO USB Choosing SAVE TO USB from...

Page 99: ...ursor Marker Delta 0 0 1250 0 2500 0 5000 0 3750 0 ZOOM IN VERT MAIN MENU E F CHG 1 000 0 750 0 500 0 250 0 000 0 250 0 500 0 750 1 000 1998 7 0 1998 7 Pulse Width ft ft 300 ns ZOOM IN HORIZ SELECT MA...

Page 100: ...to move cursor FIGURE 8 2 2 1B RUNNING A MANUAL TDR TEST WITH THE CABLE END SHORTED Typically any fault that produces a negative reflection indicates a low impedance An example of a low impedance faul...

Page 101: ...The Auto Cable End and Auto Bridge Tap TDR functions of the CableSHARK allow a user to do a quick test without having to worry about what graph scaling to use or what the correct pulse width should b...

Page 102: ...s suspected within the blind spot range of the cable under test it is advisable to add a length of cable between the CableSHARK and the cable being tested Any faults that may have been hidden in the b...

Page 103: ...ndicates that there is a load coil on the line the user can use the TDR test to quickly locate and remove any load coils on the cable When finding the location of load coils with TDR remember that the...

Page 104: ...ht is 299792458 m s Imperial Calculation VOP cable length ft time reading s light speed 2 Where the speed of light is 983559096 ft s The division by 2 is due to the return trip that the pulse has trav...

Page 105: ...imum bandwidth of 1 104 MHz in which to encode information This permits a downstream rate of approximately 8 Mbps ADSL is defined by ANSI T1 413 Issue 2 and G 992 1 G DMT For ADSL2 there are 256 bins...

Page 106: ...en see the previous illustration The parameters can be modified to customize a DMT test The following describes the DMT test setup options TEST TYPE The user can choose from DMT End to End end to end...

Page 107: ...sibility of better than expected bit rates Set to AUTO if you are not sure This assumes a 140 dBm Hz noise floor DMT BITS PER BIN Allows a user to modify the number of bits used per ADSL DMT bin The d...

Page 108: ...correct VOP for the cable as all cables are manufactured differently The available options for Imperial Measurement Units are 19 22 24 and 26 AWG For METRIC Measurement Units the options are 0 4 mm P...

Page 109: ...e to be tested is not terminated at the far end Note telephone cables may have dangerous A C or D C voltages on them therefore caution should be taken when connecting this test set SELECT NEXT FIGURE...

Page 110: ...ch of the parameters that are available for the highlighted option CABLE TESTS Pressing the function button corresponding to CABLE TESTS causes the CABLE TESTS pop up menu to appear MAIN MENU Select t...

Page 111: ...FIGURE 8 3 2A A DMT TEST RESULT ANSI FULL RATE POTS SELECTED The ADSL FROM CUSTOMER and ADSL FROM CO EXCH type DMT Tests display three types of important information The first is the Tone Level or Sig...

Page 112: ...E 10 20 30 40 50 60 70 80 90 100 110 120 46 56 66 76 86 96 106 116 126 136 146 156 dBm tone dBm Hz 4 141 278 552 kHz 415 F SHOW REF ZOOM IN HORIZ EXTRAPOLATED G LITE POTS RATES PROBABLE SIGNAL undeter...

Page 113: ...HORIZ Use these function buttons to zoom IN and OUT based on the horizontal graph scale Please note after the completion of a test the ZOOM OUT HORIZ option will be disabled as it is impossible to ZOO...

Page 114: ...116 1 26 1 36 1 46 1 56 dBm to ne dBm Hz F SAVE UPLOAD ZOOM IN HORIZ EXTRAPOL ATED ADSL2 ITU Ann ex A POTS RATES PROBABLE SIGNAL ADSL Up FIGURE 8 3 3A ADSL2 DATA RATE PREDICTION TEST The ADSL2 ADSL2...

Page 115: ...CableSHARK P3 User Guide 103 Example of a ADSL2 ATU C downstream mask non overlapped spectrum Example of a ADSL2 ATU R downstream mask non overlapped spectrum...

Page 116: ...5 18 dB octave 3 dB octave 78 dB octave 46 5 dBm Hz 47 8 dBm Hz 59 4 dBm Hz 80 dBm Hz 110 dBm Hz 112 dBm Hz 100 dBm Hz 80 92 5 dBm Hz 72 5 dBm Hz 44 2 dBm Hz 4 63 dB octave Example of a ADSL2 ATU R do...

Page 117: ...de the user with an indication on the status bar what device was detected either an Annex A or Annex B modem or DSLAM 0 279 554 1104 kHz 829 MAIN MENU E CHG TEST SETUP Single end DMT test complete Ann...

Page 118: ...one frequency can be obtained by subtracting the measured tone signal PSD in dBm Hz at that tone from the normal transmitting tone signal PSD of 40 dBm Hz as specified by the T1 413 and G Lite standar...

Page 119: ...of the control keys is pressed and their respective screens appear Figure 8 4 1A below shows the Noise Test Setup Menu EDIT SELECT MAIN MENU Test Type Term Impedance Noise Filter Measurement Units 100...

Page 120: ...Impedance Measurement Units 100 OHMS dBm E F CHG NOISE PSD Next Fext 6 0 MHz WARNING Note telephone cables may have dangerous A C or D C voltages on them therefore caution should be taken when connec...

Page 121: ...hreshold Imp Nse Meas Time Measurement Units 100 OHMS TERMINATED NO FILTER 43 dBm 1 Minute E F CHG IMPULSE NOISE WARNING Note telephone cables may have dangerous A C or D C voltages on them therefore...

Page 122: ...tions are described as follows TEST TYPE Select from NOISE PSD Next Fext 2 2 MHz NOISE PSD Next Fext 6 0MHz IMPULSE NOISE and IMPULSE HISTOGRAM The PSD NOISE test measures the PSD noise energy and dis...

Page 123: ...the Test Type of Impulse Noise IMP NSE THRESHOLD Allows the user to preset a threshold minimum level of an acceptable noise spike The default value is 43 dBm or 47 dBrn MEASUREMENT UNITS Allows the u...

Page 124: ...ction button options EDIT SELECT Pressing the function button corresponding to EDIT SELECT invokes a menu wherein a desired parameter can be highlighted by using the Cursor Pad UP DOWN arrow buttons a...

Page 125: ...at was set the time remaining to perform the test and how many impulse noise spikes that are above the threshold have occurred Once the Impulse Noise test is complete the Time Remaining will indicate...

Page 126: ...IZ dBm Hz 0 00 500 1000 2000 kHz 1500 Noise PSD Cursor Frq 112 74 dBm Hz 1000 5 kHz RMS Noise Impedance Noise Filter 61 16 dBm 100 ohms No Filter dBm 10 40 70 100 130 FREEZE 20 10 40 70 100 Press or t...

Page 127: ...20 10 40 70 100 Press or to move cursor PROBABLE SIGNAL undetermined FIGURE 8 4 2C NOISE PSD RESULTS FOR 6 MHZ BANDWIDTH The PSD test can also be run continuously or in PEAK mode where PEAK mode redr...

Page 128: ...Hz 0 00 500 1000 2000 kHz 1500 Noise PSD Cursor Frq 45 12 dBm Hz 1152 8 kHz RMS Noise Impedance Noise Filter 65 5 dBm 100 ohms No Filter dBm 10 40 70 100 130 FREEZE 20 10 40 70 100 Press or to move cu...

Page 129: ...veral options available to the operator The following are brief descriptions of each of the function button options SHOW REF Pressing the function button corresponding to SHOW REF allows a user to ove...

Page 130: ...it is impossible to ZOOM OUT Press the ZOOM IN VERT button once or multiple times and the ZOOM OUT VERT button will appear Likewise when the maximum zoom level is achieved the ZOOM IN VERT button wil...

Page 131: ...st the higher the dB reading resulting from the measurement 8 5 1 Setting up a Longitudinal Balance Test From the Main Menu pressing function button F1 CABLE TESTS will bring the user to the CABLE TES...

Page 132: ...are 100 ohms 135 ohms and AUTO older hardware will still show 120 and 150 ohms For single ended tests the AUTO impedance setting is recommended because it gives better accuracy by measuring the cable...

Page 133: ...0 0 20 0 40 0 60 0 80 0 SHOW REF Impedance 100 ohms ZOOM IN HORIZ ZOOM IN VERT TEST SETUP Press or to move cursor dB 0 0 20 0 40 0 60 0 80 0 FIGURE 8 5 2A RESULTS OF A LONGITUDINAL BALANCE TEST The be...

Page 134: ...ng the function button corresponding to SHOW REF allows a user to overlay a REFERENCE MASK over the test result on screen to compare the two See Section 5 4 for more information about the REFERENCE MA...

Page 135: ...on will appear Likewise when the maximum zoom level is achieved the ZOOM IN VERT button will disappear ZOOM IN HORIZ ZOOM OUT HORIZ Use these function buttons to zoom in and out based on the horizonta...

Page 136: ...user to the CABLE TESTS pop up menu Choosing LOAD COIL will invoke the LOAD COIL DETECTION SETUP menu The sections that follow will explain the operation as each of the control keys is pressed and the...

Page 137: ...e cables may have dangerous A C or D C voltages on them Press the function button corresponding to the RUN STOP button on the front of the CableSHARK to initiate the test The CableSHARK will first per...

Page 138: ...e Qualifier 126 Load coil detection test complete MAIN MENU Load Coil Detection Test Results No load coils detected E F CHG SAVE UPLOAD TEST SETUP FIGURE 8 6 2A RESULTS OF AN END TO END LOAD COIL DETE...

Page 139: ...the H88 88 mH which is normally placed every 6000 ft apart and the D66 66 mH which is normally placed every 4500 ft apart Depending on the location in the section load coil spacing is very particular...

Page 140: ...d and the test can be run once again from this screen MAIN MENU Select MAIN MENU to return to the Main Menu If a LOAD COIL test is run that is using a Test Type set to LOAD COIL SINGLE END the user wi...

Page 141: ...T button will appear Likewise when the maximum zoom level is achieved the ZOOM IN VERT button will disappear ZOOM IN HORIZ ZOOM OUT HORIZ Use these function buttons to zoom in and out based on the hor...

Page 142: ...METER 8 7 1 Setting up a DMM Test From the Main Menu pressing function button F1 CABLE TESTS will bring the user to the CABLE TESTS pop up menu Choose DIGITAL MULTIMETER to invoke the DMM TEST SETUP...

Page 143: ...he upper part of the screen see the previous illustration The parameters can be modified to customize a DMM Test The DMM Test setup options are described as follows TEST TYPE Select from Autotest 14 A...

Page 144: ...te results CAPACITANCE NF MI OR NF KM Allows the user to specify the cable s capacitance constant See Appendix B for more information on loop characteristics CAPACITANCE NF MI OR NF KM TO GND Allows t...

Page 145: ...any involvement by the user except to ensure the CableSHARK is properly connected to the line under test Please note that the Current Measurement test is only performed over TIP RING CABLE TYPE The C...

Page 146: ...4 22 PIC 83 0 51 6 0 90 PE 64 4 40 0 912 19 PIC 83 0 51 6 Table 8 7 1A Capacitance Constants Metric AWG Wire Gauges 0Hz DC 20 C or 70 F For measurements for T G and R G the CableSHARK is set to 125 nF...

Page 147: ...ll provide the most accurate determination of the length of a cable The function button command selection at the bottom of the DMM Tests Setup menu consists of five options available to the operator T...

Page 148: ...corresponding to CABLE TESTS causes the CABLE TESTS pop up window to appear MAIN MENU Select the function button corresponding to MAIN MENU to return to the Main Menu 8 7 2 Running a DMM Test Use cau...

Page 149: ...g wires NOTE For manually executed resistances tests the maximum resistance will be up to 999 Mohm For all tests a user will have to press the RUN STOP button to halt operation since all tests monitor...

Page 150: ...SAVE TO MEMORY Selecting the function button corresponding to SAVE TO MEMORY invokes the SAVE SESSION menu From here the test results can be saved to internal non volatile memory See Section 5 3 for m...

Page 151: ...s from two defective pairs a split pair is created While this works well for plain old telephone service POTS it is disastrous for the broadband signals of DSL Telephone cables are twisted to minimize...

Page 152: ...1A 4 WIRE CROSSTALK SETUP MENU The 4 Wire Crosstalk test setup options are described as follows TEST TYPE Select from either CROSSTALK LOOPBACK or SINGLE FREQUENCY CROSSTALK LOOPBACK will display a p...

Page 153: ...0 SHOW REF TEST SETUP ZOOM IN VERT SAVE UPLOAD Press or to move cursor Impedance Cursor position 72 4 dB 1112 625 kHz 0 0 20 0 40 0 60 0 80 0 FIGURE 8 8 2A RESULTS OF 4 WIRE CROSSTALK TEST At the com...

Page 154: ...T VERT Use these function buttons to zoom IN and OUT based on the vertical level scale Please note after the completion of a test the ZOOM OUT VERT option will be disabled as it is impossible to ZOOM...

Page 155: ...AD FIGURE 8 8 2B RESULTS OF 4 WIRE CROSSTALK TEST This test allows a user to continuous monitor the effects of crosstalk at a single frequency until the RUN STOP key is pressed and to adjust the frequ...

Page 156: ...resistance faults but also locating them NOTE If Measurement Standards under System Setup is set to ANSI then the CableSHARK s ISOLATION RESISTANCE Measurement will be titled STRESS LEAKAGE METER 8 9...

Page 157: ...caution when connecting the test set as telephone cables may have dangerous A C or D C voltages on them The Isolation Resistance Test injects 100 VDC onto the line however it is current limited Press...

Page 158: ...p Menu UPLOAD RESULT Choosing UPLOAD RESULT from the SAVE UPLOAD pop up menu sends the result that appears on the CableSHARK screen current test or recalled test to a PC via a NULL modem cable The rem...

Page 159: ...y be found using the enhanced resolution that the CableSHARK s integrated FDR solution offers 8 10 1 Setting up a LoopMapper Test From the Main Menu pressing function button F1 CABLE TESTS will bring...

Page 160: ...bottom of the screen are CABLE TESTS and MAIN MENU For some options for which a numeric value must be entered only three options may appear EDIT SELECT CABLE TESTS and MAIN MENU To modify a test param...

Page 161: ...AWG 24 0 5 mm VOP 0 66 99 m s AWG 26 0 4 mm VOP 0 64 96 m s Jelly AWG 19 0 9 mm VOP 0 68 102 m s Filled AWG 22 0 6 mm VOP 0 62 93 m s AWG 24 0 5 mm VOP 0 60 90 m s AWG 26 0 4 mm VOP 0 58 87 m s Polye...

Page 162: ...the Graph Scale automatically if necessary so that the first reflection is within the display screen The information about reflections that are found is shown on the screen including a graphical repr...

Page 163: ...ORIZ ZOOM OUT HORIZ Use these function buttons to zoom in and out based on the horizontal graph scale Please note after the completion of a test the ZOOM OUT HORIZ option will be disabled as it is imp...

Page 164: ...he Main Menu 8 10 2 1 Testing Cables with the LoopMapper Figure 8 10 2 1A shows an example of a LoopMapper test result on a 1000 ft cable with an open cable end The large pulse near 0 distance is refl...

Page 165: ...1B shows a LoopMapper test result on the same cable of Figure 8 10 2 1A with the cable end shorted Even though both images look similar please note that now the angle at the reflected point is 180 Th...

Page 166: ...TED Figure 8 10 2 1C shows the LoopMapper test result on a cable with a bridged tap Please note that the angle at the reflected point is 180 confirming the existence of a Bridge Tap The Bridge Tap con...

Page 167: ...EST WITH A CABLE AND BRIDGE TAP BRANCH Note When using the LoopMapper test be sure to use the CableSHARK s zoom function to amplify the result Often the reflected pulse is difficult to see so by using...

Page 168: ...review the setup for each test by going to that tests setup menu before continuing with the Auto Test 8 11 1 Auto Test Setup From the Main Menu pressing function button F3 AUTO SETUP to view configur...

Page 169: ...CableSHARK P3 User Guide 157 FIGURE 8 11 1 1A ADSL AUTO TEST SETUP FIGURE 8 11 1 1B ADSL2 AUTO TEST SETUP...

Page 170: ...ould they exist Press the function button corresponding ENTER to select the highlighted parameter SELECT PREVIOUS Pressing the function button corresponding to SELECT PREVIOUS scrolls backward through...

Page 171: ...Cap Imbalance Min VF Long Balance dB 0 AUTO 500 0 0 660 83 0 125 0 10 0 25 0 25 0 50 0 50 0 2 5 2 5 2 5 5 0 50 0 ITU T Annex A SELECT NEXT ADSL SETUP FIGURE 8 11 1 2A SHDSL AUTO TEST SETUP The options...

Page 172: ...N MENU Select the function button corresponding to MAIN MENU to return to the Main Menu 8 11 1 3 VF Auto Test Setup From the Auto Test Setup screen pressing the F1 button will activate the VF Auto POT...

Page 173: ...nu wherein a desired parameter can be highlighted by using the Cursor Pad UP DOWN arrow buttons and or the function buttons corresponding to PAGE UP and PAGE DOWN should they exist Press the function...

Page 174: ...key allows a user to delete a highlighted entry Pressing the PREVIOUS SCREEN key returns the user to the VF AUTO TEST SETUP screen SELECT PREVIOUS Pressing the function button corresponding to SELECT...

Page 175: ...chased Please contact your local EXFO representative for further information and to purchase this option NOTE Please review the setup for each test by going to that tests setup menu before continuing...

Page 176: ...L AUTO TEST PASS At the conclusion of the ADSL ADSL2 or ADSL2 AUTO Test the CableSHARK will report PASSED if all the user defined thresholds are not compromised Otherwise the CableSHARK will report FA...

Page 177: ...essing the SAVE UPLOAD button shows a pop up window where the user is allowed to upload results and save results to internal memory or to external USB memory UPLOAD RESULT Choosing UPLOAD RESULT from...

Page 178: ...or the tests it runs Please review the setup for each test by going to that tests setup menu before continuing with the Auto Test NOTE The CableSHARK will work with milliwatt sources providing a tone...

Page 179: ...the screen are as follows VIEW DETAIL Allows a user to view the results of each test making up a completed VF Auto test Pressing the SAVE UPLOAD button shows a pop up window where the user is allowed...

Page 180: ...aution when connecting the test set as telephone cables may have dangerous A C or D C voltages on them NOTE SHDSL AUTO Test will only be available if the SHDSL option has been purchased Please contact...

Page 181: ...he conclusion of the SHDSL AUTO test the CableSHARK will report PASSED if all the user defined thresholds are not compromised Otherwise the CableSHARK will report FAILED If the CableSHARK detects a lo...

Page 182: ...E UPLOAD button shows a pop up window where the user is allowed to upload results and save results to internal memory or to external USB memory UPLOAD RESULT Choosing UPLOAD RESULT from the SAVE UPLOA...

Page 183: ...sers to view the pass fail thresholds used for the automatic tests TEST SETUP Pressing the function button associated with TEST SETUP activates the AUTO Test Setup menu Test parameters can be modified...

Page 184: ...VF DSL Cable Qualifier 172...

Page 185: ...ce Central Office CableSHARK xD S L C abl e Qual i f i er F1 F2 F3 F4 F5 F6 F7 F8 1 2 A B C 3 D E F 4 G H I 5 J K L 6 M N O 7 P R S 8 T U V 9 W X Y 0 Q Z R U N S T O P E F CHG A W or ld of G o od fo r...

Page 186: ...ilter E F CHG SPECTRAL DETECTIVE 2 2 MHz WARNING Note telephone cables may have dangerous A C or D C voltages on them therefore caution should be taken when connecting this test set SELECT NEXT 100 OH...

Page 187: ...TE The NOISE FILTER setting is not available for TEST TYPE equal to SPECTRAL DETECTIVE 6 0 MHz 9 1 Running a Spectral Detective Test Use caution when connecting the test set as telephone cables may ha...

Page 188: ...each of the function button options SHOW REF Pressing the function button corresponding to SHOW REF allows a user to overlay a REFERENCE MASK over the test result on screen to compare the two See Sect...

Page 189: ...ut based on the horizontal graph scale Please note after the completion of a test the ZOOM OUT HORIZ option will be disable as it is impossible to ZOOM OUT Press the ZOOM IN HORIZ button once or multi...

Page 190: ...z PSD Cursor Frq 45 12 dBm Hz 1152 8 kHz RMS Noise Impedance Noise Filter 65 5 dBm Bridging No Filter dBm 10 40 70 100 130 FREEZE 20 10 40 70 100 Press or to move cursor PROBABLE SIGNAL undetermined 0...

Page 191: ...0 70 100 130 TEST SETUP 20 10 40 70 100 Press or to move cursor PROBABLE SIGNAL undetermined SAVE UPLOAD 0 00 552 1104 2208 kHz 1656 FIGURE 9 2B T1 DISTURBER 1IN 8 PATTERN MAIN MENU E F CHG SHOW REF Z...

Page 192: ...VF DSL Cable Qualifier 180...

Page 193: ...ent to the purchaser based upon each CableSHARK s unique serial number To determine the options currently installed in the CableSHARK or to view the units unique serial number go to SYSTEM SETUP and s...

Page 194: ...urn Loss Test Use caution when connecting the test set as telephone cables may have dangerous A C or D C voltages on them Press the RUN STOP button on the front of the CableSHARK to initiate the Retur...

Page 195: ...options available to the operator The following are brief descriptions of each of the function button options SHOW REF Pressing the function button corresponding to SHOW REF allows a user to overlay a...

Page 196: ...is impossible to ZOOM OUT Press the ZOOM IN VERT button once or multiple times and the ZOOM OUT VERT button will appear Likewise when the maximum zoom level is achieved the ZOOM IN VERT button will d...

Page 197: ...be sent to the purchaser based upon each CableSHARK s unique serial number To determine the options currently installed in the CableSHARK or to view the serial number go to SYSTEM SETUP and select th...

Page 198: ...rement not possible Tip and Ring wires are substantially different lengths CABLE TYPE The CABLE TYPE setting is used to select the appropriate cable type or more appropriately the appropriate diameter...

Page 199: ...gle end SHDSL test complete for 3995 ft SHOW REF Frequency Rx Level Noise Level S N Ratio 301 875 kHz 54 6 dBm Hz 138 19 dBm Hz 83 6 dB SHDSL Standard Data Rate Noise Margin ITU T Annex A 2312 kbits s...

Page 200: ...re the test results can be saved to internal non volatile memory See Section 5 3 for more information SAVE TO USB Choosing SAVE TO USB from the SAVE UPLOAD pop up menu invokes the SAVE SESSION menu Fr...

Page 201: ...rosses A short is when TIP is shorted to RING T R FIGURE 12 1A SHORT BETWEEN TIP AND RING A ground is when either TIP or RING is shorted to GROUND T R FIGURE 12 1B SHORT BETWEEN RING AND GROUND A Cros...

Page 202: ...f the circuit and a strap is placed on the customer side of the circuit IMPORTANT Attachment of the strap should not take place until the CableSHARK has indicated how to hook up the strap 12 1 1 2 Con...

Page 203: ...connector must be used with the YELLOW BLUE and GREEN leads Attach these leads to the good pair YELLOW to TIP BLUE to RING and GREEN to GROUND TIP 1 YELLOW GND GREEN RING 1 BLUE FIGURE 12 1 1 3A RFL C...

Page 204: ...faulty pair selected If the measured resistance is 10 Mohms or the voltage is 2 VDC or negative there may be a fault on the line Any fault that measures less than 3 3 Mohms must be repaired If there...

Page 205: ...test will indicate the following Yellow Blue Green MAIN MENU E CHG WARNING Connect a good pair to Yellow and Blue Connect far end strap from wire connected to Black to both ends of good pair F Black...

Page 206: ...ar end Once the strap is hooked up the user can press the CONTINUE button to advance to the RFL SETUP menu NOTE The user should locate a good pair before actually proceeding to the RFL SETUP menu 12 1...

Page 207: ...B TO GROUND FAULT STRAP PLACEMENT Battery Cross Fault T R T R X X X X T R Strap Good pair Faulty pair FIGURE 12 1 1 6C BATTERY CROSS STRAP PLACEMENT IMPORTANT Follow the CableSHARK s instructions for...

Page 208: ...ST SETUP SCREEN At the top of the screen you can see colors corresponding to the test leads Ensure that the connection to the faulty pair and the good pair corresponds to these colors For single secti...

Page 209: ...ting must be set to NOTE To enter negative temperatures highlight the Temperature Edit box press the EDIT SELECT button to change the temperature and press the asterisk key twice to enter the negative...

Page 210: ...ection 1 24 AWG PIC 59 30 29105 74 No RFL test complete Fault located in section 1 1741 ft Distance to Fault Distance to End Distance from End to Fault Resistance at Fault 1741 ft 19105 ft 17364 ft 10...

Page 211: ...he user to re check the distances entered into each section and the strap connection At the completion of a test the function button command selection at the bottom of the RFL Test screen consists of...

Page 212: ...es a problem at 12 000 ft subtract 300 ft from that distance 2 load coils x 150 feet 4 It may be necessary to put 10kohm matched resistor on the input of the RFL measurement to discharge voltage on th...

Page 213: ...0 90 PE 55 16 8 88 5 19 PIC 53 8 16 4 86 6 NOTES PE metric Polyethylene insulated cable PIC AWG Polyethylene insulated cable Metric AWG Wire Gauges R C 0Hz DC 20 C or 68 F 10 For a resistance at a te...

Page 214: ...ture R20 C resistance of the cable 20 C 11 The RFL measurement is designed to find a single fault If multiple faults exist an incorrect measurement will be given If the result does not coincide with a...

Page 215: ...age source old style 2 Constant current source new style 3 Grounded source such as AT T 5ESS This option can be ordered from EXFO A special alphanumeric software key will be sent to the purchaser base...

Page 216: ...reen to avoid confusion Ring Ground Tip Central Office R G T 2W Line TX RX R G T RX Aux FIGURE 13 1 1B GROUND RESISTANCE CONNECTION DIAGRAM 2 From the Main Menu pressing function button F1 CABLE TESTS...

Page 217: ...Use caution when connecting the test set as telephone cables may have dangerous A C or D C voltages on them Press the function button corresponding to the RUN STOP button on the front of the CableSHAR...

Page 218: ...nt Voltage Source The CableSHARK will display voltage loop current and loop resistance information Since there is no ground connection a ground resistance measurement is not given FIGURE 13 2 1A RESUL...

Page 219: ...7 13 2 2 Constant Current Source The CableSHARK will display voltage and loop current Since there is no ground connection a ground resistance measurement is not given FIGURE 13 2 2A RESULT OF MEASUREM...

Page 220: ...SL Cable Qualifier 208 13 2 3 Voltage Source plus Ground The CableSHARK will display voltage loop current loop resistance and ground resistance FIGURE 13 2 3A RESULT OF MEASUREMENT WHEN SOURCE IS VOLT...

Page 221: ...bleSHARK will display voltage loop current loop resistance and ground resistance FIGURE 13 2 4A RESULT OF MEASUREMENT WHEN SOURCE IS CURRENT Resistance values of less than 25 ohms is considered accept...

Page 222: ...hook tip ring voltage Station voltage The voltage must be negative If not an error message reporting Tip Ring polarity reversed will be displayed 2 The CableSHARK will detect the balanced unbalanced...

Page 223: ...ground voltage and the loop current The Ground Resistance measurement sequence is based on the following assumptions 1 The ground lead of the instrument is connected reliably to the ground of the CO 2...

Page 224: ...VF DSL Cable Qualifier 212...

Page 225: ...nt each device draws The maximum number of REN s per circuit is going to be a number less than 4 0 or 5 0 The exact number is set by the capabilities of your local telecom supplier As more devices are...

Page 226: ...on the front of the CableSHARK to initiate the Ringer Detection test Figure 14 2A shows an example of the results obtained from a Ringer Detection Test SAVE UPLOAD MAIN MENU Ringer Detection T R Ringe...

Page 227: ...ure and analyze the results on a PC SAVE TO MEM Choosing SAVE TO MEM from the SAVE UPLOAD pop up menu invokes the SAVE SESSION menu From here the test results can be saved to internal non volatile mem...

Page 228: ...VF DSL Cable Qualifier 216...

Page 229: ...ser to send a single tone or multiple tones to a far end device be it another CableSHARK or a EXFO Auto TIMS III Transmission Impairment Measuring Set The options under the Send Tone umbrella include...

Page 230: ...o toggle between minus and plus symbols Frequency Mode Allows user to select from SPOT VARIABLE TX 3 TONE SLOPE and TRACING TONE With SPOT frequency selected press the RUN STOP key to start the test T...

Page 231: ...inue press RUN STOP SEND TONE 600 OHMS 0 VARIABLE EDIT SELECT MAIN MENU Test Type Term Impedance Level dBm Frequency Mode E F CHG SEND TONE FIGURE 15 1 2A SETTING UP THE VARIABLE FREQUENCY TEST The VF...

Page 232: ...the test The following screen will appear FIGURE 15 1 2B RUNNING A VARIABLE FREQUENCY TEST The VARIABLE frequency screen allows a user to modify what is being transmitted from the CableSHARK Selecting...

Page 233: ...ONE FIGURE 15 1 3A SETTING UP THE 3 TONE SLOPE TEST The VF TEST menu has the following configuration option TEST TYPE Select SEND TONE TERM IMP 600 ohms or 100 150 ohms if your unit does not have 600...

Page 234: ...Selecting the EDIT SELECT button will allow the user to modify FREQUENCY if desired 15 1 4 Sending a Tracing Tone The Tracing Tone function places a continuous tone on the line for use in cable pair...

Page 235: ...configuration option TEST TYPE Select SEND TONE TERM IMP 600 ohms or 100 150 ohms if your unit does not have 600 ohms installed Level dBm Level can be set from 16 dBm to 18 dBm Use the asterisk key t...

Page 236: ...nd provides the level and frequency of the signal The transmitting device could be another CableSHARK or a EXFO Auto TIMS III Transmission Impairment Measuring Set The options under the Receive Tone u...

Page 237: ...ollowing configuration option TEST TYPE Select RECEIVE TONE TERM IMP 600 ohms or 100 150 ohms if your unit does not have 600 ohms installed Receiver Mode Allows user to select from NUMERICAL GRAPHICAL...

Page 238: ...RUNNING THE RX TONE NUMERICAL TEST 15 2 2 Graphical Level Frequency To measure level frequency graphically select the VF TESTS option from the CABLE TESTS pop up menu Select RECEIVE TONE from the VF...

Page 239: ...he VF TEST menu has the following configuration option TEST TYPE Select RECEIVE TONE TERM IMP 600 ohms or 100 150 ohms if your unit does not have 600 ohms installed Receiver Mode Allows user to select...

Page 240: ...ncy being measured by the CableSHARK By moving the LEFT RIGHT and UP DOWN arrow keys users can move the cursors on screen to pin point precise points on screen The Level Frequency of the point highlig...

Page 241: ...X TONE GRAPHICAL TEST The VF TEST menu has the following configuration option TEST TYPE Select RECEIVE TONE TERM IMP 600 ohms or 100 150 ohms if your unit does not have 600 ohms installed Receiver Mod...

Page 242: ...VF DSL Cable Qualifier 230 FIGURE 15 2 2B RUNNING THE RX 3 TONE SLOPE TEST The result screen shows the user the level frequency and slope of the incoming signal...

Page 243: ...MAIN MENU Test Type Term Impedance Noise Filter Measurement Units E F CHG NOISE FIGURE 15 3A SETTING UP NOISE TEST The VF TEST menu has the following configuration option TEST TYPE Select NOISE TERM...

Page 244: ...he following screen will appear FIGURE 15 3B RUNNING THE NOISE TEST Users can change the measurement units dBm dBrnC and filters by pressing the buttons dBm dBrnC and Cycle Filter respectively Press t...

Page 245: ...Test Type Term Impedance Noise Filter Low Thresholds Measurement Units Separation dB Imp Noise Meas Time E F CHG IMPULSE NOISE FIGURE 15 4A SETTING UP NOISE TEST The VF TEST menu has the following con...

Page 246: ...h IMPULSE NOISE selected press the RUN STOP key to start the test The following screen will appear Impulse Noise test in progress MAIN MENU Impedance Noise Filter Selected Impulse Noise Low Threshold...

Page 247: ...up menu Select RECEIVE TONE from the VF TESTS sub menu To continue press RUN STOP SEND TONE dBrn EDIT SELECT MAIN MENU Test Type Measurement Units E F CHG POWER INFLUENCE FIGURE 15 5A SETTING UP THE...

Page 248: ...Flat Noise 87 dBrnC 50 dBrnC Voltage 0 0 V 0 1 V 0 0 V 0 0 V 0 0 V 0 1 V 0 1 V 0 1 V 0 4 V Level 65 dBrn 70 65 65 65 75 80 80 87 dBrn dBrn dBrn dBrn dBrn dBrn dBrn dBrn 50 70 90 110 130 FIGURE 15 5B...

Page 249: ...e the decision for you One fault must be at least twice as heavy as the other fault e g 5k is twice as heavy as 10k I e R1 2 x R2 or R2 2 x R1 The sum of both faults must be at least 100 times the loo...

Page 250: ...leSHARK will measure the combinations of TIP RING RING GROUND and TIP GROUND using the CableSHARK voltage and resistance tests to determine if K Test is possible on the faulty pair selected If the mea...

Page 251: ...the test The following screen is displayed FIGURE 16 3B K TEST SETUP SCREEN Connect Tip to Aux Tip and Ring to Aux Ring Connect Tip and ring to the faulted pair and Ground to the reference wire Discon...

Page 252: ...made of 18AWG 1 0 mm and be very short because it will have a very low resistance and will not affect the measurement Alternatively the same gauge of cable can be used but again must be very short as...

Page 253: ...st needs to be configured in detail now that the faulty wires have been identified and the strap is properly attached at the far end The following screen is displayed IMPORTANT Follow the CableSHARK s...

Page 254: ...LE TYPE The CABLE TYPE setting is used to select the appropriate cable type or more appropriately the appropriate diameter The available options for Imperial Measurement Units are 19 22 24 and 26 AWG...

Page 255: ...temperatures highlight the Temperature Edit box press the EDIT SELECT button to change the temperature and press the asterisk key twice to enter the negative sign Press the RIGHT ARROW key to advance...

Page 256: ...ARK Typically a section is a different gauge of wire FIGURE 16 3 2 1A K TEST CABLE CHARACTERISTICS SETUP SCREEN FOR MULTI SECTION TESTING 16 3 3 Running a Test Once the test is set up press the RUN ST...

Page 257: ...be given the following information Distance to Fault Distance to End and Distance from End to Fault The following image shows this in more detail Strap Distance to Fault Distance from End to Fault Dis...

Page 258: ...e function button options UPLOAD RESULT Choosing UPLOAD RESULT from the SAVE UPLOAD pop up menu sends the result that appears on the CableSHARK screen current test or recalled test to a PC via a NULL...

Page 259: ...G 12000 ft 26 AWG 400 ft 26 AWG 550 ft 26 AWG 6250 ft CSA 7 24 AWG 10500 ft 26 AWG 800 ft Extended CSA 9 24 AWG 1000 ft 24 AWG 4500 ft 26 AWG 9000 ft Extended CSA 10 24 AWG 500 ft 26 AWG 7500 ft 26 AW...

Page 260: ...4 AWG 1000 ft 24 AWG 500 ft 24 AWG 500 ft ANSI Loop 5 26 AWG 9000 ft 24 AWG 6000 ft 26 AWG 1500 ft ANSI Loop 6 26 AWG 13500 ft ANSI Loop 7 24 AWG 9000 ft 22 AWG 1000 ft 26 AWG 6000 ft 24 AWG 1000 ft A...

Page 261: ...e following graphs depict Attenuation responses to CSA Extended CSA Mid CSA and ANSI loop topologies curve calculated attenuation of ideal cable These graphs represent the loop topologies outlined in...

Page 262: ...VF DSL Cable Qualifier 250 CSA Loop 6 CSA Loop 7 CSA Loop 8 Extended CSA Loop 9...

Page 263: ...CableSHARK P3 User Guide 251 Extended CSA Loop 10 Mid CSA Loop 0 Mid CSA Loop 1 Mid CSA Loop 2...

Page 264: ...VF DSL Cable Qualifier 252 Mid CSA Loop 3 Mid CSA Loop 4 Mid CSA Loop 5 Mid CSA Loop 6...

Page 265: ...CableSHARK P3 User Guide 253 ANSI Loop 2 ANSI Loop 3 ANSI Loop 4 ANSI Loop 5...

Page 266: ...VF DSL Cable Qualifier 254 ANSI Loop 6 ANSI Loop 7 ANSI Loop 8 ANSI Loop 9...

Page 267: ...CableSHARK P3 User Guide 255 ANSI Loop 11 ANSI Loop 12 ANSI Loop 13 ANSI Loop 15...

Page 268: ...VF DSL Cable Qualifier 256...

Page 269: ...0 0 60 PE 40 64 4 123 37 5 198 8 6 0 63 PE 45 72 4 113 34 5 182 0 644 22 PIC 51 6 83 0 108 32 9 174 14 1 0 70 PE 40 64 4 90 27 5 145 0 80 PE 40 64 4 69 21 0 111 7 1 0 90 DW12 51 1 82 3 55 5 16 9 89 3...

Page 270: ...VF DSL Cable Qualifier 258 COMMITTEE T1 Working Group T1E1 4 ftp ftp t1 org T1E1 E1 4 Dir2001 1E140023 pdf...

Page 271: ...tial voltage protection 125 VRMS or 400 VDC max Common mode voltage protection 1000 VRMS Serial port RS232 9 pin D type with flow Control XON XOFF or none For upgrading software downloading results re...

Page 272: ...t evaluating up downstream rate prediction SHDSL Auto Test Expert system automatic test Requires Single End SHDSL Data Rate Prediction Option Automatic test providing pass fail results in both text an...

Page 273: ...l accuracy 0 5 dB 300 Hz 0 dBm 0 2 dB for 1 kHz to 200 kHz 0 dBm 0 5 dB for 200 kHz to 1 MHz 0 dBm 1 dB for 1 MHz to 2 2 MHz 0 dBm 3 dB at 6 MHz 0 dBm Frequency accuracy 2 Hz from 40 dBm to 24 dBm Imp...

Page 274: ...0 to 30 V typically resolution 0 1 V Ringer detection Ringer range 0 to 5 REN ringer equivalent number based on 0 47 F ringer measured Tip to Ring Tip to Ground and Ring to Ground Time Domain Reflect...

Page 275: ...m Distance range 100 ft up to 10 000 ft 30 m to 3000 m V O P 0 400 to 0 999 or 120 to 299 m s Distance accuracy For measurements below 2000 ft 655 m 12 ft 4 m increments 1 of reading For measurements...

Page 276: ...ot to 10 kHz Distance range Up to 24 000 ft up to 7 500 m range will depend on cable type and condition specifications based on 24 AWG 0 5 PE mm cabling End to End DMT Test Combined Frequency Response...

Page 277: ...or and zoom The Single Ended DMT test used by the EXFO CableSHARK is patent pending ADSL Data Rate Prediction Single End US Patent Pending 10 133 408 Distance range 300 ft to 16000 ft 100 m to 5000 m...

Page 278: ...margin range Auto 0 to 20 0 dB in 1 dB steps Frequency range 4 3 kHz to 1 104 MHz Horizontal scale 0 1 104 MHz Vertical scale 36 dBm Hz to 156 dBm Hz Hz or 0 to 120 dBm PSD Noise Measurement Single en...

Page 279: ...400 V auto ranging Resolution 3 significant digits Accuracy 1 of reading 1 LSD AC voltage Range 0 to 250 Vrms auto ranging Resolution 3 significant digits Accuracy 1 of reading 1 LSD Resistance Range...

Page 280: ...ny user selected impedance The Impedance reference setting is required to display proper readings in dBm Hz or dBm Mode Continuous or Peak hold plot with cursor and zoom Bridging impedance 15 k Vertic...

Page 281: ...maximum Wire gauges 0 4 0 5 0 6 or 0 8 mm 19 22 24 26 AWG Cable temperature range 40 F to 140 F 40 C to 60 C Multiple cable sections 5 includes gauge and temperature setting Fault location Total resi...

Page 282: ...nning Windows 98 Windows 2000 or XP Certain functions are available even if the option is not enabled in the CableSHARK Result printing etc EXFO reserves the right to change or upgrade specifications...

Page 283: ...l shock do not operate the equipment if it bears any sign of damage to any portion of its exterior surface such as the outer casing or panels Connections to Mains Supply Power In accordance with inter...

Page 284: ...ired fuses and avoid any situations that could short circuit the fuse Unless absolutely necessary do not attempt to adjust or perform any maintenance or repair procedure when the equipment is opened a...

Page 285: ...CableSHARK P3 User Guide 273 NOTE If the CableSHARK is not used in the manner outlined in this operating manual the protection provided by the CableSHARK may be impaired...

Page 286: ...VF DSL Cable Qualifier 274...

Page 287: ...n as explained in this guide unit serial number has been altered erased or removed unit has been misused neglected or damaged by accident THIS WARRANTY IS IN LIEU OF ALL OTHER WARRANTIES EXPRESSED IMP...

Page 288: ...buse neglect fire water lightning or other acts of nature causes external to the product or other factors beyond EXFO s control Certification EXFO certifies that this equipment met its published speci...

Page 289: ...in a copy Internet FTP and Web downloads are also available These software downloads can be arranged by calling your nearest EXFO representative or by using the contact information in this manual From...

Page 290: ...IGURE F 2A SELECTING AN UPGRADE METHOD Ethernet Cable Crossover Select if connection to the CableSHARK directly from a PC using a crossover cable See Section 4 1 4 Press the Program button to upgrade...

Page 291: ...erial Be sure to include a statement or report fully detailing the defect and the conditions under which it was observed 5 Return the equipment prepaid to the address given to you by support personnel...

Page 292: ...VF DSL Cable Qualifier 280...

Page 293: ...anada Tel 1 418 683 5498 Fax 1 418 683 9224 quebec service exfo com EXFO Europe Service Center Le Dynasteur 10 12 rue Andras Beck 92366 Meudon la For t Cedex FRANCE Tel 33 1 40 83 85 85 Fax 33 1 40 83...

Page 294: ...VF DSL Cable Qualifier 282...

Page 295: ...he unit Alternatively you can use your PC arrow keys ENTER key and numerical keys to control the CableSHARK using Visi SHARK NOTE If the Visi SHARK option is not installed on the CableSHARK only the S...

Page 296: ...sktop Look for the icon visishark exe Click the icon On the File menu click Create Shortcut Drag the newly created shortcut icon onto your Desktop Now to start Visi SHARK you only need to double click...

Page 297: ...ve and directory the software is installed to use the Windows Find function to locate and run the file visi shark exe J 4 Setting up a New Connection with Visi SHARK To set up a connection between the...

Page 298: ...shown in the above figure On the Setup Connection Through dialog box there is a small field next to the label Com Port Number where the desired COM port can be selected see Figure J 4b To select the...

Page 299: ...w Control settings to their default values which correspond to the default RS 232 settings of the CableSHARK Once all of the above parameters are set as desired click on the Connect button to connect...

Page 300: ...IP address can be entered see Figure J 4A FIGURE J 4 2A SETTING THE IP ADDRESS Click on the Connect button to connect to the CableSHARK over a network LAN or Internet If the error message Socket Erro...

Page 301: ...ht cable or vice versa See Section 4 1 4 for more information FIGURE J 4 2B SOCKET ERROR J 4 3 Connecting Through a MODEM If you wish to connect via a MODEM click the radio button next to the label MO...

Page 302: ...e number or description from the pull down list that is displayed FIGURE J 4 3B SELECTING A PRE PROGRAMMED NUMBER If you have not pre programmed any Number s or wish to add a new number click on the b...

Page 303: ...right of the Dialed Number or Description field Select the Number to be removed from the pull down list that appears Click the Remove No button J 5 Controlling the CableSHARK with Visi SHARK Once the...

Page 304: ...simulated on screen CableSHARK display changes accordingly to reflect what the remotely connected CableSHARK is displaying Similarly the Visi SHARK simulated display will change when the actual butto...

Page 305: ...t can be saved J 6 1 File Menu The File menu contains such menu functions as Upload Result Print and Exit To open the file menu click on the File entry on the Menu Bar to open the File menu as shown b...

Page 306: ...To print make the desired selections and click on the OK button To cancel the print dialog click on the Cancel button If it is necessary to change the properties of the printer such as paper size pap...

Page 307: ...be activated by clicking on the File entry on the Menu Bar and then clicking on the Print Setup entry See also Print for more information J 6 1 5 Exit Exit terminates the Visi SHARK application and cl...

Page 308: ...Recall from File function allows the operator to open a previously saved Screen Capture from disk This function is invoked by clicking the Screen Image item on the Menu Bar and then clicking the Recal...

Page 309: ...le in or to find an existing file to replace the operator can browse for the desired directory or file by using the controls nearest the top of the dialog box FIGURE J 6 2 2A SAVING A SCREEN IMAGE FIL...

Page 310: ...RECT CONNECTION FROM THE NEW CONNECTION MENU Next click on Setup Connection on the pull down menu that is displayed The Setup Connection Through menu shown below is displalyed FIGURE J 6 3B THE SETUP...

Page 311: ...e activated deactivated J 6 4 1 View Toolbar Click the Tool bar item on the View menu to toggle the display of the Toolbar at the top of the screen on or off A check mark next to this item indicates t...

Page 312: ...st and or result windows so that they are stacked on top of each other with a slight overlap J 6 5 2 Tile The Tile function arranges the test and or result windows so that they are tiled on the screen...

Page 313: ...ewhere between the ends of an operating telephone pair The balance of the original circuit is not cut off but remains in place as an unterminated open circuit pair of wires BRITL Basic Rate Interface...

Page 314: ...tion type 1 The ISDN device responsible for the termination of the ISDN transmission facility at the customer premise NT2 Network Termination type 2 An ISDN device responsible for on premise communica...

Page 315: ...ary One Quaternary A signaling method used across the 2 wire BRI U reference point 2B1Q is a four level line code associating 2 bits to each line signal U Interface The physical 2 wire echo canceling...

Page 316: ...VF DSL Cable Qualifier 304...

Page 317: ...or commercial partner EXFO will cover costs related to the collection treatment recovery and disposal of end of lifecycle waste generated by electronic equipment introduced after August 13 2005 to an...

Page 318: ...VF DSL Cable Qualifier 306...

Page 319: ...CableSHARK P3 User Guide 307 Notes...

Page 320: ...VF DSL Cable Qualifier 308...

Page 321: ...ntreal 2650 Marie Curie St Laurent Quebec H4S 2C3 CANADA Tel 1 514 856 2222 Fax 1 514 853 2232 EXFO Toronto 160 Drumlin Circle Concord Ontario L4K 3E5 CANADA Tel 1 905 738 3741 Fax 1 905 738 3712 EXFO...

Reviews: