CableSHARK
P3
User Guide
25
Section 5 General Operating Instructions
The CableSHARK is easy to operate, with a simple to understand top panel consisting of a large 640 x 480
graphic Liquid Crystal Display, eight function buttons, menu control buttons, alphanumeric keypad, contrast
controls, easy access connectors at the rear, and a power on/off button.
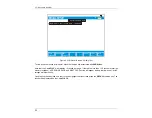
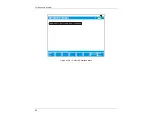
To begin operation, press the power button for
2 seconds
to turn the unit on and the screen will display the
“
MAIN MENU
” after a brief self-test sequence. The Self-test sequence will take less than 60 seconds to
complete (typically 30 seconds).
Note:
All test leads can be purchased from EXFO. These twisted pair cables have been manufactured to
ensure maximum protection against radio frequency and electromagnetic radiation. If any of the cables used
with the CableSHARK become lost or broken, please contact EXFO or your local representative for
replacements. If time does not permit, use only 24 AWG twisted pair cable providing the twist is maintained.
These cables must be less than 6 ft (2m) to prevent any noise to be induced upon the test.
5.1 Self Tests and Resetting the CableSHARK
5.1.1 Self Tests
The CableSHARK is equipped with a self-test feature. The function is performed each time the unit is turned
on. To repeat a self-test, turn the instrument off,
wait a few seconds
and then turn it back on. There are
actually two self tests (calibration tests) that can be performed at start-up. The ‘warm’ self test is a quick
calibration that is performed at start-up. A full calibration is performed once the unit is reset or when the
start-up program detects any variations of hardware and/or environmental conditions.
If any of the circuits are defective, the screen will display a list of the faults. If one or more of these
messages appear on the screen, ensure the unit is within the operating conditions specified in this manual.
Condensation and/or temperature extremes may cause failure conditions. If the failure persists, the unit
should be serviced by EXFO or a certified EXFO repair and serving facility to enable reliable operation.
5.1.2 Resetting the CableSHARK
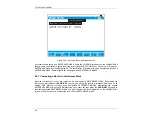
The CableSHARK comes with a reset feature so that the user can reset all settings to their factory defaults.
To reset the CableSHARK, enable the Set Factory Defaults option under the System Setup. Once enabled,
the CableSHARK will be reset to its default settings and commence normal startup procedures.
Any changes made by the user to the settings of a test will revert back to its factory default settings in most
cases.
Summary of Contents for CableSHARK P3
Page 1: ......
Page 10: ...VF DSL Cable Qualifier viii...
Page 12: ...VF DSL Cable Qualifier x...
Page 26: ...VF DSL Cable Qualifier 14...
Page 36: ...VF DSL Cable Qualifier 24...
Page 64: ...VF DSL Cable Qualifier 52...
Page 80: ...VF DSL Cable Qualifier 68...
Page 184: ...VF DSL Cable Qualifier 172...
Page 192: ...VF DSL Cable Qualifier 180...
Page 224: ...VF DSL Cable Qualifier 212...
Page 228: ...VF DSL Cable Qualifier 216...
Page 262: ...VF DSL Cable Qualifier 250 CSA Loop 6 CSA Loop 7 CSA Loop 8 Extended CSA Loop 9...
Page 263: ...CableSHARK P3 User Guide 251 Extended CSA Loop 10 Mid CSA Loop 0 Mid CSA Loop 1 Mid CSA Loop 2...
Page 264: ...VF DSL Cable Qualifier 252 Mid CSA Loop 3 Mid CSA Loop 4 Mid CSA Loop 5 Mid CSA Loop 6...
Page 265: ...CableSHARK P3 User Guide 253 ANSI Loop 2 ANSI Loop 3 ANSI Loop 4 ANSI Loop 5...
Page 266: ...VF DSL Cable Qualifier 254 ANSI Loop 6 ANSI Loop 7 ANSI Loop 8 ANSI Loop 9...
Page 267: ...CableSHARK P3 User Guide 255 ANSI Loop 11 ANSI Loop 12 ANSI Loop 13 ANSI Loop 15...
Page 268: ...VF DSL Cable Qualifier 256...
Page 286: ...VF DSL Cable Qualifier 274...
Page 292: ...VF DSL Cable Qualifier 280...
Page 294: ...VF DSL Cable Qualifier 282...
Page 316: ...VF DSL Cable Qualifier 304...
Page 318: ...VF DSL Cable Qualifier 306...
Page 319: ...CableSHARK P3 User Guide 307 Notes...
Page 320: ...VF DSL Cable Qualifier 308...


