Exinda Network Orchestrator
2 Getting started
|
21
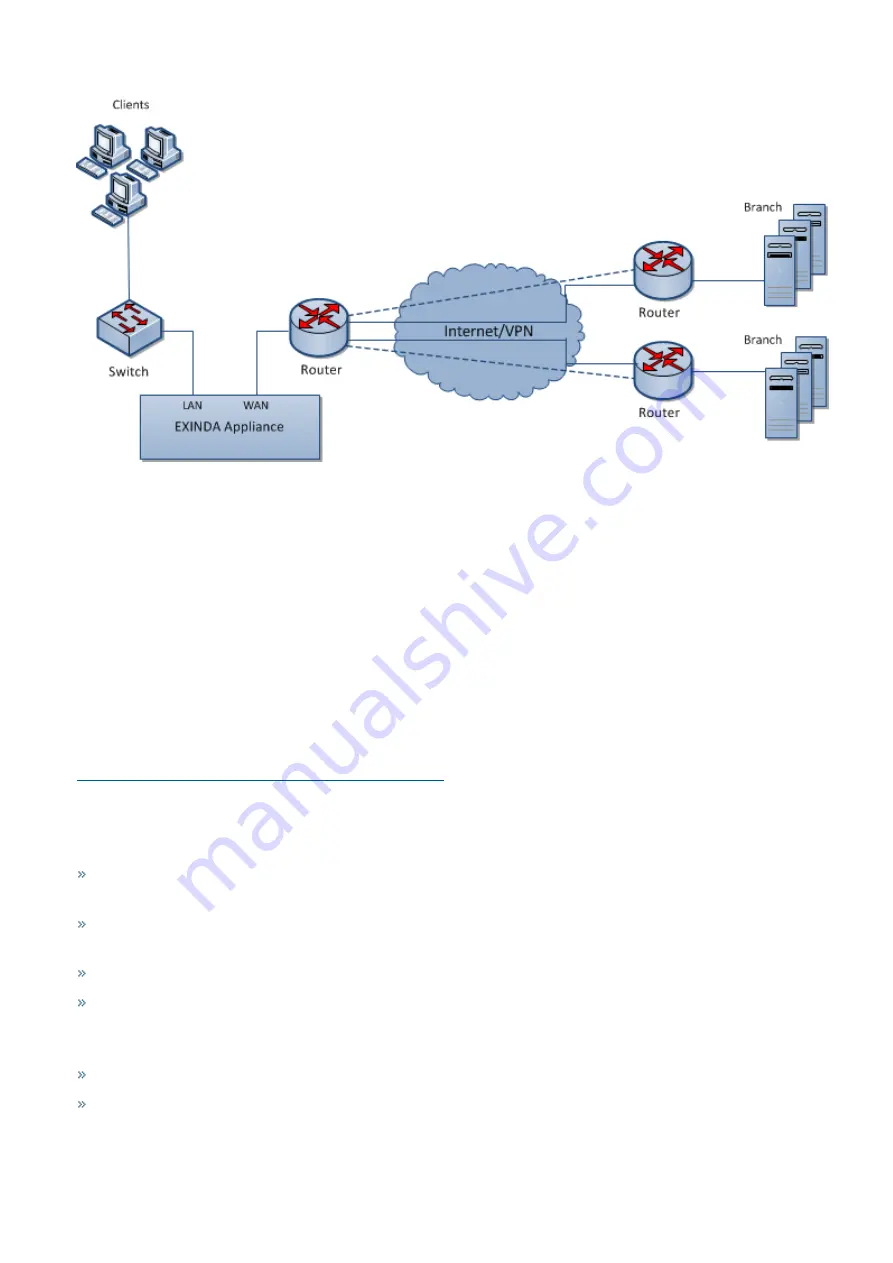
Screenshot 11: Main Site WAN Link topology deployment
Installing the Exinda Appliance in a main site WAN link topology
Plug your Exinda Appliance in line between the switch and router or firewall. If you have a VPN, refer to
.
1.
Connect the WAN port to your router/firewall using a crossover cable.
2.
Connect the LAN port into the LAN switch.
3.
Leave the Exinda Appliance powered off.
4.
Check for Internet connectivity.
5.
Turn on the Exinda Appliance and check for Internet connectivity again.
There are a few Exinda Appliance basics to keep in mind while planning a deployment.
For more information, refer to
Basic characteristics and behaviors of Exinda Appliances
Capabilities provided by the main site WAN link topology
In this topology, the Exinda appliance:
Monitors all traffic utilization and all applications to the Internet. You can distinguish between business relevant
traffic and traffic used for recreational purposes.
Monitors usage of Internet and WAN traffic, e.g., how much of the link is being used by the Internet and each
branch office?
Monitors and controls individual applications and users from each branch office.
Controls all traffic traversing the link. Allocate bandwidth to WAN and Internet applications.
Limitations of the main site WAN link topology
Application Acceleration is not possible with a single appliance.
If a branch office connects to the Internet directly, the branch link cannot be monitored and controlled.
Summary of Contents for EXNV-10063
Page 369: ...Exinda Network Orchestrator 4 Settings 369 ...
Page 411: ...Exinda Network Orchestrator 4 Settings 411 Screenshot 168 P2P OverflowVirtualCircuit ...
Page 420: ...Exinda Network Orchestrator 4 Settings 420 Screenshot 175 Students OverflowVirtualCircuit ...


