Maintenance
Check Rollover Protections
Systems (Roll Bar) Knobs
Service Interval: Before each use or daily
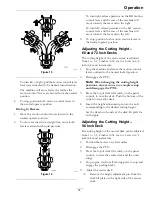
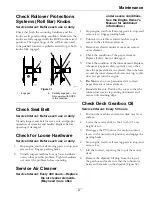
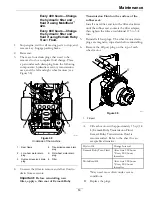
Check that both the mounting hardware and the
knobs are in good working condition. Make sure the
knobs are fully engaged with the ROPS in the raised
position. The upper hoop of the roll bar may need
to be pushed forward or pulled rearward to get both
knobs fully engaged.
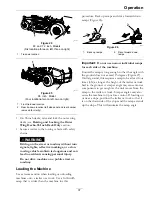
g008619
Figure 31
1.
Engaged
2.
Partially engaged — Do
Not operate with ROPS
in this condition.
Check Seat Belt
Service Interval: Before each use or daily
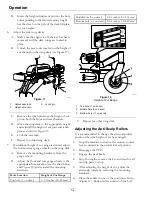
Visually inspect seat belt for wear, cuts, and proper
operation of retractor and buckle. Replace before
operating if damaged.
Check for Loose Hardware
Service Interval: Before each use or daily
1.
Stop engine, wait for all moving parts to stop, and
remove key. Engage parking brake.
2.
Visually inspect machine for any loose hardware
or any other possible problem. Tighten hardware
or correct the problem before operating.
Service Air Cleaner
Service Interval: Every 400 hours—Replace
the air cleaner elements.
(May need more often
under severe conditions.
See the Engine Owner's
Manual for additional
information.)
1.
Stop engine, wait for all moving parts to stop, and
remove key. Engage parking brake.
2.
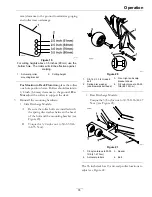
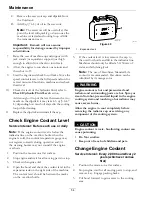
Unhook two air filter canister latches to gain
access to the air cleaner element.
3.
Remove air cleaner canister cover and remove
outer element.
4.
Check the condition of the paper element.
Replace if dirty, bent or damaged.
5.
Check the condition of the inner element. Replace
whenever it appears dirty, typically every other
time the paper element is replaced. Clean the base
around the inner element before removing, so dirt
does not get into the engine.
6.
Do Not
wash or use pressurized air to clean
paper element or inner element.
7.
Reinstall elements. Position the cover so that the
rubber dust ejector is pointing downward and
secure with retaining clips.
Check Deck Gearbox Oil
Service Interval: Every 50 hours
1.
Position the machine and mower deck on a level
surface.
2.
Lower the mower deck to the 1 inch (2.5 cm)
height of cut.
3.
Disengage the PTO, move the motion-control
levers to the neutral-lock position, and engage the
parking brake.
4.
Stop engine, wait for all moving parts to stop, and
remove key.
5.
Lift the footrest, exposing the top of the mower
deck.
6.
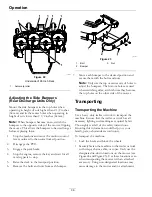
Remove the dipstick/fill plug from the top of
the gearbox and make sure that the lubricant is
between the marks on the dipstick (Figure 32).
47

