Maintenance
Air Gap:
0.030 inch (.76 mm)
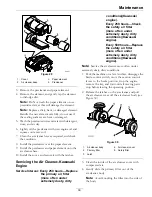
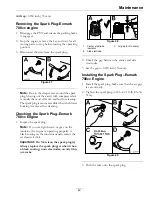
Removing the Spark Plug-Exmark
708cc engine
1. Disengage the PTO and ensure the parking brake
is engaged.
2. Stop the engine, remove the key, and wait for all
moving parts to stop before leaving the operating
position.
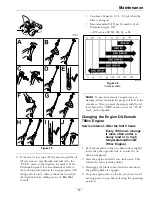
3. Disconnect the wire from the spark plug.
B
A
g027478
Figure 47
Note:
Due to the deep recess around the spark
plug, blowing out the cavity with compressed air
is usually the most effective method for cleaning.
The spark plug is most accessible when the blower
housing is removed for cleaning.
Checking the Spark Plug–Exmark
708cc Engine
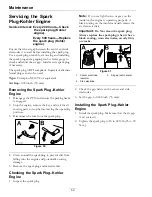
1. Inspect the spark plug
Note:
If you see light brown or gray on the
insulator, the engine is operating properly. A
black coating on the insulator usually means the
air cleaner is dirty.
Important:
Do Not clean the spark plug(s).
Always replace the spark plug(s) when it has:
a black coating, worn electrodes, an oily film,
or cracks.
B
A
g027479
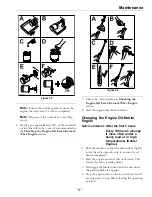
Figure 48
1.
Center electrode
insulator
3.
Air gap (not to scale)
2.
Side electrode
2. Check the gap between the center and side
electrodes.
3. Set the gap to 0.030 inch (.76 mm).
Installing the Spark Plug–Exmark
708cc Engine
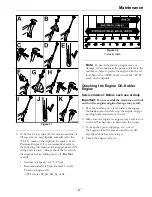
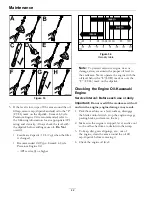
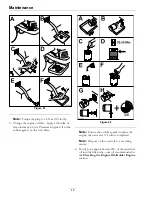
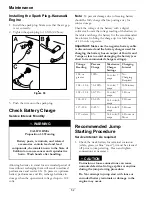
1. Install the spark plug. Make sure that the air gap
is set correctly.
2. Tighten the spark plug to 18.5–22.1 ft-lb (25–30
N-m).
B
A
25-30 N-m
18.5-22.1 ft-lb
g027960
C
D
Figure 49
3. Push the wire onto the spark plug.
49
Summary of Contents for RADIUS
Page 1: ...RADIUS For Serial Nos 400 000 000 Higher Part No 4502 907 Rev B ...
Page 73: ...Schematics Schematics Electrical Logic Schematic Exmark Engine 73 ...
Page 74: ...Schematics Electrical Logic Schematic Kohler Engine 74 ...
Page 75: ...Schematics Electrical Logic Schematic Kawasaki Engine 75 ...
Page 79: ...Notes 79 ...
Page 80: ...Notes 80 ...
Page 81: ...Service Record Date Description of Work Done Service Done By 81 ...
Page 82: ...82 ...

