2. Insert the end of the linkage opposite the yoke into
the end of the speed control lever located underneath
the handle console from the right hand side and
fasten with a hairpin from the bolt bag.
3. Connect the lower end of the speed control linkage
to the speed control crank located at the top rear of
the fuel tank support. Secure with a clevis pin and
3/32 x 1/2 inch cotter pin.
Installing the Wheel Drive
Linkages
1. Position the speed control lever in neutral.
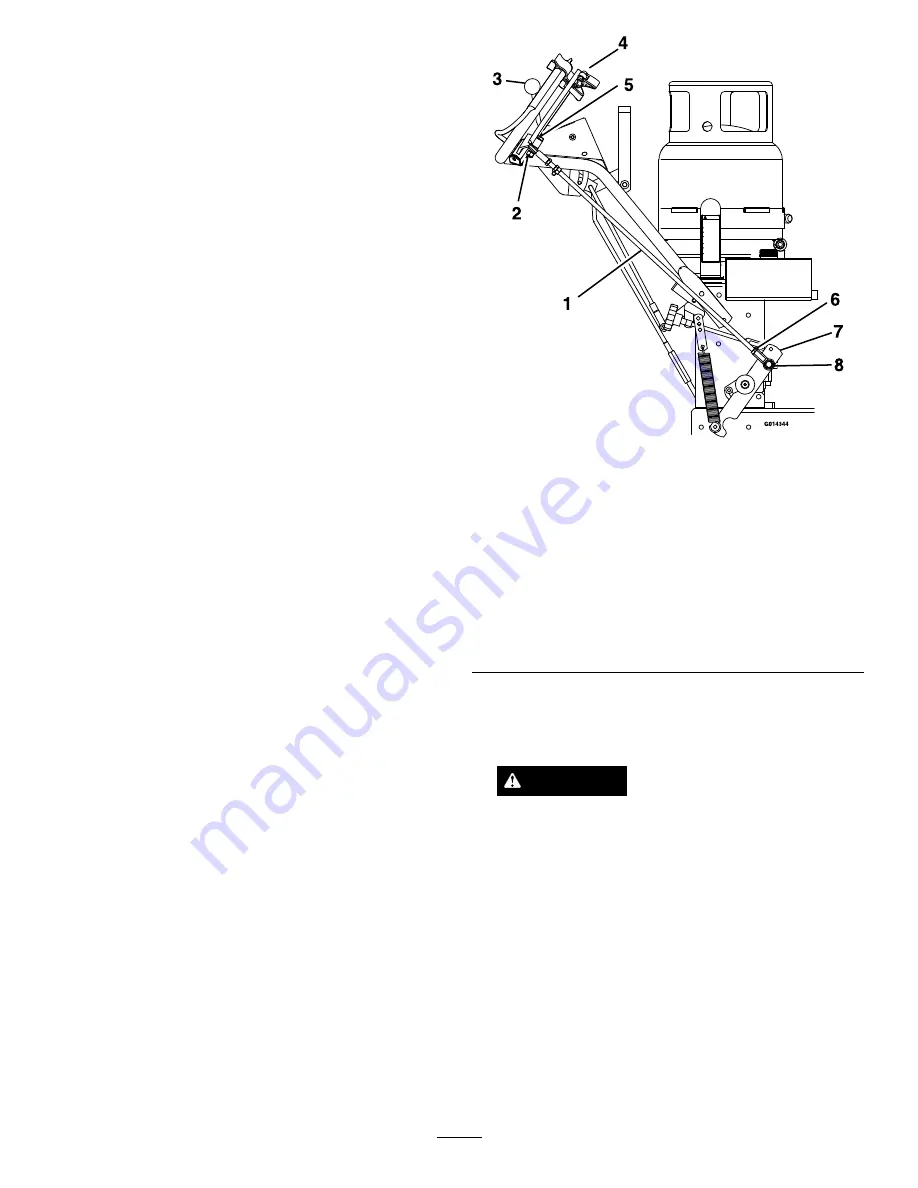
2. Position the drive levers in neutral and engage the
neutral lock latches (Figure 6).
3. Thread a 3/8-24 inch LH jam nut, from the bolt bag,
onto the lower end of each drive lever linkage.
4. Identify the lower ball joints installed on the hydro
control arm weldments. Thread the lower end of
each drive lever linkage into the lower ball joint until
the hole in upper ball joint aligns with hole in drive
lever.
5. Install a 5/16-18 x 1 3/4 inch hex cap screw and
a 5/8-18 inch nyloc nut on each side and tighten.
This will give an approximate setting for drive lever
linkages.
Figure 6
Right Hand Side of Unit Shown
1.
Drive lever linkage
2.
5/16-18 inch nyloc nut
3.
Speed control lever in neutral
4.
Drive levers in neutral
5.
5/16-18 x 1 3/4 inch hex capscrew
6.
3/8-24 inch LH jam nut
7.
Hydro control arm weldment
8.
Lower ball joint
Adjusting the Drive Lever Linkages
1. Raise the rear of machine off of the ground.
CAUTION
Raising the rear of the unit for assembly relying
solely on mechanical or hydraulic jacks could be
dangerous. The mechanical or hydraulic jacks
may not be enough support or may malfunction
allowing the unit to fall, which could cause
injury.
Do Not rely solely on mechanical or hydraulic
jacks for support. Use adequate jack stands or
equivalent support.
2. With the rear of machine on jack stands and engine
running at full throttle, disengage the park brake
and move the speed control lever to the midway
position. Move the respective drive lever upward
until it reaches the neutral position and engage the
4


