INSTALLATION FOR PCMCIA INTERFACE
HARDWARE INSTALLATION
If install on a NT station, make sure you turn OFF all power to your system
before connecting the CD ReWriter to your computer. However, you are
allowed to install the CD with power while using Windows 95/98, because
OS support plug-and-play.
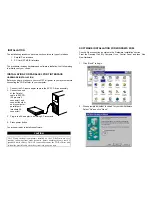
1. Connect the PCMCIA interface card to the CD ReWriter drive. Push
firmly until the CD-RW connector is seated, and then tighten the two
screws on the cable connector.
2. Place the CD drive in the horizontal position
3. Consult your computer’s documentation to locate the PCMCIA slot.
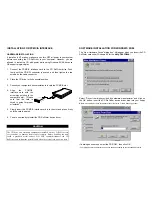
4. Align the PCMCIA
interface card with the
arrow sign pointing to the
computer’s slot. (Please
note that the card is
keyed to guide for proper
orientation.)
5. Slowly insert the PCMCIA interface card into the slot and press firmly
until the card is seated.
6. You are now ready to install the CD ReWriter device driver.
SOFTWARE INSTALLATION FOR WINDOWS 95/98
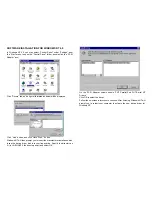
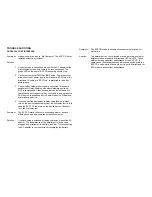
The “New Hardware Found” dialog box* will appear when you insert the CD
ReWriter card under Windows 95 for the
very first time.
Select “Driver from disk provided by hardware manufacturer” and click on
the OK button
.
Insert the CD ReWriter device driver disk into your floppy
drive.
(If the dialog box does not appear, please refer to the “Trouble Shooting” section.)
If a dialog box come up select the CD-ROM , then click OK.
* Your dialog box may be different from the one shown depending on your Windows 95 version
CAUTION
The CD drive and electronic components installed on the CD ReWriter are
very sensitive to damage from static electricity. Before handling the unit,
touch a grounded metal surface. DO NOT connect/disconnect the CD
ReWriter
unit
to/from the parallel cable when the system is in power-on state.


