background image


Getting Started 


 

Securely mount the LED Sound to Light Panel on a wall the appropriate wall fixings. 

 

Connect the round XLR connector from the Low Voltage transformer to the socket on the side of the unit. 

 

Connect the mains plug to a mains outlet socket and switch on the socket. 

 

The LED Sound to Light Panel is now ready to use. 

 

Press the mode select button to choose the program required. The mode number can be seen on the LED 

display. 

 

Adjust the sensitivity to suit a person’s voice/sound when using a sound activated mode. 

 

Adjust the speed control to increase/decrease the speed that the colours change when using the automatic 

modes. 


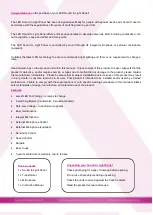
Please note: Only use the transformer supplied. Use of a different transformer may result in damage to the 

product and void the warranty. 

For warranty information please see separate warranty card supplied. 


Additional Notes 


An external microphone can be connected via the ¼ inch jack socket located on the front of the LED Sound to Light 

Panel. 


Summary of Contents for 48 00 92

Page 1: ...Interactive Sound to Light Panel 48 00 92 Product Manual ...

Page 2: ...please contact the manufacturer immediately Please be aware that improper installation and or misuse of this product may result in injury death or adverse reactions to its user This product is intended to be installed and or used by a trained professional Failure to comply with these precautions or with specific warnings elsewhere in this manual violates safety standards of design manufacture and ...

Page 3: ... The mode number can be seen on the LED display Adjust the sensitivity to suit a person s voice sound when using a sound activated mode Adjust the speed control to increase decrease the speed that the colours change when using the automatic modes Please note Only use the transformer supplied Use of a different transformer may result in damage to the product and void the warranty For warranty infor...

Page 4: ... appears on the Sound to Light Panel in a random manner 5 Sound to light the lights build up depending on the volume one light at a time The lights pause at the top then go back down and the lights cease to display unless a further sound is heard 6 Sound to light the light builds up depending on volume in numerous sections at a time The lights pause at the top then go back down and the lights ceas...

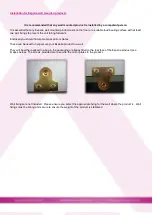
Page 5: ...nclosed you should find some brass mirrors plates These can be used to help secure your Experia product to a wall They will be either packed in a bag in the packaging or already fitted to the rear face of the Experia product see images below The screws provided are to secure the mirror plates to the product Wall fixings are not included Please ensure you select the appropriate fixing for the wall ...

Page 6: ...oting Q The LED Sound to Light Panel doesn t work A1 Is it switched on If so A2 Is it in the correct mode If so A3 Is the sensitivity increased if in sound activated mode If so A4 Is the speed increased if in automatic mode If so A5 Please contact us Technical Specifications Product code 48 00 92 Supply 240vAC 30mA 50 60Hz Load 9vAC 5A Max Dimensions 1050mm W x 135mm D x 650mm H Only use the power...

Page 7: ... and services please call us on Freephone 0800 612 6077 If you would like a FREE Sensory Brochure you can request one by telephone or visiting our website For more information on Experia Free 3D Room Designs or to schedule an onsite visit from our sales team then please request a visit by telephone email or by using the form on our website Support Contact Details For USA please email support exper...

Reviews: