background image

10. Cover over ejector
11. Cord clip
12. Wing nut
13. Cylinder containing blades for lawn 

aerating

14. Cylinder containing springs for moss 

removal

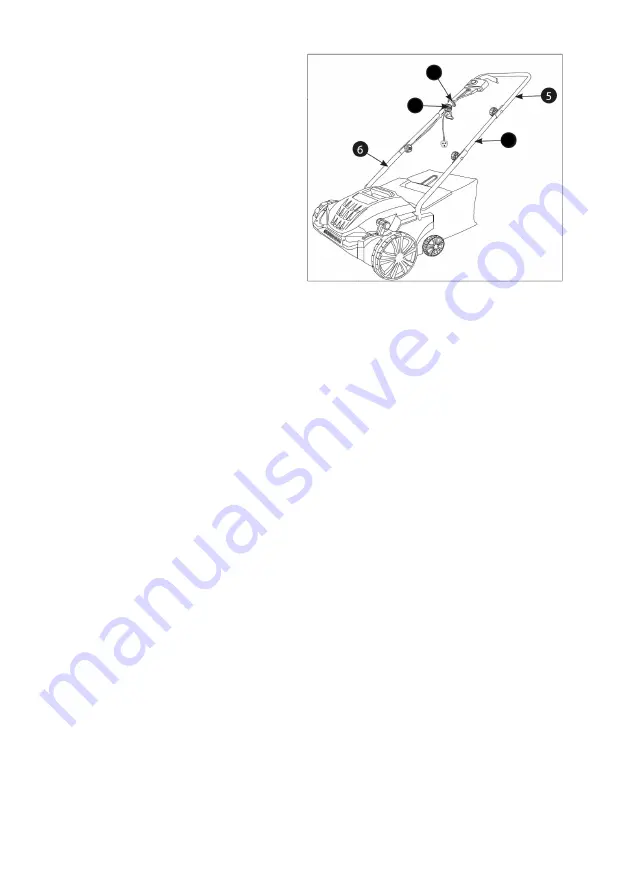
15. Middle section of handle

Assembling the machine 

Fitting the handle

Insert the bottom handle sections (6) into the holes at the rear of the machine’s upper 

section and screw them together using the screws provided.

Insert the middle handle sections (15) into the bottom handle sections (6) and screw 

them together with wing screws (12).

Attach the top handle section (5) to the middle handle sections (15) and screw them 

together with wing screws (12).

Secure the cord from the machine to the handle using cord clips (11).

Fitting the grass box

Open the cover over the ejector and fit the grass box using the hooks. Put the cover 

down on the grass box again.

Changing the cylinder

Unplug the machine. Move the cylinder to its lowest position to make it more acces-

sible. 

13

15

12

11

Summary of Contents for 613-400532

Page 1: ...BEDIENUNGSANLEITUNG INSTRUCTION MANUAL Rasenl fter reiniger Lawn aerator scarifier 613 400532 Manufacturer EXPO B rse GmbH Industriestr 12 D 49577 Ankum www expo boerse de...

Page 2: ...Sie Platz f r das Gras sodass sie einen gesunden und ppigen Rasen erhalten Indem Sie Ihren Rasen alle 4 6 Wochen l ften stimulieren Sie den Graswuchs und entfernen gleichzeitig Unkraut mit Oberfl che...

Page 3: ...k rperliche oder geistige Behinderungen haben unter der Voraus setzung benutzt werden dass sie beaufsichtigt werden oder im sicheren Gebrauch des Ger ts angeleitet wurden und die damit verbundenen Gef...

Page 4: ...itt von mindestens 1 0 mm und eine L nge von maximal 40 Meter hat Rollen Sie das Verl ngerungskabel vollst ndig aus Legen Sie das Verl ngerungskabel so aus dass Sie nicht versehentlich mit der Maschin...

Page 5: ...ie sie mit den mitgelieferten Schrauben fest Stecken Sie die mittleren Lenkerteile 15 in die unteren Lenkerteile 6 und schrauben Sie sie mit Fl gelschrauben 12 fest Stecken Sie das obere Lenkerteil 5...

Page 6: ...he Abbildung A Nehmen Sie die Zylinderhalterung aus dem Zylinder und montieren Sie sie auf den anderen Zylinder Siehe Abbildung B Setzen Sie den anderen Zylinder auf die Motorwelle und befestigen Sie...

Page 7: ...8 mm 1 mm 3 4 mm 5 mm 4 4 mm 13 mm Anschluss Machen Sie mit dem Verl ngerungskabel eine Schlinge und stecken Sie sie in die Kabelhalterung 4 Stecken Sie den Stecker des Verl ngerungskabels in die Str...

Page 8: ...ung und Wartung Entleeren Sie den Fangsack nach jedem Gebrauch oder sp testens wenn er halb voll ist Entfernen Sie Gras und Schmutzablagerungen unter der Maschine Wischen Sie die Teile der Maschine mi...

Page 9: ...hlfunktio nen aufgrund von Eingriffen und Reparaturen durch Dritte oder durch den Einbau von Nicht Originalteilen entstehen sind durch diese Garantie nicht abgedeckt Umweltgerechte Entsorgung Das Symb...

Page 10: ...lawn can be healthy and lush Aerating your lawn every 4 6 weeks stimulates grass growth and also removes any weeds with shallow roots The grass should be dry and a maximum of 4 cm high when you remove...

Page 11: ...ance in a safe manner and have thus understood the associated risks Never allow children to use the machine Keep the machine out of the reach of children Never leave the machine unattended while it is...

Page 12: ...ead Make sure not to run over the extension lead with the machine Always disconnect from the mains before adjusting the machine or changing the cylinder Main components 1 On off handle 2 Safety button...

Page 13: ...ided Insert the middle handle sections 15 into the bottom handle sections 6 and screw them together with wing screws 12 Attach the top handle section 5 to the middle handle sections 15 and screw them...

Page 14: ...holder from the cylinder and fit it to the other cylinder See figure B Insert the other cylinder to the mo tor shaft and secure the other end of the cylinder to the machine using the cylinder holder...

Page 15: ...emoval 1 12 mm 3 mm 2 8 mm 1 mm 3 4 mm 5 mm 4 4 mm 13 mm Connection Make a loop in the extension cord and place it firmly in the cord holder 4 Insert the extension cord plug in the power socket 3 on t...

Page 16: ...the cord Cleaning and maintenance Empty the collector after use or when it is half full at the latest Remove any grass deposits and dirt from under the machine Wipe the machine with a damp cloth and r...

Page 17: ...caused by unauthorised interven tion or repairs and faults caused by use of non original parts are not covered by the guarantee Correct disposal The symbol above and on the product means that the pro...

Reviews: