8
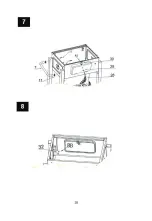
10. Attach the ash pan handle (20) and ash pan handle bases (3) to the ash pan (18)
using (MM) M5x16 screws.
11. Insert the ash pan into the firebox assembly. Screw the charcoal pan crank (31)
into the handle bar grip(32).
12. Attach the lower hinges (8) to the firebox rear panel (9) using (DD) M6x45
screws.
13. Attach bottle opener (12) to the leg (15) using (MM) M5x16 screws. Attach the
side shelf (27) to the grill left using (HH) M6 half screw thread bolts.
14. Attach the upper hinges (33) to the hood (1) using (AA) M6 flange nuts, (CC)
M6x35 screws. Install the hood handle (4) and hood handle base (3) to the
hood (1) using (LL) M5x28 screws.
15. Unscew the pre-assembled nut from the thermometer (2). Attach the thermom-
eter (2) to the hood (1), re-attach nut and tighten. Attach the air vent (34) to the
right outside of hood (1) using (AA) M6 flange nut,(EE) M6 washer and (BB)
M6x10 screws. Repeat for left side of hood.
16. Attach the hood (1) to the firebox assembly by inserting (FF) hinge pins
through the holes on the upper hinges (33) and lower hinges (8). You may need
to slightly lift up the hood (1) so that the holes on the hinges (8, 33) line up
properly. Insert the (GG) pin clips into the ends of the hinge pins (FF).
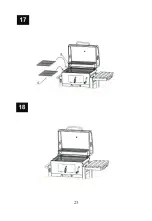
17. Insert the top part of the warming rack (5) into side of the hood (1). Place the
lower portion of warming rack (5) into the sides of the firebox assembly. Place
the cooking grids (6) into the firebox assembly.
18. The grill is now assembled.
Use
It is recommended that barbecue charcoal or briquettes be used, and that no more
than approximately 1.8 kg fuel be placed on the barbecue.
Light the barbecue. A barbecue starter is recommended. Do not cook before the fuel
has a coating of ash.
Cleaning
Clean the barbecue rack with a barbecue brush while still warm. To remove burnt-on
food, soak the rack in soapy water, and then scrub with a scouring pad or similar.
Rinse with water and apply cooking oil before using again.
Summary of Contents for 613-400574
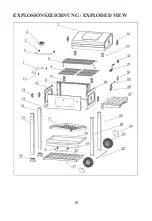
Page 10: ...10 EXPLOSIONSZEICHNUNG EXPLODED VIEW...
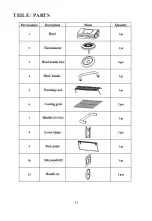
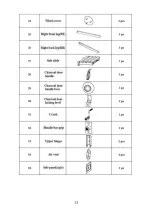
Page 11: ...11 TEILE PARTS...
Page 12: ...12...
Page 13: ...13...
Page 14: ...14...
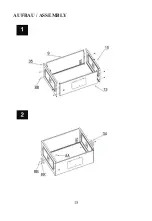
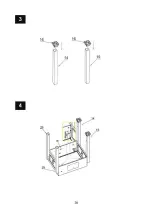
Page 15: ...15 AUFBAU ASSEMBLY...
Page 16: ...16...
Page 17: ...17...
Page 18: ...18...
Page 19: ...19...
Page 20: ...20...
Page 21: ...21...
Page 22: ...22...
Page 23: ...23...

