CARAT
10
INSTALLATION AND START UP
Water connection
Pressure and temperature
Starting the machine
The Installation of the machine to a water mains connection must be done by a qualified person.
Rinse around 20 liters of water from the main water supply before connecting the machine to the water
connection.
Connect the inlet hose that is assembled in the machine to the main water supply, which should have
a 3/8” male connection fitted with a shut-off valve, tighten it with a wrench.
Use safe drinking water with hardness between 5ºfH and 8ºfH (French hardness degrees). If the value
is below this limit, the presence of corrosion of hydraulic components is a possibility. If the value is
higher than this limit, the presence of lime in the boiler will increase. In both cases the operation of
the machine and coffee quality will be affected negatively.
If necessary, connect the machine to a water softener or remineraliser to reduce water hardness. Use
the flexible hose that is included in the accessory box of the machine.
Connect one end of the corrugated tube to the drain cup in the machine, connect the other to the
main drainage tube at the installation area.
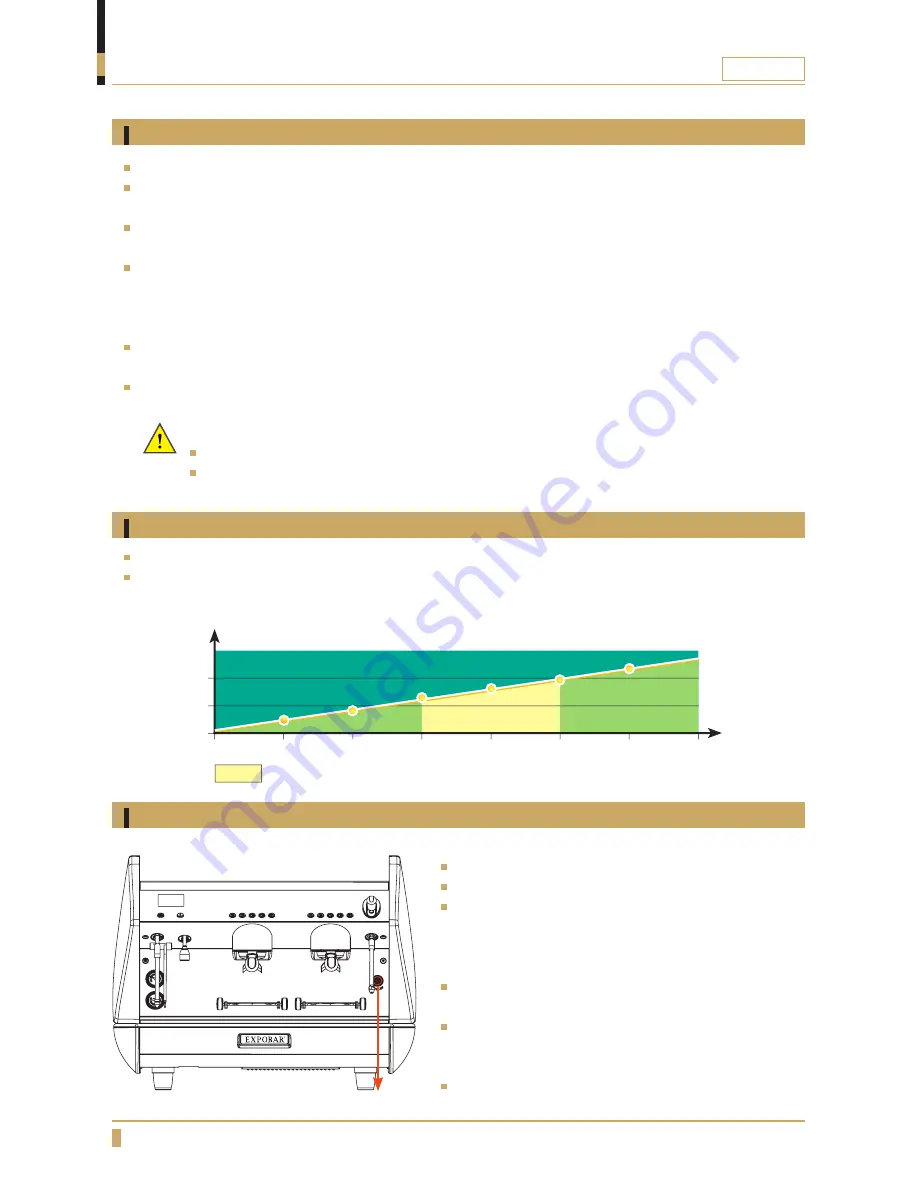
Boiler temperature and pressure are directly related (see Fig. 01).
Machine is fitted with a pressure gauge that will display the boiler pressure, if the machine is fitted
with a display it will also indicate boiler temperature.
Relationship between boiler pressure and temperature
Standard pressure and temperature
Open the external supply of water to the machine.
Turn on the main power switch.
Press a drink button at the control panel on each
group, wait until water comes out continuously from
each of them. This way the heat exchangers in the
machine will be correctly filled.
Open the steam tap to release the air trapped in the
boiler.
The red lamp indicates that the boiler is heating.
The lamp switches off when the machine reaches
operating temperature.
The machine is now ready to use.
0.7
110
115
120
125
0.8
0.9
1
1.1
1.2
Power switch
o
C
BAR
Important:
Only use the hoses supplied with the machine. Never reuse hoses.
Make sure that the drainage tube is not twisted and ensure that the entire tube is below the
level of the drain cup.
Fig. 01
Summary of Contents for CARAT 1GR
Page 1: ...CARAT TECHNICAL MANUAL TM_EN Part No 1764016_01 Date 150413 ...
Page 40: ...CARAT 40 WATER SYSTEM Machine with 1GR Cold water Hot water Drain waste water ...
Page 41: ...CARAT 41 WATER SYSTEM Machine with 2GR Cold water Hot water Drain waste water ...
Page 46: ...CARAT 46 6 EXPLODEDVIEW Rotary pump Drawing 2 3 9 7 8 4 1 5 10 11 ...
Page 48: ...CARAT 48 EXPLODEDVIEW Boiler 1GR Drawing 1 11 12 13 14 7 8 16 17 18 9 6 4 5 5 3 2 10 15 ...
Page 50: ...CARAT 50 EXPLODEDVIEW Boiler 2GR Drawing 13 15 14 14 16 11 3 4 6 7 5 8 9 10 12 1 2 17 18 12 ...
Page 59: ...CARAT 59 EXPLODEDVIEW Hot water outlet Drawing 1 2 3 4 5 6 7 11 12 8 9 10 ...
Page 61: ...CARAT 61 EXPLODEDVIEW Group head Drawing 1 7 15 14 13 2 8 3 9 4 16 11 5 12 6 10 ...
Page 63: ...CARAT 63 EXPLODEDVIEW Lower water system Drawing 6 7 8 9 10 11 12 3 4 2 13 5 1 ...


