background image

9


The polycarbonate sheets are to be mounted after the frame assembly is completed. First mount the side 

sheets, then the middle ones; it is required that the sheets are oriented in such a way that the bending direction 
follows the cell direction (

Figure 6

). Mount the sheets so that they overrun the end arcs (end-wall arcs) by at 

least 5 cm. The polycarbonate sheets are installed so that they overlap with each other along the long side. 

Carefully align the sheets and fix them with the screws, first along the bottom edge, and then along the 

arcs according to the drilled holes. 


Attention! 

Do not forget to remove the packing tape from the both sides of the sheets


Step 5. Greenhouse installation 
 

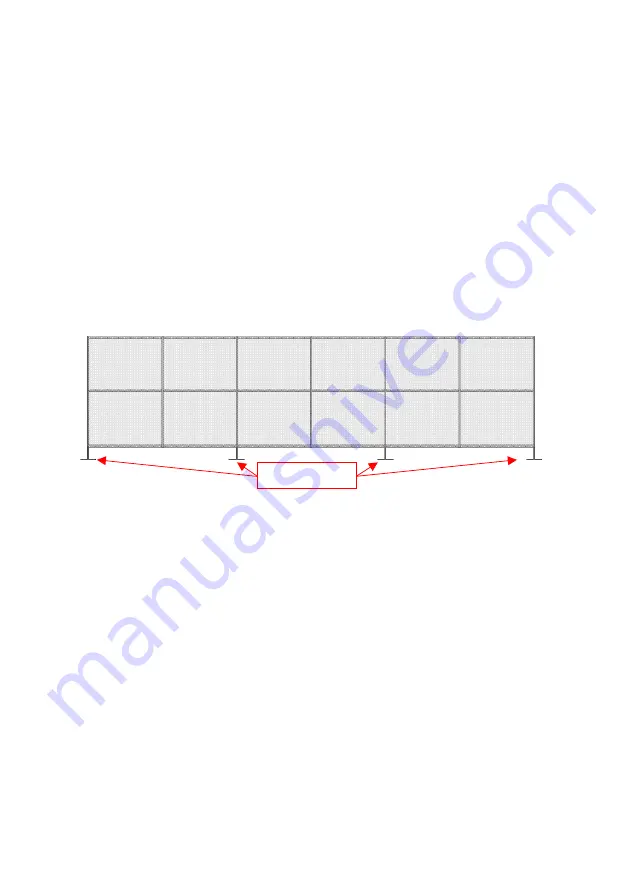
Before installation start, carefully level the greenhouse installation area. Insert the anchors into the arcs 

(into every second arc for the greenhouse with 1 m spacing, and into every third arc for the greenhouse with 0.67 
m spacing) and the end-walls from both sides 

(Figure 8)

.  


Attention! 

Make sure to fix the anchors to the arc with the screws with a pressure pad.


Make  the  ground  recesses  for  the  anchors  which  are  deep  enough  to  completely  accommodate  the 

anchors. Install the assembled greenhouse so that the bottom crossbar rows are levelled with the ground, and the 
legs and polycarbonate sheet edges are buried in the ground. Then fill the anchor recesses with ground and firm 
it. As an option, it is possible to use a wooden frame or a concrete foundation for the greenhouse installation. 


Figure 8 – Anchor installation 


Attention! 

The  greenhouse  has  a  high  windage  area.  Do  not  leave  an  assembled  greenhouse  not 

anchored to the ground.  


Attention! 

The “Garant Triumph sectional Modular arc” greenhouse has a specific shape, which has 

to be taken into account during foundation laying (Figure 9).  


Anchors 

Summary of Contents for ATLAS

Page 1: ...MANUAL ATLAS ...

Page 2: ...fixation to the ground using materials at hand such as metallic rods bars etc WARRANTY Warranty period for the greenhouse frame is 1 year from the purchase date The warranty covers any manufacturing and material defects The warranty does not cover damages caused by corrosion of the construction elements The warranty is terminated in the following cases failure to comply with the installation manua...

Page 3: ...8 154 170 186 11 Screws 4 2 16 mm for interconnecting the end wall parts for attaching latches hinges hooks and anchors to the greenhouse frame 96 98 100 102 104 12 Hooks for fixing the vent and the door in an open position 2 2 2 2 2 13 Anchors for anchoring the greenhouse to the ground 6 8 10 12 14 14 Cellular polycarbonate sheets 2100 6000 mm not included in the set and are to be purchased separ...

Page 4: ...the outer side of the greenhouse for attaching polycarbonate sheets The locations and amount of the screws are shown in Figures 1 and 2 Attention When assembling the end walls make sure that the punched holes are located on the same side for all elements The punched holes on the elements are used for subsequent attaching of the polycarbonate sheets which are to be mounted on one side of each end w...

Page 5: ...5 Figure 2 Types of element connections for the greenhouse frame end walls view from the inside of the greenhouse ...

Page 6: ... small teeth After finishing mounting the cellular polycarbonate sheets immediately remove the protection film from the sheet surfaces if present To avoid ingress of moisture dust and insects into the polycarbonate channels cells it is recommended to cover them by installing face sections not included in the set and are to be purchased separately First install the polycarbonate sheets on the green...

Page 7: ...ts along the door opening perimeter and between the door and the vent Attention The cuts along the door opening and between the door and the vent can be made only after fixing the polycarbonate sheets to the end walls and installing the hardware on top of them It is absolutely forbidden to fix to the door and vent and cut polycarbonate sheets separately from the side walls after subsequent mountin...

Page 8: ... are mounted under the arcs from the inner side of the greenhouse with the nut being screwed onto the bolt from the inner side too Figure 6 The cross bars are connected by attaching the end crossbars to the crossbars with connecting bends on one end Figure 6 Figure 6 The mutual arrangement of the arcs and the crossbars during assembly Figure 7 The mutual arrangement of the arcs and crossbars of th...

Page 9: ...the arcs into every second arc for the greenhouse with 1 m spacing and into every third arc for the greenhouse with 0 67 m spacing and the end walls from both sides Figure 8 Attention Make sure to fix the anchors to the arc with the screws with a pressure pad Make the ground recesses for the anchors which are deep enough to completely accommodate the anchors Install the assembled greenhouse so tha...

Page 10: ...riumph sectional Modular Arc greenhouse design the manufacturer reserves the right to change the design without prior notice The product is intended for private use and not for public commercial use Purchase data _______________________ Seller _____________________ Foundation ...

Reviews: