MO270-EU-EN-v2.1 11/12
7
Operation
Basic Operation for Pin Measurements
%
CAUTION
: The electrode measurement pins are extremely sharp, use care when handling this
instrument. Cover the pins with the protective cap when the instrument is not in use.
1.
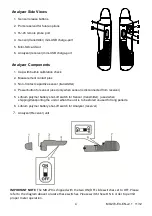
Remove the protective cap to expose the electrode pins.
2.
Press and hold the
key for 3 seconds to switch the analyzer ON.
3.
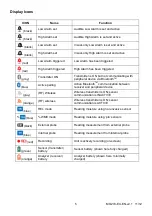
If the
icon is displayed, proceed as follows to switch to the
%
icon.
a)
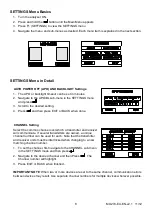
Press the MENU (F1) button and navigate to the WME/REL box.
b)
Press
to toggle WME and REL (select WME) and then press EXIT.
4.
Carefully
push the electrode pins a minimum of 0.07” (2mm) into the material under test.
Note that the pins should be inserted into wood perpendicular to the wood’s fiber structure.
For high moisture readings, several minutes may be required for readings to stabilize.
5.
Take readings in several locations on the material under test for the best representation of
the amount of moisture present.
6.
Read the measurement value on the display.
7.
Replace the protective cap when finished.
Using the Extender Probe Handle
The supplied telescoping handle can be used to extend the sensor into areas that are difficult or
unsafe to reach. Connect the sensor (transmitter) unit to the extender using the
extender’s
mounting screw and the mounting screw hole on the sensor. Note that extender handles of
various lengths are optionally available. Once connected, instructions for use match those
provided above in the
‘Basic Operation for Pin Measurements’ section and below in the ‘Basic
Operation for Pinless Measurements’ section.
Basic Operation for Pinless Measurements
1.
Press and hold the
key for three seconds to switch the analyzer ON.
2.
If the
%
icon is displayed, proceed as follows to switch to the
icon.
a) Press the MENU (F1) button and navigate to the WME/REL box.
b) Press
to toggle REL and WME (select REL) and then press EXIT.
3.
Press and hold the
key for three seconds to switch the analyzer OFF.
4.
Keep hands and other materials away from the rear sensor and then press and hold the
button to switch the analyzer ON. The analyzer will auto-zero during power-on.
5.
The pinless moisture detector is located at the rear of the instrument, just behind the display.
6.
Place the analyzer so that the sensor lies flat against the surface of the material under test.
7.
Take readings in several locations on the material for the best representation of the amount
of moisture present.
8.
Read the measurement values on the display.


