background image


13 


Chapter 11 Adjustment 


        Warning: Before adjusting portion of the machine. Cut the power first, and make 
adjustments after receiving instructions. 


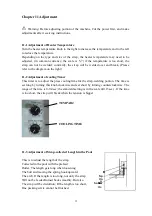
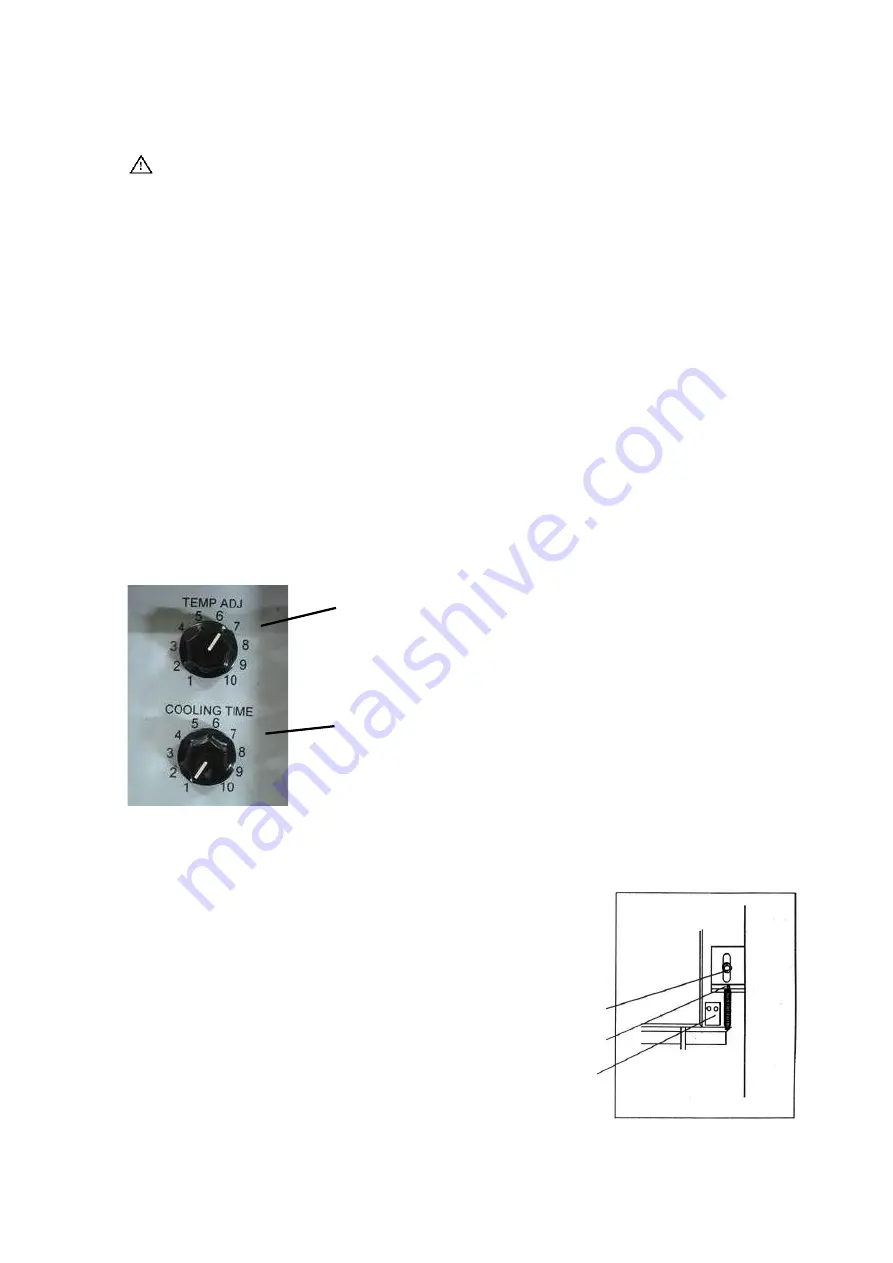
11-1 Adjustment of Heater Temperature   

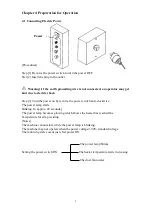
Turn the heater temperature knob to the right to increase the temperature and to the left 
to reduce the temperature. 
Depending  on  the  type  and  size  of  the  strap,  the  heater  temperature  may  need  to  be 
adjusted,  (in  common  currency,  the  scale  is  5-7)  if  the  temperature  is  too  short,  the 
strap  can  not  be  welded;  contrarily,  the  strap  will  be  welded  over  and  break,  (Please 
refer to the diagram on the right) 
 

11-2 Adjustment of cooling Timer     

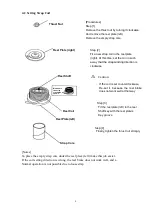
This timer is to adjust the press cooling time for the strap-welding portion. The time is 
set long by turning this knob clockwise and set short by turning counterclockwise. The 
range of the time is 0-0.4sec; the standard setting is in the scale 4(0.15sec.). If the time 
is too short, the strap will break when the tension is bigger 


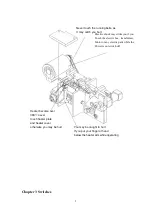
11-3 Adjustment of Strap-collected Length in the Pool 

 
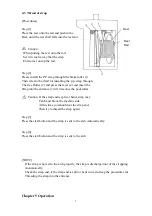
This is to adjust the length of the strap 
Collected in the pool with the prefeed 
Roller. The length gets long when loosening 
The bolt and moving the spring hook upward. 
The arch. If the length is too long, not only the strap 
Will not be feeded/turned back smoothly. But also 
The strap will be distortion; If the length is too short, 
One packing circle cannot be finished. 


B
o
lt 

Sp

rin

hook


Sw
itc

TEMP ADJ 

COOLING TIME 

Summary of Contents for EXS-125

Page 1: ...1 EXS 125 AUTOMATIC STRAP MACHINE OPERATION MAINTENANCE MANUAL...

Page 2: ...reaches about 380 don t touch it Don t change parts freeform Cut off the power supply while machine is stopping or getting maintenance Don t wash the machine with water Don t touch any swiveling part...

Page 3: ...ches 3 4 Chapter 4 Preparation For Operation 5 7 Chapter 5 Operation 8 Chapter 6 Stop Operation 9 Chapter 7 At Coil Completion 9 Chapter 8 Shutting Down 10 Chapter 9 Steps to Clean Strap Power 11 12 C...

Page 4: ...Tool 1 set To be used for simple maintenance cleaning etc Warning Do not use the attached tools for modifying the machine Warning Do not attempt maintenance or repair of the machine until power sourc...

Page 5: ...rike you if you Touch the electric box transformer Motor or any electric parts while the Power is not switch off Heater become over 380 never touch heater plate and heater cover otherwise you may be h...

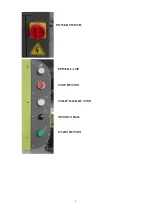
Page 6: ...3 POWER SWITCH POWER LAMP STOP BUTTON STRAP BACK BUTTON TENSION DIAL START BUTTON...

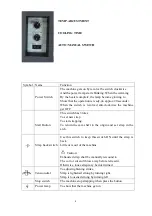
Page 7: ...es To set new strap To start strapping To return the cam shaft to the origin and set strap in the arch Strap back switch Use this switch to keep this switch ON until the strap is back Little or is out...

Page 8: ...revolve the power switch anti clockwise The power lamp starts blinking In approx 20 seconds The power lamp becomes glowing which shows the heater has reached the Temperature for strap welding Notes T...

Page 9: ...l Coil Reel Plate left Strap Core Procedures Step 1 Remove the thrust nut by turning it clockwise And remove the reel plate left Remove the empty strap core Step 2 Fit a new strap coil in the reel pla...

Page 10: ...into the entrance 3 till it reaches the pool roller Caution If the strap end is split or bend strap may Catch and block the machine side At this time you should cut the strap end Then try to thread th...

Page 11: ...es a small sealed loop and cuts the loop off automatically The operator must remove the loop and depress the start button Automatic Strap Discharge System When strapping cannot make by depressing the...

Page 12: ...ecomes impossible the remaining strap is discharge and the machine stops in approx 10 seconds automatically Remove the automatically discharge strap and set a new strap conducting procedures in 4 2 Ch...

Page 13: ...ut dust ect Stick to especially the sealer ect For details contact with us or your dealer Remarks This machine is a non oiling type you don t have to make daily oiling Chapter 9 Steps to Clean Strap P...

Page 14: ...11 Figure 2 2 Back Feeding Unit Use Air Compressor to clean strap powder inside areas of A and B completely Cover A B A B S1 S2...

Page 15: ...tools and devices for maintenance and repair 4 Repair and maintenance should be conducted only by well trained service persons Other Notes 1 Do not touch the heater and surrounding area before they ar...

Page 16: ...g Timer This timer is to adjust the press cooling time for the strap welding portion The time is set long by turning this knob clockwise and set short by turning counterclockwise The range of the time...

Page 17: ...nsion become stronger when the knob is rotate clockwise and it become weaker when the knob is rotated anti clockwise Please align the red mark of the Spring Hook to the required position Note Setting...

Page 18: ...n pressed down Set the power switch to OFF And restore the stop Button again C Overload to motor occurred The circuit protector for motor is operating Cut strap or strap dust block the feed roller to...

Page 19: ...ke done not work well and the strap tangles Adjust O C The strap or feed roller is slipping due to oil contamination Clean O D Strap collected length in the pool is not enough Adjust Adjust the actuat...

Page 20: ...roper At the time of feed reversing the return roller and feed roller are operating at she same time which results in strap nipping and overload the sealer motor Inspect Trouble with feed reversing an...

Page 21: ...shes the strap Adjust Shake the heater plate right and left and fit O O C Heater temperature is low Raise the temperature Setting knob VR2 slightly O D Melt strap dust sticks to the heater Clean O E T...

Reviews: