background image

69

68

EN

EN

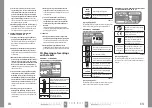
c)  Connect the charger to an el. power source.


y

On charger 

Extol® Premium 8891893

 (model 

with a charging current of 2.4 A), the charging 
process is indicated by a green flashing diode with 
a red lit diode, whilst a fully charged battery is indi-
cated by only a green lit indicator light.  
On charger 

Extol® Premium 8891892

 (model 

with a charging current of 4 A) the charging process 
is indicated only by a red lit LED indicator light and 
the fully charged process by only a green lit LED 
indicator light. The battery charge level can be seen 
by the number of lit LED indicator lights on the 
battery, which are lit while the battery is charging. 
The manufacturer reserves the right to change the 
above-described indication of the charging process 
/ charged state with respect to the possible changes 
in the manufacturing process.


y

The charger will automatically stop charging when 
the battery is fully charged. Battery overcharging 
cannot occur. 

APPROXIMATE BATTERY CHARGING TIMES

Battery 


SHARE 20 V

4 A charger 

Extol® 8891892

2.4 A charger

Extol® 8891893

8 000

 mAh

120 min.

200 min.

6 000

 mAh

90 min.

150 min.

5 000

 mAh

65 min.

110 min.

4 000

 mAh

60 min.

100 min.

2 000

 mAh

30 min.

50 min.

Battery 


SHARE 20 V

2

×

 3.5 A charger Extol® 8891894 


(for 2 batteries)

4

×

 3.5 A charger Extol® 8891895 


(for 4 batteries)

8 000

 mAh

140 min.

6 000

 mAh

105 min.

5 000

 mAh

70 min.

4 000

 mAh

60 min.

2 000

 mAh

35 min.

Table 3

d)  After charging, first disconnect the charger 

from the el. power source

 and then, after pressing 

and holding down the button on the battery, slide the 
battery out of the grooves in the charger. 

V. Preparing  

the hammer drill for use

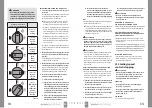
INSTALLING THE FRONT HANDLE  

AND DEPTH LIMIT STOP


ATTENTION


y

Never use the hammer drill without the front handle 
installed. Loss of control over the tool may cause injuries.

1.  Turn the handle to loosen the collar and seat 

it into the grooves on the neck of the hammer 

drill (see fig. 2A). 


y

Prior to securing it in place, turn the handle to such 
a position (fig. 2B) that the hammer drill is held 
firmly, safely and comfortably during work.

2.  Properly secure the handle in the required 

position by turning it (fig. 2A). 


y

For the purpose of measuring the depth of the 
drilled hole, it is possible, while holding down the 
lock button (fig. 1, position 3), to slide the depth 
limit stop into the hole in the handle and to set it to 
the required drilling depth. 
The distance between the end of the depth gauge 
and the end of the drill bit defines the depth (d) of 
the drill hole, see fig. 3. To lock the depth limit stop 
in place, release the depth limit stop lock button 
(fig. 1, position 3). Check that the depth limit stop is 
securely locked in position.

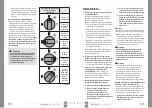
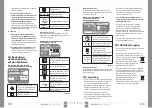
SETTING THE WORK MODE


y

Select the required work mode, i.e. impact drilling, 
impactless drilling, chiselling mode or chisel orientation 
adjustment function (Vario Lock system) by turning 
the work mode selector dial (fig. 1, position 9) to the 
symbol for the respective work mode as shown in table 
4. To turn the work mode selector dial, it is necessary 
to first unlock it by pressing the button on the selector 
dial (fig. 1, position 10). 

The selected work mode is 

set when the work mode selector dial clicks into 

the locked position of the selected work mode.


WARNING 


y

Vibration and noise emissions during actual use of the 
power tool may differ from the declared values depen-
ding on the method in which the tool is used, particu-
larly the type of workpiece that is being worked on.


y

It is necessary to determine the safety measurement for 
the protection of the operator, which is based on the 
assessment of exposure under real operating conditi-
ons (to include all the parts of the work cycle such as 
time for which the power tool is turned off and when 
running idle outside the time that it is in operation).

III. Parts and  

control elements

Fig. 1, position-description

1)  Drill bit

2)  Keyless chuck head

3)  Drill depth setting button via depth limit stop

4)  Trigger switch

5)  Rotation direction toggle button  

in drill mode / for locking the trigger switch

6) Handle

7) Battery

8)  Front handle

9)  Work mode selector dial

10) Work mode selector dial release button  

for setting the work mode

11)  Depth limit stop


WARNING


y

Prior to preparing the power tool for use, carefully 
read the entire user‘s manual and keep it with the 
product so that the user can become acquainted with 
it. If you lend or sell the product to somebody, include 
this user‘s manual with it. Prevent this user‘s manual 
from being damaged. The manufacturer takes no 
responsibility for damages or injuries arising from use 
that is in contradiction to this user‘s manual. Before 
using this power tool, first acquaint yourself with all 

the control elements and parts as well as how to turn 
it off immediately in the event of a dangerous situation 
arising. Before using, first check that all parts are firmly 
attached and check that no part of the power tool, such 
as for example safety protective elements, is damaged 
or incorrectly installed, or missing. Likewise, check 
the protective cover and DC connectors of the battery 
and the charger, and also check that the power cord 
or plug of the charger is not damaged. Do not use the 
power tool, battery, charger with damaged or missing 
parts and have this repaired or replaced at an autho-
rised service centre for the Extol® brand - see chapter 
Servicing and maintenance, or the website address at 
the introduction to this user‘s manual.

IV. Charging the battery


y

To check the battery power level, press the button on 
the battery and based on the number of lit diodes and 
the expected duration of operation of the hammer drill, 
charge the battery if necessary. If the battery is fully char-
ged, all the LED diodes are lit. The battery can be charged 
from any charge level without reducing its capacity. 


ATTENTION


y

Only the batteries specified in table 1 may be used 
for powering the hammer drill and they may only be 
charged using the specified charger. Using different 
chargers could result in a fire or explosion as a result of 
inappropriate charging parameters. 


ATTENTION


y

Charge the battery at an ambient temperature range 
of 10°C-40°C.

a)  First insert the battery into the grooves of the 

supplied charger.

b)  Before connecting the charger to the power sour

-

ce, check that the voltage in the power socket 

corresponds to the range 220-240 V~50 Hz and 

that the charger does not have a damaged power 

cord (e.g. insulation), cover, charger connectors, 

etc. Likewise, check the condition of the battery.


WARNING


y

If the charger or battery is damaged, do not use 
it and have it replaced with an original in perfect 
working order from the manufacturer. 

Summary of Contents for 8791816

Page 1: ...us v s s f r kalap cs SHARE 20V HU Akku Mei el und Bohrhammer SHARE 20V DE Cordless Rotary Hammer SHARE 20V EN P vodn n vod k pou it Preklad p vodn ho n vodu na pou itie Az eredeti haszn lati utas t s...

Page 2: ...3 2 1 8 10 9 11 3 2 6 7 4 5 Obr 1 1 bra Abb 1 Fig 1 Obr 2B 2B bra Abb 2B Fig 2B Obr 2A 2A bra Abb 2A Fig 2A h Obr 3 3 bra Abb 3 Fig 3 2 1 Obr 4 4 bra Abb 4 Fig 4 Obr 5 5 bra Abb 5 Fig 5...

Page 3: ...n do zdiva kamene betonu apod a pro vrt n bez p klepu do kovu d eva um l hmoty atd D ky pneumatick mu p klepov mu syst mu je kladivo schopno vrtat mnohem rychleji ne p i vrt n s p klepem s pou it m p...

Page 4: ...cen n stroj SDS plus umo uje rychl bezn strojov uchycen a v m nu n stroj r zn ch zna ek na trhu a tak pou vat v t n stroje pro n ro n j pr ce 9 9 Motor a baterie maj elektronickou ochranu proti p et e...

Page 5: ...im pr ce lze p enastavit pouze pokud se up nac hlava neot V STRAHA y y Emise vibrac a hluku b hem skute n ho pou v n n ad se m e li it od deklarovan ch hodnot v z vislos ti na zp sobu jak m se n ad po...

Page 6: ...t en prove te v dy pokud kladivo nepou v te VLO EN BATERIE y y Do p slu n ho m sta kladiva obr 1 pozice 7 zasu te baterii aby do lo k jej mu zaji t n doprov zen m sly i teln m zacvaknut m VI Zapnut re...

Page 7: ...hra te p ed n razy a p dy a zamezte vnik nut vody do nab je ky VII Zp sob pr ce y y P ed zapo et m pr ce se p esv d te zda v sekan m vrtan m materi lu nejsou p tomna rozvodn veden nap elekt iny vody p...

Page 8: ...oupravapr v pou v na chra tejip edstykemsjin mikovov mip ed m tyjakojsoukancel sk sponky mince kl e h eb ky rouby nebojin mal kovov p edm ty kter mohouzp sobitspojen BEZPE NOSTN POKYNY PRO BATERII y y...

Page 9: ...o to kupuj c je prod vaj c povinen kupuj c mu poskytnout z ru n podm nky pr va z vadn ho pln n v p semn form dle z kona Z RU N A POZ RU N SERVIS Pro uplatn n pr va na z ru n opravu zbo se obra te na o...

Page 10: ...ohl en o shod P edm t prohl en model identifikace v robku Extol Industrial 8791816 Sekac a vrtac kladivo aku SHARE 20 V varianta s bateri a nab je kou Extol Industrial 8791817 Sekac a vrtac kladivo ak...

Page 11: ...SDS plus umo uje r chle bezn strojov uchytenie a v menu n strojov r znych zna iek na trhu a takisto pou va v ie n stroje na n ro nej ie pr ce 9 9 Motor a bat ria maj elektronick ochranu proti pre a e...

Page 12: ...po as skuto n ho pou vania n radia sa m e l i od deklarovan ch hodn t v z vis losti od sp sobu ak m sa n radie pou va najm ak druh obrobku sa opracov va y y Je nutn ur i bezpe nostn merania na ochran...

Page 13: ...poz cia 7 zasu te bat riu aby do lo k jej zaisteniu sprev dzan mu po u te n m zacvaknut m VI Zapnutie regul cia ot ok vypnutie UPOZORNENIE y y Pred uveden m kladiva do prev dzky v dy skontrolujte i ne...

Page 14: ...red za at m pr ce sa presved te i v sekanom v ta nom materi li nie s pr tomn rozvodn vedenia napr elektriny vody plynu pary a pod preto e po koden m t chto veden m e d js k razu v buchu a al m hmotn m...

Page 15: ...ost ne t ch pre ktor bolo ur en m e vies k nebezpe n m situ ci m h Rukov te a povrchy na uchopenie je treba udr iava such ist a bez mastnoty myk av rukov te a povrchy na uchopenie neumo uj v neo ak va...

Page 16: ...aktubat riesdruh m Skratovaniekon taktovbat riem esp sobi pop leninyalebopo iar d Pri nespr vnom pou van m u z bat rie unika tekutiny vyvarujte sa kontaktu s nimi Ak d jde k n hodn mu styku s t mito t...

Page 17: ...m stroja z neho odoberte bat riu y y Bat riu chr te pred da om mrazom vysokou vlhko s ou teplotami nad 50 C pred mechanick m po kode n m napr p dom a nikdy ju neotv rajte nespa ujte Bat riu skladujte...

Page 18: ...BEN SHARE20Vakkumul tor T pussz m rend sz m SHARE 20 V akkumul tort lt T pussz m rend sz m Akkumul tor8000mAh Extol 8891886 4A es akkumul tort lt Extol 8891892 Akkumul tor6000mAh Extol 8891885 2 3 5A...

Page 19: ...LED vil g t Az akkumul tort b rmilyen t lt tts gi llapotb l fel lehet t lteni an lk l hogy a kapacit sa cs kkenne FIGYELMEZTET S y y Az akkus f r kalap cs m k dtet s hez csak az 1 t bl zatban tal lhat...

Page 20: ...LED jelzi ki Teljes felt lt s ut n a LED sz ne z ldre v lt t Az akkumul tor t l t tts gi llapot t az akkumul toron tal lhat LED di d k vil g t sa jelzi ki Az akkumul tor t lt s nek a LED es kijelz se...

Page 21: ...y y Abont kalap csk ls burkolat nakatiszt t s hozhaszn ljon mosogat szeresmelegv zbem rtott sj lkifacsartpuha ruh t gyeljenarra hogyav zneker lj naf r g pbe y y A tiszt t shoz ne haszn ljon karcol sz...

Page 22: ...kal mas hosszabb t t haszn ljon az elektromos k ziszersz mhoz A szabadt ri haszn latra k sz lt hosszabb t alkalmaz s val cs kkentheti az ram t s kock zat t IX Biztons gi utas t sok a f r kalap cs hasz...

Page 23: ...RCD haszn lata cs kkenti az ram t s kock zat t Az ram v d kapcsol RCD kifejez ssel azonos jelent s a hiba ram v d kapcsol GFCI vagy a f ldz rlat megszak t ELCB is 3 SZEM LYI BIZTONS G a Az elektromos...

Page 24: ...GARANCI LIS ID A mindenkori rv nyes vonatkoz jogszab lyok t rv ny ek rendelkez seivel sszhangban a Madal Bal Kft az n ltal megv s rolt term kre a j t ll si jegyen felt ntetett garanciaid t ad A term...

Page 25: ...tkozat t rgya modell vagy t pus term kazonos t Extol Industrial 8791816 Akkus f r kalap cs s v s SHARE 20 V akkumul torral s akkumul tort lt vel Extol Industrial 8791817 Akkus Akkus f r kalap cs s v s...

Page 26: ...e f r anspruchsvollere Arbeiten 9 9 Motor und Batterie verf gen ber einen elektronischen berlastungsschutz der die Stromversorgung im Falle einer berlastung unterbricht 9 9 Die Umdrehungszahl und oder...

Page 27: ...erkzeug k nnen sich von den deklarierten Werten in Abh ngigkeit von der Art unterscheiden wie das Werkzeug benutzt wird vor allem welches Werkst ck bearbeitet wird y y Es sind Sicherheitsmessungen zum...

Page 28: ...nutzt wird und ber einen SDS Schaft verf gt oder auch einen Bittr ger sind nicht Bestandteil der Lieferung siehe Abb 5 HINWEIS y y Bei der Anwendung vom Spannkopf mit SDS Schaft oder einem Bittr ger z...

Page 29: ...finden Sie unter der in der Einleitung die ser Gebrauchsanweisung angef hrten Internetadresse IX Sicherheitshinweise f r Hammer 1 Sicherheitsanweisungen f r alle Arbeitst tigkeiten a Benutzen Sie ein...

Page 30: ...hr nkt die Unfallgefahr durch Strom ein c Vor der Verwendung des Werkzeugs muss man sich ausreichend abst tzen Dieses Werkzeug erzeugt ein hohes Ausgangsdrehmoment und ohne ordnungsgem e Abst tzung ge...

Page 31: ...d rfen keiner berm igen Temperatur oder gar Feuer ausgesetzt werden Das Aussetzen von Feuer f Sofern Elektrowerkzeug in feuchten R umlichkeiten benutzt wird ist es n tig die Einspeisung durch einen St...

Page 32: ...Recycling bei entsprechenden Sammelstellen abgegeben werden weil sie umweltgef hliche Stoffe enthalten y y Vor der Entsorgung des Akku Ger t muss die Batterie aus dem Ger t entfernt werden Diese darf...

Page 33: ...kku Mei el und Bohrhammer SHARE 20 V Variante mit Akku und mit Ladeger t Extol Industrial 8791817 Akku Mei el und Bohrhammer SHARE 20 V Variante ohne Akku und ohne Ladeger t Hersteller Madal Bal a s B...

Page 34: ...nd also to use larger work tools for more demanding work 9 9 The motor and the battery have electronic protection against overloading which disco nnects the power supply when excessive load is detecte...

Page 35: ...the selected work mode WARNING y y Vibration and noise emissions during actual use of the power tool may differ from the declared values depen ding on the method in which the tool is used particu larl...

Page 36: ...the hammer drill fig 1 position 7 so that it locks into position with an audible click VI Starting speed control stopping ATTENTION y y Prior to starting the hammer drill always check that it shows n...

Page 37: ...prevents them from safely using the appli VII Method of work y y Before starting work make sure that there are no utility lines e g electrical water gas steam etc in the chi selled drilled material si...

Page 38: ...maintained and sharpe ned cutting power tools are less likely to get stuck on material or to jam and they are also easier to control ance without supervision or instruction Children must not play wit...

Page 39: ...ol charge only using the char ger specified by the manufacturer A charger that may be suitable for one type of battery pack may lead to a fire hazard if used with a different battery pack b Only use t...

Page 40: ...Store the power tool in a safe dry location that is out of reach of children and protect it against mechanical damage direct sunlight radiant heat sources frost high humidity and ingression of water...

Reviews: