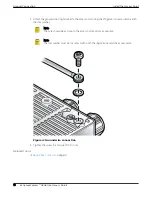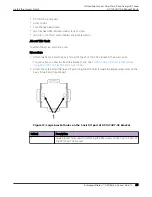
5. Using four M6 hex-head screws, attach the KT-150173-01 extension arm to a flat surface.
Tip
The best practice is to use screw-in anchors with the M6 screws on a wood surface, and
concrete anchors on a concrete surface.
Install the Access Point On a Flat Surface Using the KT-150173-01 Extension Arm
Before You Begin
The KT-150173-01 extension arm is used to install the access point on a flat surface, away from any
obstruction and to get a stronger antenna signal.
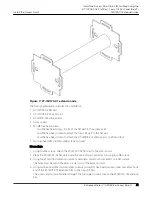
The following hardware is required:
•
KT-150173-01 extension arm
•
Eight M6 hex-head screws
◦
Four M6 hex-head screws to attach one end of the extension arm to the access point
◦
Four M6 hex-head screws to attach the other end of the extension arm to the wall
•
Access point
Procedure
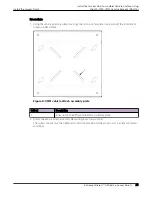
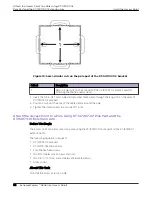
1. Using the KT-150173-01 extension arm as a template, mark and drill four hole centers on a flat
surface.
The holes must be within the semi-circular cuts of the extension arm.
2. Using four M6 hex-head screws, attach one end of the KT-150173-01 extension arm to the access
point.
3. Using four M6 hex-head screws, attach the other end of the KT-150173-01 extension arm to the wall.
Tip
The best practice is to use screw-in anchors with the M6 screws on a wood surface, and
concrete anchors on a concrete surface.
Install the Access Point on a Flat Surface Using the MBO-ART02 Articulating
Mounting Bracket
Before You Begin
The following hardware is required:
•
MBO-ART02 articulating mounting bracket
•
Access point
Install the Access Point On a Flat Surface Using the
KT-150173-01 Extension Arm
Install the Access Point
22
ExtremeWireless™ AP460i/e Access Points


