background image


c. If the belt is still not at centre, repeat the above steps until the running belt is on centre. 

C). 

After the belt is centered, increase the speed to 16kph (or highest speed) and verify that it is running 

smoothly. Repeat the above steps if it is necessary. 

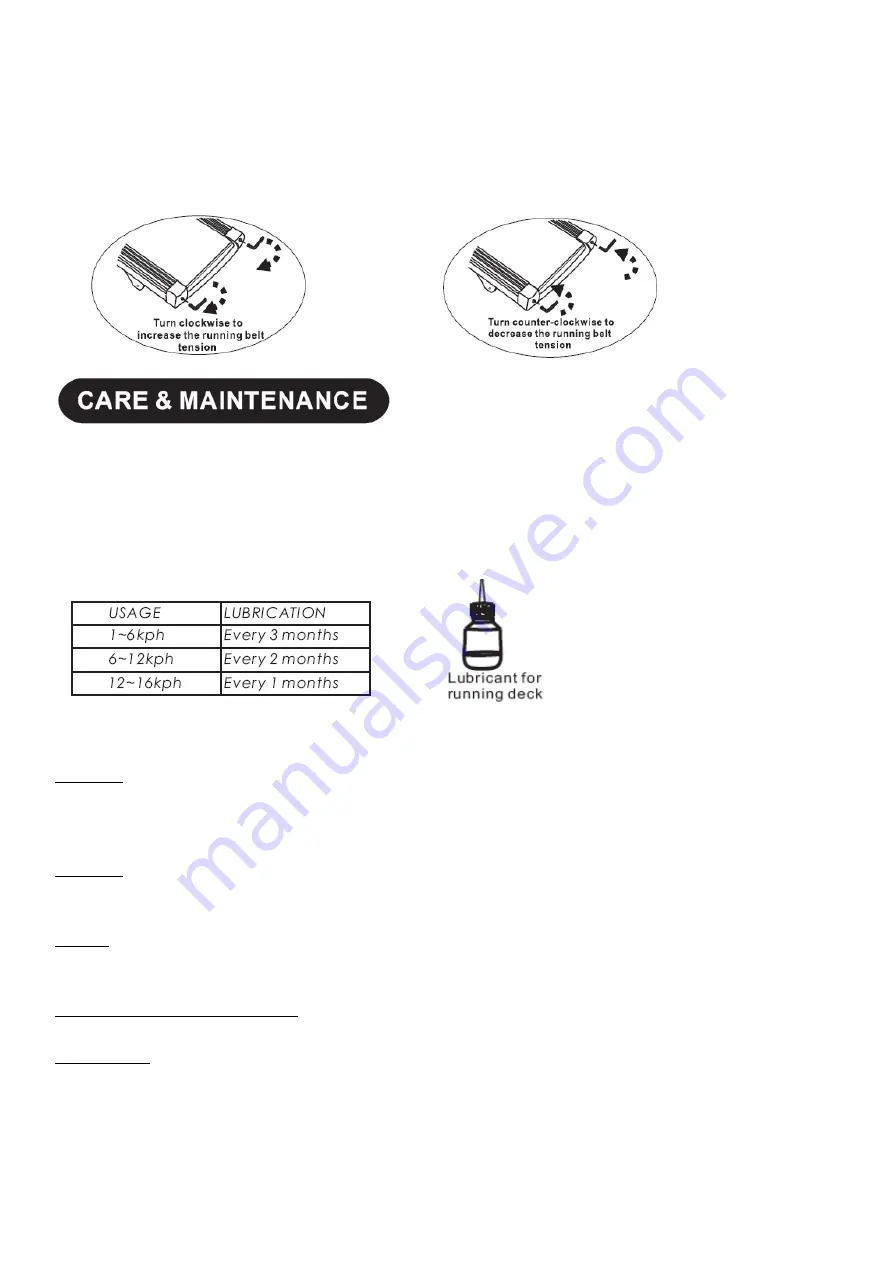
If the above procedure is unsuccessful in resolving the off-centre, you may need to increase the belt 

tension. 


WARNING!: 

To prevent electrical shock, be certain the treadmill is turned off and unplugged before cleaning or routine 

maintenance. 

RUNNING BELT AND RUNNING DECK LUBRICATION 

For maximum treadmill life, this treadmill needs a routine lubrication as part of a general maintenance for the machine. The routine 

maintenance procedure will prevent premature wear of the running belt, running deck and drive motor system. The recommended 

lubrication schedule as: 


This schedule is the recommended application for a single user, up to 20~30 minutes per time. It should be 3~4 times per week. For 

lubrication, you can contact your dealer. 

CLEANING 

Perspiration should be wiped from the console and treadmill surface after your workout. 

You should wipe down your treadmill once a week with a water dampened, soft cloth. Be careful not get excessive moisture on the 

display panel as this might cause an electrical hazard or electronics to fail. 

STORAGE 

Store your treadmill in a clean and dry environment. Ensure the master power switch is off and is un-unplugged from the electrical 

wall outlet. 

MOVING 

This treadmill has been designed and equipped with wheels for easy mobility. Before moving, ensure the master power switch is in 

the off position and the power cord is unplugged from the electrical outlet. 

FOR CONSUMER/HOME USE ONLY!! 

This treadmill is designed for home use only. Do not use for light institutional or commercial. 

LUBRICATION 

It is important to take good care of your treadmill deck (the walking surface underneath the belt).A good silicone lubrication will also 

improve the performance of your treadmill. 

NOTE: 

Use the silicone that is supplied with the treadmill. Additional silicone lubricant can be purchased from your retail store. 

WARNING: STOP 

the treadmill and remove the safety key before lubricating the running deck. 

Summary of Contents for ES660B

Page 1: ...ES660B USER S MANUAL V 01 17 SZ ...

Page 2: ...ounding provides a patch of least resistance for electric current to reduce the risk of electric shock This product is equipped with a cord having an equipment grounding conductor and a grounding plug The plug must be put into an appropriate outlet that is properly installed and grounded in accordance with all local codes and ordinances DANGER Improper connection of the equipment grounding conduct...

Page 3: ...t modify the treadmill in any way TARGET HEART RATE ZONE You do not want to workout at your maximum heart rate The recommended Heart Rate Zone is a percentage of your maximum heart rate It is between 60 and 75 of your maximum heart rate Lower limit of Target Heart Rate Zone Maximum Heart Rate X 0 6 Upper limit of Target Heart Rate Zone Maximum Heart Rate X 0 75 This is recommended by American Hear...

Page 4: ...tain 2 3 minutes of steady rhythmic exercise then check your heart rate BEGINNER TREADMILL PROGRAM EXERTION LEVEL WEEK 1 Easy WEEK 2 Easy WEEK 3 Moderate WEEK 4 Moderate WEEK 5 Moderate WEEK 6 Slightly higher or slightly lower WEEK 7 Add interval training DURATION 10 16 minutes 14 20 minutes 18 24 minutes 22 28 minutes 20 minutes 3 minutes at moderate exertion with 3 minutes at higher exertion for...

Page 5: ...quantity number name unit quantity 1 Meter up cover PCS 1 26 Rear roller PCS 1 2 Loudspeaker cover PCS 2 27 End cover left PCS 1 3 PCB board PCS 1 28 End cover right PCS 1 4 Console frame PCS 1 29 Shock pad PCS 4 5 Mast right PCS 1 30 Running board PCS 2 6 Mast left PCS 1 31 Running belt PCS 1 7 Motor PCS 1 32 Side rein SET 2 8 Drive belt PCS 1 33 Motor cover PCS 1 9 Front roller PCS 1 34 Handle p...

Page 6: ...18 Power switch PCS 1 43 19 Incline motor PCS 1 44 20 Controller PCS 1 45 21 Overload protector PCS 1 46 22 Air shock PCS 1 47 23 Cushion PCS 4 48 24 Frame PCS 1 49 25 Frame move wheels PCS 2 50 ...

Page 7: ......

Page 8: ...Motorized Treadmill Installing Sketch Map ...

Page 9: ...torized Treadmill Installing Sketch Map washerφ8 screw M8x15 washerφ8 screw M8x15 screw M8x15 screw M8x15 washerφ8 screw M8x15 screw M8x15 washerφ8 screw M8x80 screw M8x80 nut M8 screw ST4x15 screw ST4x15 ...

Page 10: ... mode 30 minutes 1 2 Can set time countdown distance countdown and calorie countdown workout modes 1 3 Speed 1 16 km h 1 4 Incline 0 15 1 5 Each 7 fast keys of speed and incline 1 6 Hear rate handle function 1 7 MP3 function 1 8 Fan function II Keypad operation instruction ...

Page 11: ...stance countdown setting mode press ENTER key enter calorie countdown setting mode 3 2 Time countdown training mode in standby press SELECT key enter setting position time window blink default value is 30 00 press SPEED key to change the value range 1 99minutes Press START key to start treadmill start from 1KM H can press SPEED to adjust the speed Time countdown to 00 00 treadmill stop 3 3 Distanc...

Page 12: ...ng is eliminated D Be careful not to tighten the running belt tension too much as you can create excessive pressure on the front and rear roller bearings An excessively tightened running belt may damage the roller bearings that would result in bearing noise from the front and rear rollers TO DECREASE THE TENSION ON THE RUNNING BELT TURN BOTH BOLTS COUNTER CLOCKWISE THE SAME NUMBER OF TURNS CENTERI...

Page 13: ...ING Perspiration should be wiped from the console and treadmill surface after your workout You should wipe down your treadmill once a week with a water dampened soft cloth Be careful not get excessive moisture on the display panel as this might cause an electrical hazard or electronics to fail STORAGE Store your treadmill in a clean and dry environment Ensure the master power switch is off and is ...

Page 14: ...ne lubricant This is to prevent injury otherwise the edge of the running belt may cut you or your fingers could be crushed by the rollers Do not put too much silicone on the deck Excessive lubricant may cause slippage of the belt on the rollers HOW TO SPRAY SILICONE ON DECK 1 Speed error signal OVER SPEED Solution 1 Adjust the position of speed sensor wire 2 Replace the speed sensor wire 2 The saf...

Page 15: ...15 ...

Reviews: