5
Option 3: Retractor Bracket
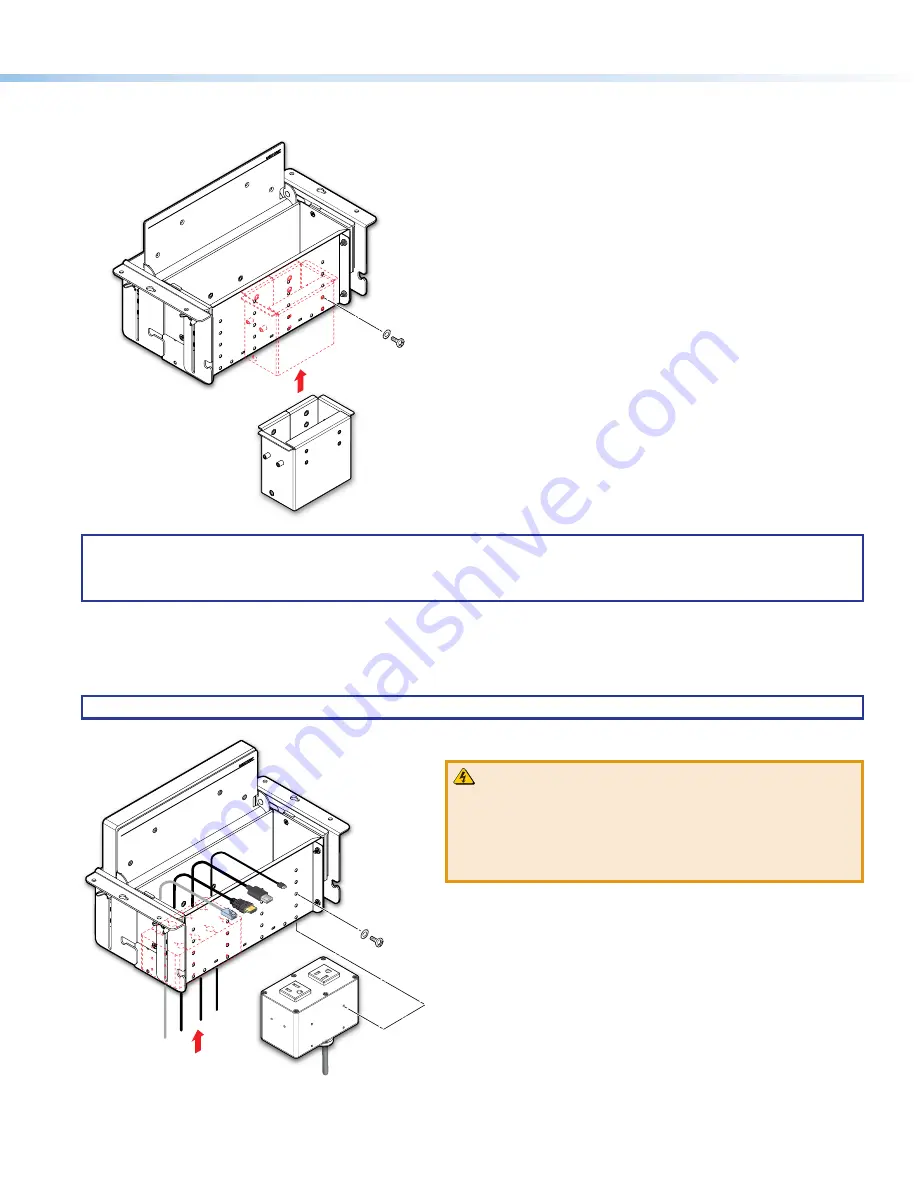
Use the retractor bracket to mount retractors in the Cable Cubby 1252 MS enclosure.
1
2
2
Extr
on
Extr
on
Secure the bracket using four of the
provided #6-32 pan-head mounting
screws with star washers.
Use a screwdriver to tighten the screws.
Insert the bracket as shown.
The bracket may be installed on the left
or right side of the enclosure and at the
lowest height.
1
NOTES:
•
After installing the bracket, proceed to “Step 2 — Install the Modules” to install the power module.
•
After mounting the Cable Cubby on the table, install the Retractors (see
on page 8).
Step 2 — Install the Modules
Determine where the connectivity modules and power module will be installed in the Cable Cubby. The modules may be installed
on the left or right side of the enclosure and at various heights.
NOTE:
Ensure that there is enough room above the modules for the Cable Cubby lid to close completely.
Extr
on
Extr
on
125V~ 12A MAX
TO
TAL
Secure the modules using four of the
provided #6-32 pan-head mounting
screws and star washers. Use a
screwdriver to tighten the screws
Insert the modules
into the Cable Cubby.
1
2
WARNING:
Risk of Electric Shock.
To ensure proper
electrical grounding, use the provided #6-32 mounting screws
with the star washers.
AVERTISSEMENT :
Risque de choc électrique.
Afin
d’assurer une mise à la terre correcte, utilisez les fixations de
mise à la terre #6-32 et les rondelles en étoile fournies.


