

NetPA U 2002 SB • Setup Guide
The Extron NetPA U 2002 SB is an ENERGY STAR-qualified, Dante-enabled power amplifier with onboard audio DSP, for use in
low-impedance speaker systems or high-impedance line distribution audio systems.
The NetPA U 2002 SB is 1U high, half rack-width, and rack-mountable. The amplifiers have mounting holes for 9” (22.86 cm) and
deeper rack shelves and are plenum-rated with an optional flex conduit adapter. The units are convection-cooled.
This guide provides instructions for an experienced installer to set up and operate the NetPA U 2002 SB power amplifier. For full
installation, configuration, and operation details, see the
NetPA U 2002 SB User Guide
available at
www.extron.com
.
Installation Steps
Step 1 — Mounting onto a Rack
Turn off all of the equipment and disconnect it from the power source. Mount the amplifier as required. It can be securely mounted
in a variety of locations, using optional Extron Mounting Brackets and accessories (see the
Extron website
for compatible
optional mounting accessories), or using the included three-piece bracket system. The brackets do not come attached to the
amplifier.
The following sections describe two methods of rack-mounting the amplifiers.
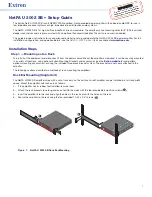
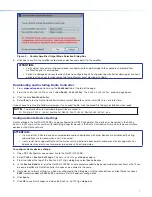
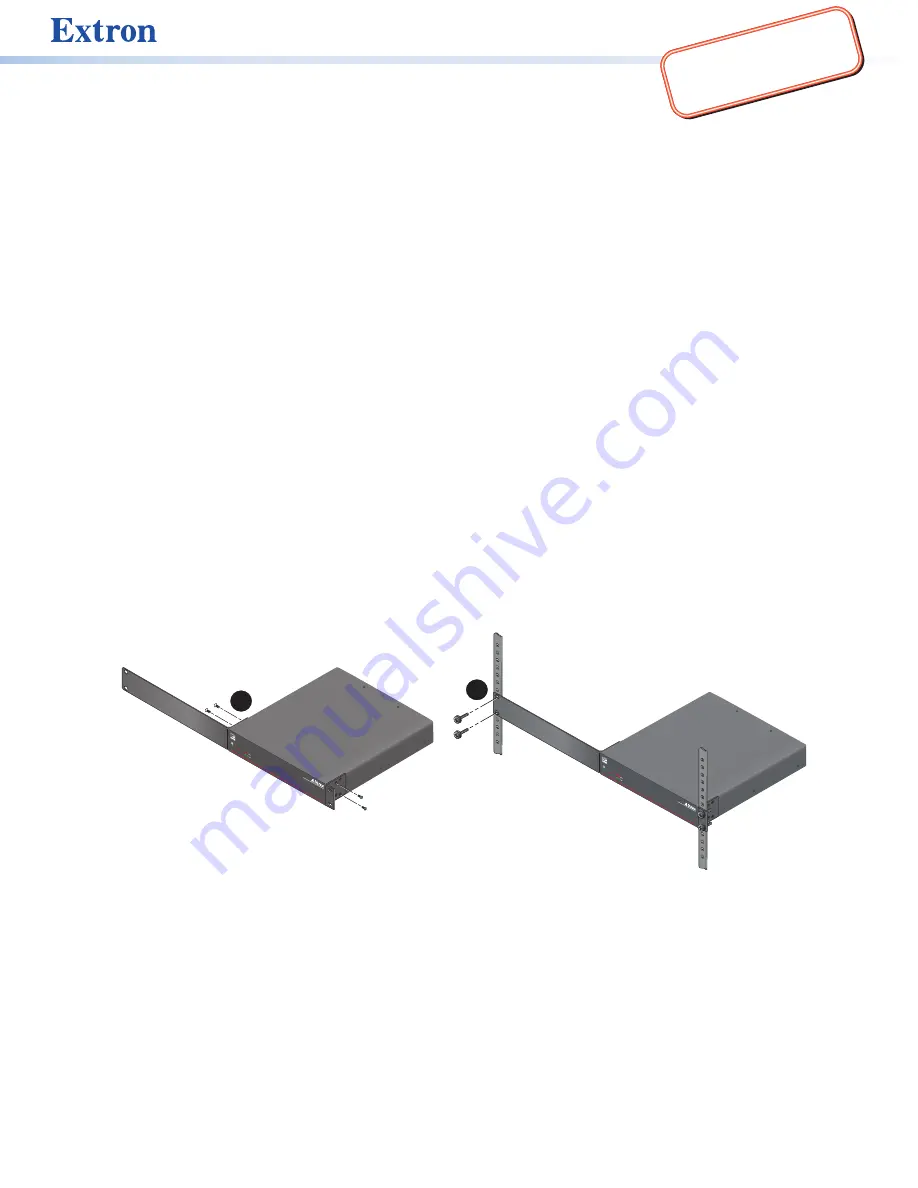
Rack Ear Mounting (Single Unit)
The NetPA U 2002 SB amplifier ships with a set of rack ears, so the half-rack width amplifier can be installed in a full-rack width
space. Mount the amplifier with rack ears as follows:
1.
If the amplifier has its rubber feet installed, remove them.
2.
Attach the rack brackets (one long and one short) to the sides with the four provided #6 machine screws (
1
).
3.
Insert the amplifier into the rack and align the holes in the rack ears with the holes on the rack.
4.
Secure the amplifier to the rack using the four provided
10-32 x 3/4” screws (
2
).
e
NetP
A U
200
2 SB
1
2
OVER
TEMP
LIMI
TER/P
ROTEC
T
SIGN
AL
POW
ER A
MPL
IFIER
S
1
Net
P
POW
ER AM
PLIF
IERS
Net
P
POW
ER AM
PLIF
IERS
Net
P
e
NetP
A U
200
2 SB
1
2
OVER
TEM
P
LIMIT
ER/P
ROTE
CT
SIGN
AL
POW
ER A
MPL
IFIE
RS
2
NetP
Figure 1.
NetPA U 2002 SB Rack Ear Mounting
IMPO
RTAN
T:
IMPO
RTAN
T:
Go to
www.e
xtron.com
for the
comp
lete u
ser g
uide, installation
instructions
, and specifications
.
1


