5
Software Installation & Adjustments
** Please do not connect the Micro-Image Capture USB cable to your PC until
AFTER the software and drivers are fully installed. Doing so may prevent the
drivers from fully installing and the unit may not operate properly.
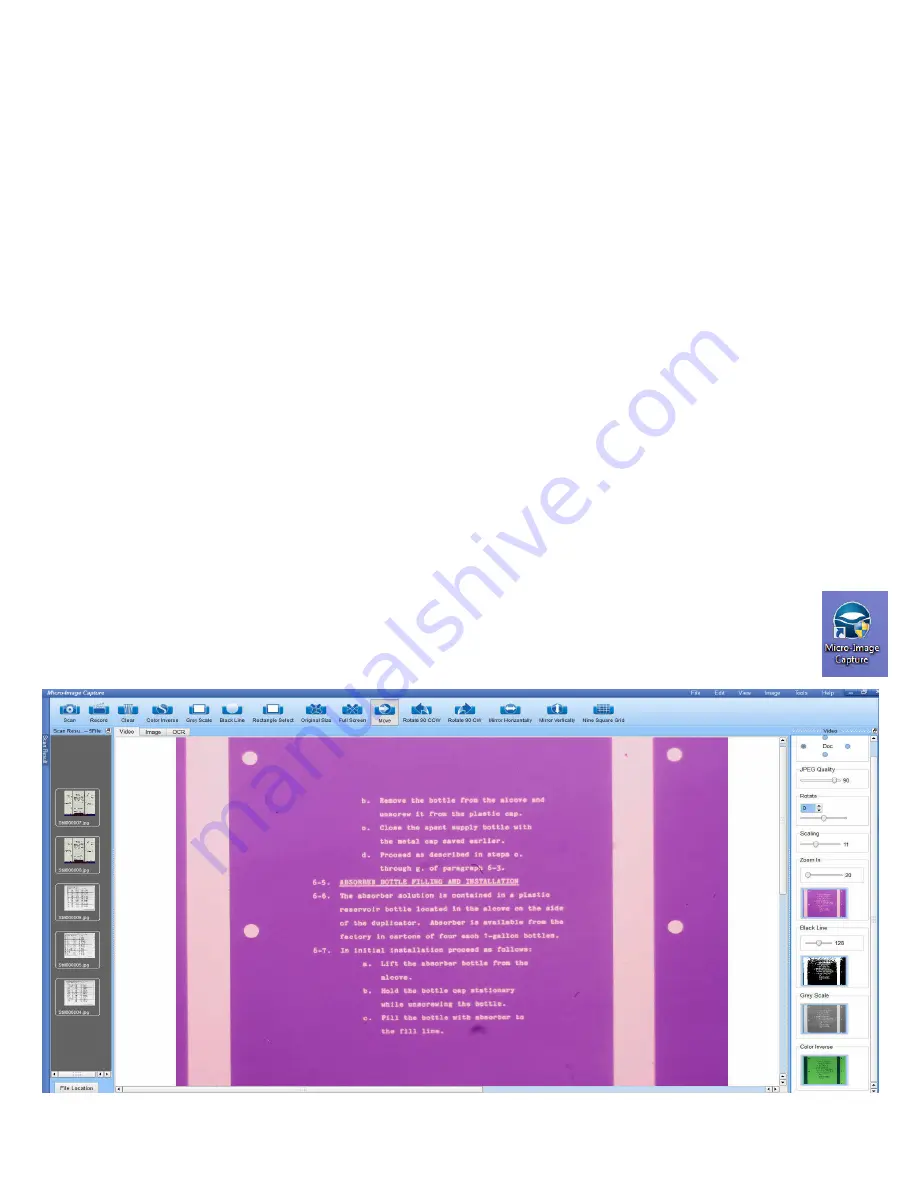
Micro-Image Capture Software – Quick Start Guide
There are three main tabs in the MIC user interface;
Video
,
Image
and
OCR
. The Video tab is
where you will view and capture microform images using Snagit.
You may use the Micro-Image Capture Software to capture images but we strongly
recommend using Snagit instead as it offers increased functionality, speed and ease of use.
If you do capture images with the MIC User Interface instead of Snagit, the Image tab is where
post scan images can be adjusted, printed, faxed, e-mailed and OCR’d if desired. The OCR tab
will open up the OCR’d document(s) when complete, for review and saving. A mouse with a
scroll wheel provides optimum usability when using the MIC user interface.
1.
Load the Micro-Image Capture software, plug in the USB cable to an available USB 2.0
port, then click the Micro-Image Capture launch icon.


