19
Product Overview
2) Main Unit Installation
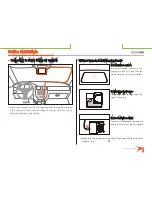
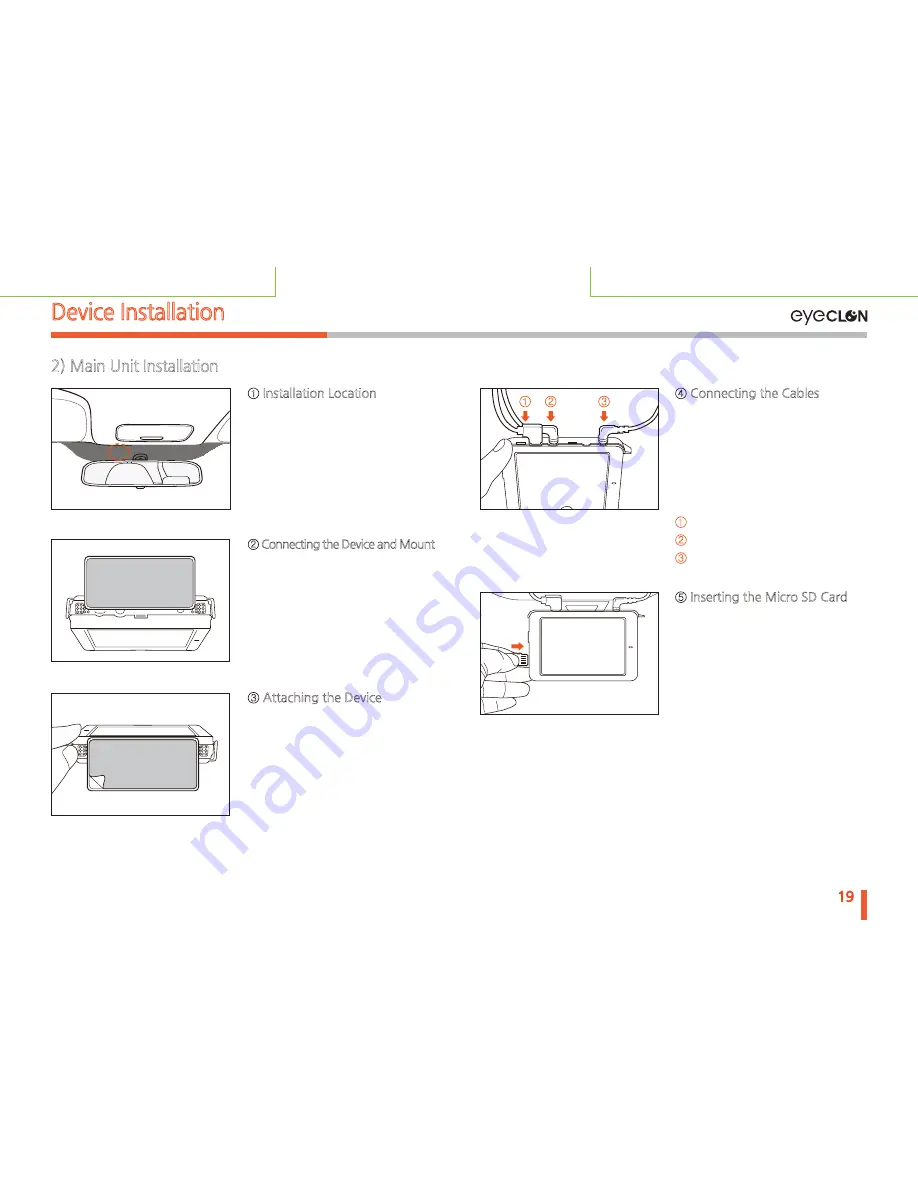
① Installation Location
Before installation, make sure the
engine is turned off. Clean the area
where the product will be installed.
※ Do not install the device where it
interferes with the driver’s vision.
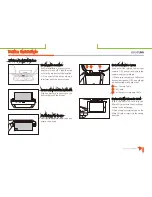
② Connecting the Device and Mount
Align and attach the device to the
bottom holes of the mount.
④ Connecting the Cables
Connect all the related cables (rear
camera, GPS, power) and adjust the
camera angle accordingly.
※ Make sure the cables of different
devices (navigation, GPS, and others)
do not overlap with each other.
⑤ Inserting the Micro SD Card
Insert the Micro SD card into the
Micro SD card slot in the direction as
shown in the left image.
※Do not apply excessive force on the
Micro SD card or insert it in the wrong
direction.
③ Attaching the Device
Remove the double-sided tape
and
attach the device.
①
Rear Camera Cable
②
GPS Cable
③
Car Charger or Hardwire Cable
①
②
③
Device Installation
Summary of Contents for L3 POP
Page 1: ...EYECLON HD Driving Image Recorder L3 POP USER S MANUAL www eyeclon com ...
Page 5: ...01 Warning and Caution ...
Page 9: ...02 Product Features ...
Page 12: ...03 Product Overview ...
Page 14: ...14 Product Overview Main Unit Front Camera 2 Product Overview ...
Page 16: ...04 Device Installation ...
Page 21: ...05 Basic Operation ...
Page 41: ...06 PC Viewer ...
Page 54: ...07 Others ...
Page 58: ...www eyeclon com EYECLON HD Driving Image Recorder L3 POP USER S MANUAL ...


