background image

- 12 - 

eyeheight 


Unit 34 Park House Watford Business Park Greenhill Crescent Watford Herts GB WD18 8PH

Reg. No. 2855535  Telephone: +44 (0) 1923 256 000  Fax: +44 (0) 1923 256 100  email: eesales@eyeheight.com

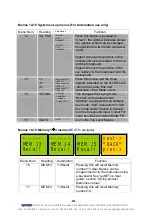
Menus 28-31 Save memory 4

Æ

6 menus 

(NEXT/PREV to navigate)


------ 

MEM 16 
 Save 

------

MEM 17
 Save 

------

MEM 18
 Save


next-> 
*BACK* 

prev-> 


Menu Num. 

Heading 

Automation                        Function 

       28 

SAVE 
MEM16 

1= Save 

Pressing this will Save Memory 
number 4. 

       29 

SAVE 
MEM17 

1= Save


Pressing this will Save Memory 
number 5. 

       30 

SAVE 
MEM18 

1= Save 

Pressing this will Save Memory 
number 6. 

       31 

BACK 

none 

Go To the Top Level Menus 


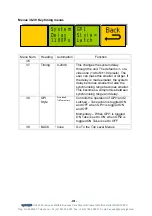
Menus 32-35 Power on memory menus 


Set As 

Pow On 
Memory 

Recall

Pow On
Memory


Total!

Reset!

!!!!!!


Menu Num. 

Heading 

Automation                        Function 

       32 

Set As 
Pow On 
Memory 

1=Set 

Pressing this will set the current 
system set-up as the Power on 
memory default. 

       33 

Recall 
Pow On 
Memory 

1=Recall


Pressing this will recall The Power-on 
memory set up in the last menu. 

       34 

Total 
Reset 

1=Reset 

Pressing this will cause a first Birthday 
of the unit. All current memories and 
settings will be lost. 

       35 

BACK 

none 

Go To the Top Level Menus 


Summary of Contents for keyEyesHDi

Page 1: ...keyEyesHDi 01 12 05 v1 00 user manual eyeheight ...

Page 2: ...view 4 2 Installation 5 2 1 Connections to a keyEyesHDi 5 2 2 Applications for keyEyesHDi 5 2 3 Associated Equipment for the keyEyesHDi 5 3 Control Panel 6 4 Operation 8 4 1 Manual control of the keyEyesHDi 8 4 2 Automation Control of the keyEyesHDi 8 4 3 Operational Menus for the keyEyesHDi 8 5 Technical Appendix 21 5 1 Jumper Links on the GPI I O 21 5 2 Rear 25W D Type Pinout 21 5 3 Appendix 4 t...

Page 3: ...nhill Crescent Watford Herts GB WD18 8PH Reg No 2855535 Telephone 44 0 1923 256 000 Fax 44 0 1923 256 100 email eesales eyeheight com Table of Figures Figure 1 Typical Connections 5 Figure 2 evolutionDT Control Panel 7 Figure 3 Diagram of GPI Output GPI1 4 21 ...

Page 4: ... units are commonly used in transmission and post production The main features are as follows Full 10 Bit luminance Keying Auto Transition Timed Fade in control Key Gain and lift controls Multiplicative Additive Self Key and colour fill modes Key Mix and 8 Wipe Transitions Up to 27 6uS user definable synchronisation window for Inputs Transparent to all embedded signals Automation controllable 6 us...

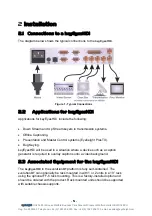
Page 5: ...Stream keyers in transmission systems Offline Captioning Presentation and Master Control systems Eyeheight PresTX Bug Keying keyEyesHDi will be used in a situation where a device such as a caption generator is required to overlay captions onto a video background 2 3 Associated Equipment for the keyEyesHDi The keyEyesHDi in the evolutionDT platform is fully self contained The evolutionDT can option...

Page 6: ...ithin a layer of the menu hierarchy there may be more than four menus and where this is the case the next button will illuminate to show that further menus are available Pressing the next button moves you to the next set of menus 4 Previous Menu Button Within a layer of the menu hierarchy there may be more than four menus and where this is the case the prev button will illuminate to show that prev...

Page 7: ...owned by this panel from this panels device list The button will flash to indicate an owned device is selected 9 Info Button This button displays all hardware software and firmware version information for the currently selected product and this panel In setup mode where a free evolutionDT device is selected this button will flash indicating that the network address box slot can be changed Pressing...

Page 8: ...utomation of the evolutionDT products is achieved either via the RS232 port currently not implemented or via the I Bus Port using an optional DG 9 RS232 to I Bus dongle Automation control of the keyEyesHDi is performed using the geNETics Automation Protocol Genetics protocol is described in detail in the geNETics User Guide section titled Automation Protocol on the geNETics Platform The menu list ...

Page 9: ...te is also indicated in the window 05 TIME 1 200 This is the Key Transition time The time taken for the key to fade on or off in auto transition mode 06 07 BACK none Go To the Top Level Menus Menus 08 11 System set up menus For Automation use only Menu Num Heading Automation Function 08 K GAIN 0 511 Default is 299 This sets the key gain 100 represents unity key gain default 09 K LIFT 128 511 Defau...

Page 10: ...A 0 15 Default 7 Level B 0 15 Default 7 When this button is pressed to Green the window indicates shows two options which can be changed by adjusting the two rotary digipots A and B Digipot A moves the position of the background picture relative to the key and the foreground Digipot B moves the position of the key relative to the foreground and the background 13 L H S Menu Level A 0 255 L Menu Lev...

Page 11: ...eading Automation Function 20 MEM16 1 Recall Pressing this will recall Memory number 4 21 MEM17 1 Recall Pressing this will recall Memory number 5 22 MEM18 1 Recall Pressing this will recall Memory number 6 23 BACK none Go To the Top Level Menus Menus 24 27 Save memory 1Æ3 menus NEXT PREV to navigate MEM 13 Save MEM 14 Save MEM 15 Save next BACK prev Menu Num Heading Automation Function 24 SAVE ME...

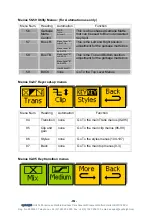
Page 12: ...his will Save Memory number 5 30 SAVE MEM18 1 Save Pressing this will Save Memory number 6 31 BACK none Go To the Top Level Menus Menus 32 35 Power on memory menus Set As Pow On Memory Recall Pow On Memory Total Reset Menu Num Heading Automation Function 32 Set As Pow On Memory 1 Set Pressing this will set the current system set up as the Power on memory default 33 Recall Pow On Memory 1 Recall Pr...
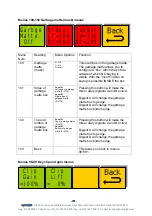
Page 13: ...the unit The default is of a video line 14 8uS 1100 pixels The user can make this smaller or larger If the delay is made smaller the system delay becomes smaller but also the synchronising range becomes smaller This becomes a compromise between synchronising range and delay 38 GPI Style 0 Latched 1 Momentary Controls the operation of GPI1 and 2 Latched Take action is toggled ON and OFF when GPI1 i...

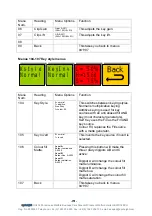
Page 14: ...ck 2 Shade 3 Black When this button is pressed to Green The Three line display in the window indicates the three options which can be changed by adjusting the three rotary digipots A B and C Digipot A Determines the basic Function Selects Safe Action option Selects Safe Caption option Selects Digital Edge option Selects the An Edge option Digipot B Determines the Screen Format Standard 4 3 Screen ...

Page 15: ...o none info 49 info none info 50 Transition Time 1Æ200 Changes the Key Transition Time 51 info none info Menus 52 55 Keyer transition type menus For Automation use only Menu Num Heading Automation Function 52 TRANS 0 Mix 1 Wipe 2 Cut 3 Mix Wipe This sets the transition type between Mix Wipe and Cut and Mix Wipe Mix Wipe does a simultaneous Mix with the selected wipe pattern 53 WIPE Pattern 0 Verti...

Page 16: ... Spill 57 Box LR Menu Level A L 0Æ719 Menu Level B R 0Æ719 This is the Left and Right position adjustment for the garbage matte box 58 Box TB Menu Level A L 0Æ575 Menu Level B R 0Æ575 For 525 487 This is the Top and Bottom position adjustment for the garbage matte box 59 BACK none Go To the Top Level Menus Menus 84 87 Keyer set up menus Menu Num Heading Automation Function 84 Transition none Go To...

Page 17: ... slow 3 user This changes the speed of the transition 94 More This takes you to menus 88Æ91 which further configure the mixer transitions 95 Back This takes you back to menus 84 87 Menu Num Heading Menu Options Function 88 Wipe pattern 0 vertical wipe 1 horizontal wipe 2 vertical curtain 3 horizontal curtain 4 diagonal wipe 5 diamond wipe 6 horizontal arrow 7 vertical arrow This changes the type o...

Page 18: ...on no keying is possible INSIDE the box 101 Sides of garbage matte box Level A Left edge of garbage matte 0Æ719 Level B Right edge of garbage matte 0Æ719 Pressing this button will make the three rotary digipots A and B active Digipot A will change the garbage matte box top edge Digipot B will change the garbage matte box bottom edge 102 Top and bottom of garbage matte box Level A Top of garbage ma...

Page 19: ...y 3 colour fill This switches between keying styles Normal is multiplicative keying Additive keying is used for key sources with an anti aliased fill AND key most character generators Self Key uses the Fill as the Fill AND key source Colour Fill replaces the Fill source with a matte generator 105 Key Invert 0 normal 1 invert This inverts the key source if invert is selected 106 Colour fill Matte L...

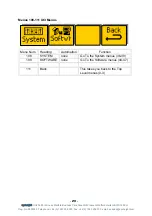
Page 20: ...eg No 2855535 Telephone 44 0 1923 256 000 Fax 44 0 1923 256 100 email eesales eyeheight com Menus 108 111 Util Menus Menu Num Heading Automation Function 108 SYSTEM none Go To the System menus 36 39 109 SOFTWARE none Go To the Software menus 44 47 111 Back This takes you back to the Top Level menus 0 3 ...

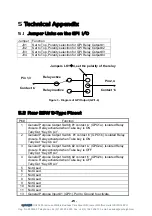
Page 21: ...b Relay active Relay inactive Figure 3 Diagram of GPI Output GPI1 4 5 2 Rear 25W D Type Pinout Pin Function 1 General Purpose Output Switch 1 contact a GPO1a Isolated Relay closure Relay activated when Take key is ON Tally Out Key On Air 2 General Purpose Output Switch 1 contact b GPO1b Isolated Relay closure Relay activated when Take key is ON Tally Out Key On Air 3 General Purpose Output Switch ...

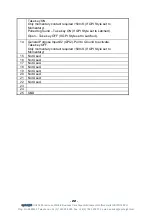
Page 22: ...momentary contact required 50mS If GPI Style set to Momentary Pulled to ground Take key ON If GPI Style set to Latched Open Take key OFF If GPI Style set to Latched 14 General Purpose Input 2 GPI2 Pull to Ground to activate Take key OFF Only momentary contact required 50mS If GPI Style set to Momentary 15 Not Used 16 Not Used 17 Not Used 18 Not Used 19 Not Used 20 Not Used 21 Not Used 22 Not Used ...

Page 23: ...s Take Key On Take Key Off Tally Outputs 2 GPO s Key is On Key is Off Control System connections eyeheight I Bus 2 wire network Control Surfaces Option of 2 eyeheight control surfaces Integral front mounted contol panel or remote FP 9 flexipanel Chassis Eyeheight evolution miniBox chassis Either a half width 1RU assembly for desk mounting or a full 1RU assembly for 19 inch rack mounting Line Stand...

Reviews: