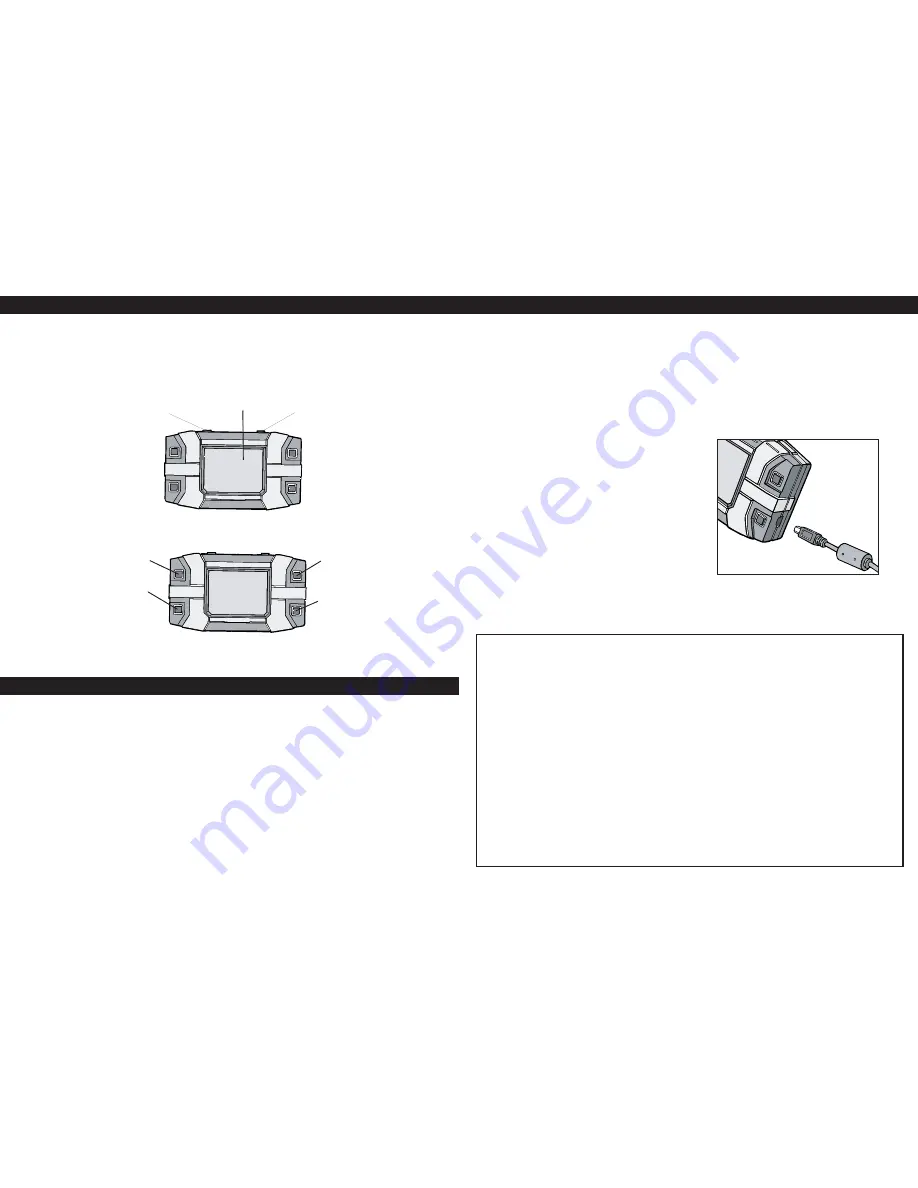
Controller/Viewer:
The Spyder Cam viewer’s built-in Lithium Polymer rechargeable 800mAh, 3.7 V,
non-removable battery requires charging before its first use. The small plug on the included
USB cord must be carefully inserted into the jack on the right-side of the viewer. The larger
plug is inserted into an open USB port, found on most desktop, laptop, and notebook
computers.
Leave the USB cord attached for two hours.
After two hours, disconnect the USB cord. The
circular opening next to the USB connection jack
is a 1/8” mini-jack. Plug in any standard
earphone or headset to hear the sounds picked
up by the camera unit. This feature will work in
both the WATCH and REVIEW modes.
GETTING STARTED
HOW TO USE (Continued)
1.
5.
2.
IMPORTANT SAFETY INSTRUCTIONS AND WARNINGS
For LI-ION / POLYMER BATTERIES
• You must read these safety instructions and warnings before using or charging your battery.
• Never disassemble the viewer or try to remove the battery.
• While generally safe, Lithium-Polymer batteries are volatile. Failure to read and follow the below
instructions may result in fire, personal injury and damage to property if charged or used improperly.
• Lithium-Polymer battery may explode and cause fire if misused or defective.
• When charging the battery, please place it on a fire resistant surface. Do not leave the viewer on
a wood surface or on paper, carpet, or grass. Do not leave the unit unattended while it is
charging. If at any time you witness the viewer starting to swell up, emit smoke or feel hot,
discontinue charging process immediately, disconnect the viewer and observe it in a safe place
for approximately 15 minutes. The battery may be leaking, and the reaction with air may cause
the chemicals to ignite, resulting in fire. In the unlikely event of this occurring, please contact us
via the EyeSpy website
www.eyespytoys.com or call our Customer Assistance Line at 1866 469 9686.
• Never store or charge the viewer inside your car in extremely warm temperatures 105ºF or 41ºC),
since extreme temperature could ignite a fire.
• Never drop the viewer, as this may cause a battery to leak.
Add
USB
Cable
To use these options there are four buttons on the front of the viewer;
Photo - to take a picture
or start a recording
Next - moves the screen
cursor down to choose
another task
Select - to confirm
chosen function
Back - cancels current
function & goes back
one step to previous function
WATCH
RECORD
REVIEW
TIMER
DELETE
Night Vision
OFF
/
ON
Video Screen
WATCH – When you press the button with the check mark, the screen will show you what
the EyeSpy camera unit is seeing. If you are in low-light conditions and the image is not
clear, you can press the small square button on top of the viewer. This will turn on the
amplified Night Vision circuit which will make the image easier to see, and will impart a slight
green tint to the image. In either mode a sharp picture will be seen if the camera is set no
closer than 8 inches (20cm.) from the subject.
To take a picture, push the button with the icon of a camera on it. Note: To use this feature
you must have an SD memory card inserted.
RECORD – Note: To use this feature you must have an SD memory card inserted into the
card socket located on the left side of the viewer, as shown in the illustration.
Controller / Viewer – Slide the power switch on top of the viewer to the left. The screen will
light up and show the EyeSpy logo. In another second or two the menu will appear.
It will show five options:
EXPLANATION OF EACH FUNCTION
Warning: Changes or modifications to this unit not expressly approved by the party responsible for compliance could void the user’s authority to
operate the equipment.
NOTE: This equipment has been tested and found to comply with the limits for a Class B digital device, pursuant to Part 15 of the FCC Rules.
These limits are designed to provide reasonable protection against harmful interference in a residential installation. This equipment generates,
uses and can radiate radio frequency energy and, if not installed and used in accordance with the instructions, may cause harmful interference to
radio communications.
However, there is no guarantee that interference will not occur in a particular installation. If this equipment does cause harmful interference to
radio or television reception, which can be determined by turning the equipment off and on, the user is encouraged to try to correct the
interference by one or more of the following measures:
- Reorient or relocate the receiving antenna.
- Increase the separation between the equipment and receiver.
- Connect the equipment into an outlet on a circuit different from that to which the receiver is connected.
- Consult the dealer or an experienced radio/TV technician for help.
- Shielded cables must be used with this unit to ensure compliance with the Class B FCC limits.


