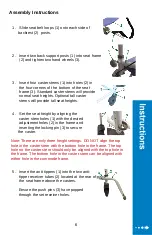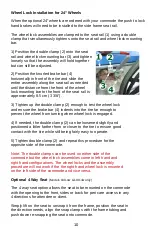
6. Anti-tipper adjustment is made by
depressing the anti-tipper push pin (1),
sliding the inner anti-tipper tube (2) to the
desired length, aligning the push
pin with the closest adjustment hole (3) and
allowing it to pop through.
The anti-tippers can be flipped up or
removed when necessary to clear obstacles
but should be in place as often as possible
to prevent accidental tipping.
The anti-tippers should be as close to the floor as possible without
catching on doorway thresholds, changes in floor levels or other
obstacles.
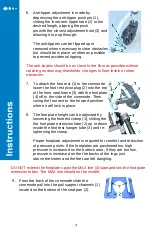
7. To attach the foot rest (1) to the commode
lower the foot rest pivot plug (2) into the top
of the front seat frame (3) with the foot plate
(4) off to the side of the commode. Then
swing the foot rest to the forward position
where it will lock in place.
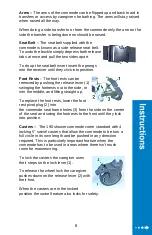
8. The foot plate height can be adjusted by
loosening the footrest clamp (1), sliding the
the foot plate extension tube (2) up or down
inside the foot rest hanger tube (3) and re-
tightening the clamp.
Proper footplate adjustment is required for comfort and reduction
of pressure points. If the footplates are positioned too high
pressure is increased on the buttock area; if they are too low,
pressure is increased on the the backs of the legs just
above the knees and the feet are left dangling.
DO NOT extend the footplates past the MAX line (4) stamped into the foot plate
extension tubes. The MAX line should not be visible.
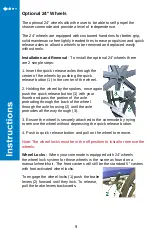
9. From the back of the commode slide the
commode pail into the pail support channels (1)
located on the bottom of the seat pan (2).
7


