Operation Manual Telescopic Ladder
About the Telescopic Ladder
Your telescopic ladder has two practical basic
functions, because you make big things out of
small things: you can expand them either from
their compact format to their full length or to an
intermediate length.
How to use, maintain and repair it
You would like to enjoy your ladder for a long
time. No problem: Just follow these instructions!
What is most important to your safety
This ladder is equipped with a telescopic
stabilization bar. Never use the ladder without
pulling out the stabilization bar! The stand
extension ensures a safe stand and is essential
for your safety! The stand extension is only
inserted for transport and storage. To do this,
press the locking buttons at the end of the strip
and slide in the side parts.
The stand extension can be fitted with the
enclosed height adjustment screws to
compensate for uneven floors. To do this,
actuate the red lever and insert the screw into
the stand from below. Make sure that the
screw engages securely at the desired height.
Fine adjustments can now be made by
moving the screws. To remove the screws,
actuate the red lever and drop or pull out the
screw downwards. Of course, the ladder can
also be used without the height adjustment
screws if the floor is flat.
Before you use your ladder, it must be properly
locked after extending. Please always note: do
not climb onto the ladder until all the rung
segments are blocked!
1. How to extend the telescopes to their full
length
Good to know: After extending the ladder, it locks
automatically. Note that each segment has its
own lock mechanism.
How to extend the ladder:
A)
Place the ladder upright on a dry, Use the
height adjustment screws on uneven
surfaceshorizontal surface. Extend the ladder
and proceed as follows:
-> Hold the bottom ladder rung down with one
foot
B)
Now extend the ladder and start from the top:
For this purpose, grasp the top rung and pull it
upwards until the rung segment completely
engages. Then pull out the individual rung
segments one after the other until the ladder is
fully extended.
C)
The segments automatically engage one
after the other. Important: The locking bars must
now drop at an angle of 60 degrees and the
locking buttons on the last but one rung will
display the closed lock symbol.
D)
You now need to check: Are all rung segments
locked? Are all locking latches fully extended?
Important: You will find the locking buttons at the
second bottom rung. When the rung segments
are locked, these buttons point to the closed
lock symbol. If this does not happen immediately,
jog a little on the ladder until all segments snap
into the respective locking position. When
everything is fixed, we can start.
E)
Now we need to perform the assembly: To
ensure that the ladder is secure, it should be
placed at an angle of 75 degrees to the ground.
If you use the height adjustment screws, these
are in a ball joint and allow the correct angle of
attack
2. How to extend the telescopic ladder to an
intermediate length
A) Place the ladder upright on a dry,
horizontal surface.
Extend the ladder and
proceed as follows:
-> Hold the bottom ladder rung down with one
foot
Extending the ladder:
Contrary to
B)
, now secure the ladder firmly with the rung,
which should be at the top when the ladder is
extended. The height information on the ladder
will help you find the right step to take off the
32
Summary of Contents for EVO-PROLEAN
Page 1: ...DK NL UK FR DE RO PL NO ES I T...
Page 2: ...1 1 2...
Page 3: ...2 D H C B A 3 FRONT...
Page 4: ...E F G 3 4...
Page 5: ...K I J 4 5...
Page 6: ...5 6 7...
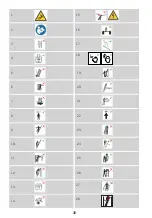
Page 18: ...17 1 2 3 4 5 6 7 8 9 10 11 12 13 14 15 16 17 19 20 21 22 23 24 25 26 27 18...


