background image

TOP

-ino


User Manual

17  of  

25


F+D

 Feinwerk- und Drucktechnik GmbH

                   Kirchenstraße 38, D - 69239 Neckarsteinach, Germany
                

Phone: +49 6229 7000, Fax: +49 6229 70067


E-Mail: hotline@fuddruck.de, Internet: http://www.fuddruck.de

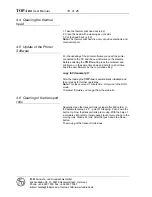
4.2 Changing the thermal
head

1. Follow the steps 1. to 4. of changing the color ribbon.
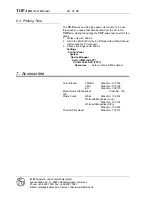
2. Release the cable connection to the thermal head (pull up
and off).
3. Remove the two screws on the mounting of the thermal 

head (Ill.).

4. Pull the thermal head with heat sink off to the front.
5. Insert the new thermal head very carefully.
6. Tightened the two fastening screws.
7. Re-establish the cable connection to the thermal head, 

doing so, you must assure of a stable connection.

8. Follow  the steps 5 to 11 of changing the color ribbon.
8. Connect the Centronics cable. Switch on the 

TOP-

ino

and wait for initialisation.

10. Insert the diskette to the floppy drive of the PC.
11. Start the program setuppre.exe under MS-DOS

.

Check the head number and the port (Normal LPT1). It
takes around 1min time.

12. Switch off the 

TOP-

ino

.

13. Switch on the 

TOP-

ino

.

14. Print a testcard.

Note: 

On the testcard must be the new headnumber and the

head count = 0.
With this software we are setting the voltage of the thermal
head and loading the correction table for every dot of the head.

4.3 Changing the cleaning
rolls

1. Switch the printer off.
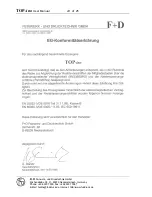
2. Pull the two cleaning rolls up and off (Ill.).
3. Insert  new, i.e. cleaned and dry rolls.  To do so, insert

the rolls from the top and push them down.

4. Switch the printer on again.

The cleaning rolls may be cleaned again with tab water and put
them dry back. Cleaning should take place according to
contamination.

Summary of Contents for TOP-ino

Page 1: ...User Manual User Manual Color Card Printer Color Card Printer TOP ino State July 2002 3078 02 998 90 06 ...

Page 2: ......

Page 3: ... 6 Printing a card from your PC 7 2 7 Serial Interface 7 3 Operation 8 3 1 Operation Panel 8 3 2 Operation 9 3 2 1 On line Mode 9 3 2 2 Off line Mode 9 3 2 3 Menu Mode 10 3 2 4 Parameter Mode 11 3 2 5 Setup Mode 11 4 Service 16 4 1 Changing the ribbon 16 4 2 Changing the thermal head 17 4 3 Changing the cleaning rolls 17 4 4 Cleaning the thermal head 18 4 5 Update of the Printer Software 18 4 6 Cl...

Page 4: ...y other personalising system by using Win 3 11 Win 95 Win 98 or NT 4 0 driver By keeping already known advantages of the TOP as print speed precise mechanical engineering and compact design we succeeded in development of a new printer for a wide range of card printing applications The TOP ino includes the features Ultra fast 25 seconds full color edge to edge printing Ease for operation Front pane...

Page 5: ...th any liquid 2 2 Unpacking After removing the packing material from the printer check the contents of the carton Printer TOP ino Power Cable DIN standard Centronics Cable Sublimation Ribbon YMCKO for 250 cards with an empty spool Card Support Weight 2 cleaning rolls Card Output Plate Spherical Typehead Screwdriver Operating Instructions Diskette with the printer software and the print head parame...

Page 6: ...ver Note The quality of the printed cards depends on the quality of the blanks cards and how to handle the cards Never touch the cards with your fingers To guaranty the best quality order the ribbon and the cards from F D Feinwerk und Drucktechnik GmbH see 7 2 4 Running the self test With the printing of the test card you will get your first experience with the TOP ino This is the internal printer...

Page 7: ...e computer corresponding parallel interface 2 6 Printing a card from your PC The target is to print a card from your PC For this you must prepare the PC that means install the software Before printing install the TOP ino printer driver diskette Start your windows application to create a cardlayout as a sample you can use WORD from Microsoft Make the following Install the windows driver regarding t...

Page 8: ...ut of the memory In the Off line Mode start the menu 3 Going up in the Menu Parameter and Setup Mode clear ff key 1 Clear the any error messages 2 Form feed of a card 3 Going down in the Menu Parameter and Setup Mode All three keys This is the Reset function from all modes hold the keys down until the red error LED is off print menu key and clear ff in the same time 1 From the Parameter Mode in to...

Page 9: ...going to the Off line Mode print menu key Press this key then the last card from the TOP ino memory is printing When no card was printed from the TOP ino before no function of this key clear ff key Press this key then the error will be cleared in some cases end of the ribbon torn ribbon 3 2 2 Off line Mode From the On line Mode you are going by pushing down the online select key in the Off line Mo...

Page 10: ...u Mode by pushing down the print menu key Key Functions online select From the Menu Mode to the Parameter Mode see 3 2 4 print menu Show you the Menu parameters in the up direction clear ff Show you the Menu parameters in the down direction print menu and clear ff in the same time Go back to the Off line Mode see 3 2 2 service settings magnetic stripe print offset black speed overcoat int black in...

Page 11: ...eter print menu Show you the parameters in the up direction clear ff Show you the parameters in the down direction print menu and clear ff in the same time Go back to the Menu Mode see 3 2 3 3 2 5 Setup Mode 1 Copies Set the quantities of the to be printed cards from the TOP ino memory With the print menu up key and clear ff down key you set the quantities of the copies After confirmation online s...

Page 12: ... the online select key 7 Now the TOP ino will check the set ribbon type Please wait Go back to the On line Mode press all three keys together Note In the error case check the ribbon type in the TOP ino and in the software 3 Print Test Card Press online select key After that will be printed the internal testcard 4 Contrast Select the parameter with the print menu and clear ff keys Confirm the selec...

Page 13: ...rface of the card should be shining 8 Speed resin black Select the parameter with the print menu and clear ff keys Confirm the selected parameter with online select key Slow 21 mm sec and High 42 mm sec This parameter will be temporary saved in the TOP ino but will be also temporary overwrite every time from Windows TM Driver Note When your are setting this parameter from slow to high you have als...

Page 14: ...nything Ribbon type Which ribbon type is set Head number Serial number of the thermal head copy count Counter of the general printed cards Head count Counter of the printed cards with the current print head SW Ver Software Version firmware Serial number Serial number of the TOP ino Work time Working time Days Hours Minutes Seconds Magnetic stripe Option work time 12 04 45 14 serial number 001423 s...

Page 15: ...ers Stepping motor Stepping motor on off Transport rolls Move the transport rolls up down Feed roll Move the feed roll up down Magnetic head Move the magnetic head up down Color sensor Indicate the color sensor value for different color ribbon panel Printing s card Print the service card Note The parameter stepping motor is helpful for the cleaning the transport rolls 13 Return Confirm with the on...

Page 16: ...y wind up spool you may use the old unwind spool for this Ill 6 Insert a new color ribbon spool serving as unwind spool 7 Mount the color ribbon according to the drawing Ill Note Doing this pay attention that the two color ribbon spools both are pushed back until to be fixed to the buffer 8 By three complete rotations you achieve a fixation of the color ribbon on the wind up spool 9 Unlock the the...

Page 17: ...ging the color ribbon 8 Connect the Centronics cable Switch on the TOP ino and wait for initialisation 10 Insert the diskette to the floppy drive of the PC 11 Start the program setuppre exe under MS DOS Check the head number and the port Normal LPT1 It takes around 1min time 12 Switch off the TOP ino 13 Switch on the TOP ino 14 Print a testcard Note On the testcard must be the new headnumber and t...

Page 18: ...fore switching the TOP ino On press the on select and print menu in the same time down and hold for a short time Load the new firmware by the commando string copy b Filename lpt1 After the loading the TOP ino is automatically initialised and then is ready for further operations Note This takes around 1 minute time Only work in the DOS mode The latest firmware you can get from the web site 4 6 Clea...

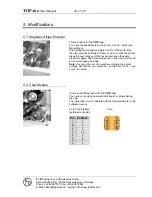
Page 19: ...ll be printed If there is an error than the printer takes the next cards out of the feeder and make the same procedure again After three cards with an error the printer send an error message and stops Note Use only HiCo or LoCo cards according to the printer settings Set to HiCo use only HiCo cards Set to LoCo use only LoCo cards 5 2 Chip Module This is an additional option for the TOP ino You nee...

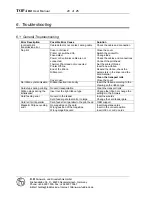
Page 20: ...t the print head Set the printer ON line Insert a new ribbon Rewind the ribbon check the parameters in the driver and the card material Clean the transport rolls Close the cover No ribbon synchronisation Ribbon inserted incorrectly Insert the ribbon according to the drawing an the ribbon type Card stops during printing No card transportation Clean the transport rolls Ribbon stops during the initia...

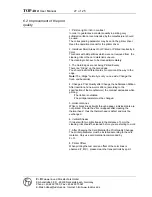
Page 21: ...ert different cards or not print all the way to the edge Note The Ridge normally is only on one side Change the front and backside 4 Change in Print Quality after Change the Sublimation Ribbon After insertion of a new color ribbon according to the specification of the manufacturer the contrast decreases while printing The ribbon is outdated The print parameter must be changed 5 Horizontal Lines Wh...

Page 22: ... doesn t wait for the data s 1 Works only with Win 95 2 Set in the BIOS of PCs the ECP Mode with a DMA Channel before read the PC manual 3 Check all settings under Win 95 Settings Control Panel System Device Manager Ports COM and LPT Printer Ports ECP LPT1 Resources here must be a DMA channel 7 Accessories Color Ribbon YMCKO Order No 100 136 YMC Order No 100 138 KO Order No 100 170 Monochrome Ribb...

Page 23: ... Resolution 8 bit per color 16 7 Mill colors Operation Front panel LCD Interface Centronics for PC Serial for service purposes Controller 32 bit RISC Basic Storage 4 MBytes Power Supply 230 115 V 0 4 0 9 A 50 60 Hz stand by 15 W Fuse M2 Dimensions H x B x D 220mm x 300mm x 320mm Weight 13 5 kg Card Feeder max 120 cards 0 76 mm Card Material PVC ABS PE PET Card Dimensions 54 mm x 85 6 mm ISO 7810 C...

Page 24: ...P ino User Manual 24 of 25 F D Feinwerk und Drucktechnik GmbH Kirchenstraße 38 D 69239 Neckarsteinach Germany Phone 49 6229 7000 Fax 49 6229 70067 E Mail hotline fuddruck de Internet http www fuddruck de ...

Page 25: ...technik GmbH Kirchenstr 38 D 69239 Neckarsteinach Tel 49 0 6229 700 0 Fax 49 0 6229 700 67 Mail hotline FuDdruck de Web www FuDdruck de Copyright by F D 3078 02 998 90 06 Spezifications subject to change without prior notice ...

Reviews: