146
When completing the installation to the trusted and non-trusted
domains with a domain account, make sure you enter the account in
format DOMAIN\ACCOUNT.
When using a local administrator account, use format ACCOUNT. (Do
not enter the host name as part of the account, otherwise the account
is accepted only by the host in question.)
5.
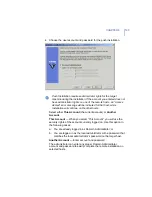
Review the installation summary. To start the Remote Installation
Wizard, click
Start
.
The Remote Installation Wizard will guide you through a series of
dialog boxes in which you must answer some questions for the
installation to take place. In the final dialog box, click
Finish
, and go
to the next step.
6.
F-Secure Policy Manager installs F-Secure Management Agent and
the selected products on the hosts. During this process, the
Status
line will display the procedure in process. You can click
Cancel
at any
time to stop the installation.
When the
Status
line displays
finished
, the process has finished. You
can select in which domain the new hosts should be placed using the
import
settings. Click
Finish
. F-Secure Policy Manager Console will
place the new hosts in the domain that you selected in Step 1, unless
you specified another domain in this dialog. You can also choose not
to place the hosts to any domain automatically. The new hosts will
send autoregistration requests and the hosts can be imported that
way.
7.
After a few minutes, the Product View pane (the right pane) will list
the products that were installed. To see this list, select the
Installation
tab in the Properties pane (alternatively select the top domain in the
Policy Domain
pane).
When installing, if administrator machine has open network
connections to the target machine with another user account, the
NT Credential conflict error message 1219 appears. The solution in
this case is to close the active connections before using the Push
Installation features.
Summary of Contents for CLIENT SECURITY 7.00
Page 1: ...F Secure Client Security Administrator s Guide...
Page 10: ...10 ABOUT THIS GUIDE Overview 11 Additional Documentation 13...
Page 41: ...CHAPTER2 41 Click Next to continue...
Page 75: ...CHAPTER3 75 Real Time Scanning Figure 3 10 Settings Real Time Scanning page...
Page 78: ...78 Manual Scanning Figure 3 11 Settings Manual Scanning...
Page 82: ...82 Spyware Control Figure 3 12 Settings Spyware Control...
Page 88: ...88 Firewall Security Levels Figure 3 15 Settings Firewall Security Levels...
Page 91: ...CHAPTER3 91 Firewall Rules Figure 3 16 Settings Firewall Rules...
Page 229: ...229 8 UPGRADING SOFTWARE Overview Upgrading Software 230...
Page 278: ...278 A APPENDIX Modifying PRODSETT INI Overview 279 Configurable Prodsett ini Settings 279...
Page 292: ...292 B APPENDIX E mail Scanning Alert and Error Messages Overview 293...
Page 297: ...297 GLOSSARY...


