Booting the Switch
ARX-500 Hardware Installation Guide
3 - 13
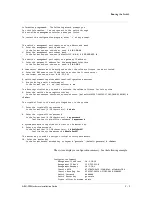
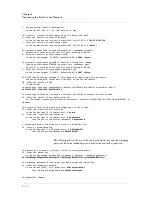
Management
IP
Address
10.1.38.19
Management
IP
Mask
255.255.255.0
Management
Gateway
10.1.38.1
Management
DNS
10.51.1.29
Power
Configuration
110
Private
IP
Subnet
169.254.245.128
Private
IP
Mask
255.255.255.192
Private
VLAN
1006
Private
Metalog
VLAN
1007
Chassis
GUID
db922942
‐
876f
‐
11d8
‐
9110
‐
8dtu78fc8329
Switch
Password
#######
Switch
Master
Key
2oftVCwAAAAgAAAApwazSRFd2ww/H1pi7R7JMDZ9SoIg4WGA/XsZP+HcXjsIAAAADDRbMCxE/bc=
Wrapping
Password
#######
Crypto
‐
officer
Username
admin
Crypto
‐
officer
Password
#######
Enter
'yes'
to
load
configuration
or
'r'
redo
the
interview
#
yes
You
have
completed
the
switch
startup
configuration.
The
switch
will
now
initialize
the
local
database.
When
the
login
prompt
appears,
log
into
the
switch
using
the
crypto
‐
officer's
username
and
password.
Closing
configuration
file.
Processing
configuration
file.
(boot
‐
config)
...
User
Access
Authentication
Username:
admin
Password:
mypassword
SWITCH>
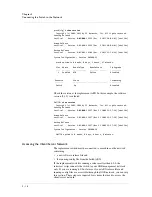
At this point, the switch is ready for configuration through the GUI or CLI.
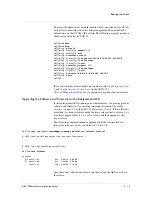
Confirm that the replacement switch is running compatible software and
firmware with its peer, then set it up. The next sections describe this process.
Checking Software and Firmware Before Joining the Pair
The replacement peer must run the same software and firmware as its
predecessor. This insures a proper rendezvous with the redundant peer. If
the replacement ARX is running a lower release or outdated firmware,
upgrade it before you proceed.
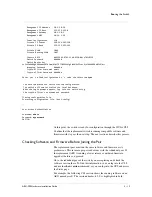
Go to the redundant peer of the switch you are replacing and check the
software version there. To find this information, you can log into the CLI
and use the
show version
command, or you can log into the GUI and access
the Status page.
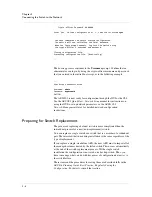
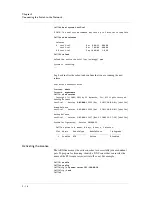
For example, the following CLI session shows the running software on an
ARX named
provB
. The version number, 6.2.0, is highlighted in bold.
Summary of Contents for ARX-500
Page 1: ...ARX 500 Hardware Installation Guide 810 0039 00 ...
Page 2: ......
Page 7: ...Table of Contents ...
Page 8: ......
Page 10: ...Table of Contents x ...
Page 11: ......
Page 12: ...Table of Contents xii ...
Page 14: ......
Page 22: ......
Page 32: ......
Page 50: ...Chapter 3 Connecting the Switch to the Network 3 20 ...
Page 51: ...4 Maintenance Powering Down the ARX 500 POST Diagnostics Front Panel LEDs Rear Panel LEDs ...
Page 52: ......
Page 59: ...Index ...
Page 60: ......
Page 62: ...Index Index 4 ...

